The Oregon Hole

Click for Branch Tips index

For those of you who tuned into last Saturday’s Zoom session on winter care, here is the article that I promised. One of the challenges of winter care that we talked about was the fact that it can rain incessantly during our Oregon winters, to the point of compromising the health of our trees. This can be especially true during our wet springs and just after repotting.

One way to combat that challenge is to tilt the tree up on one side so that you increase the height of the water column inside the pot, which will drive the water out. As Andrew Robson noted in our Zoom meeting, be sure to switch sides once in awhile or you will start developing a one-sided root system. There is only one hitch in this scenario. You have to have a hole in the right location to drain all that water out. Sometimes you have one, and sometimes you don’t.

202012_01.jpg

Most contemporary American potters, like our own Vicki Chamberlain and Nao Takutake are adding many holes to the bottom of their pots for both drainage and anchoring, which is an ideal situation.

But many older and imported pots don’t have those holes. Many of the antique Chinese pots that are so valued in the bonsai world have just one single, large hole in the middle of the pot. Making things worse, they often sagged before firing, when drying upside down, so the middle of the pot is raised creating quite a swampy environment for our bonsai.

A couple of years ago I started adding what I call the Oregon Hole to my pots. That is, one small diameter hole on each side of an ovular or rectangular pot, which will end up at the bottom of the tilt. I have been adding holes to my pots for many years to anchor trees down. This is pretty much the same technique, with just size and placement that varies.

The most important thing to consider is that we are drilling through stone – usually high-fired clay, which is super hard. To get through that material, you need specialized drill bits. I have been using spade shaped glass and tile bits for many years with great success. After this Saturday’s Zoom, I decided that I had better try a diamond studded bit. Here is what I have found about both.

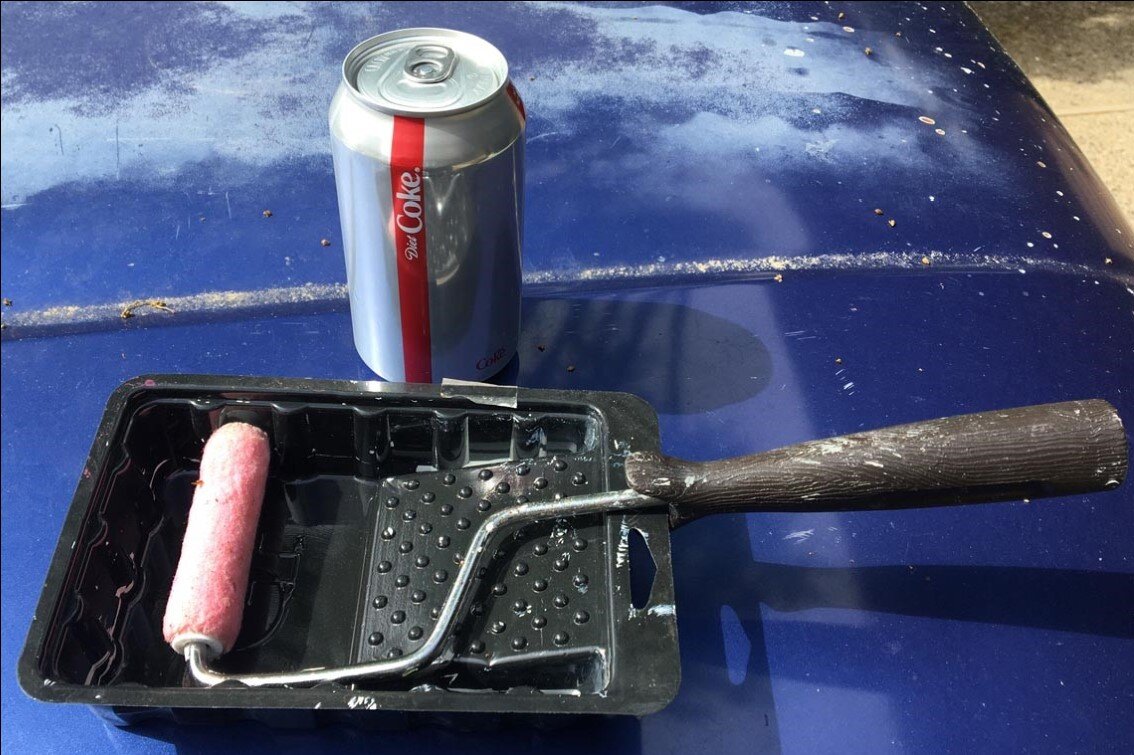
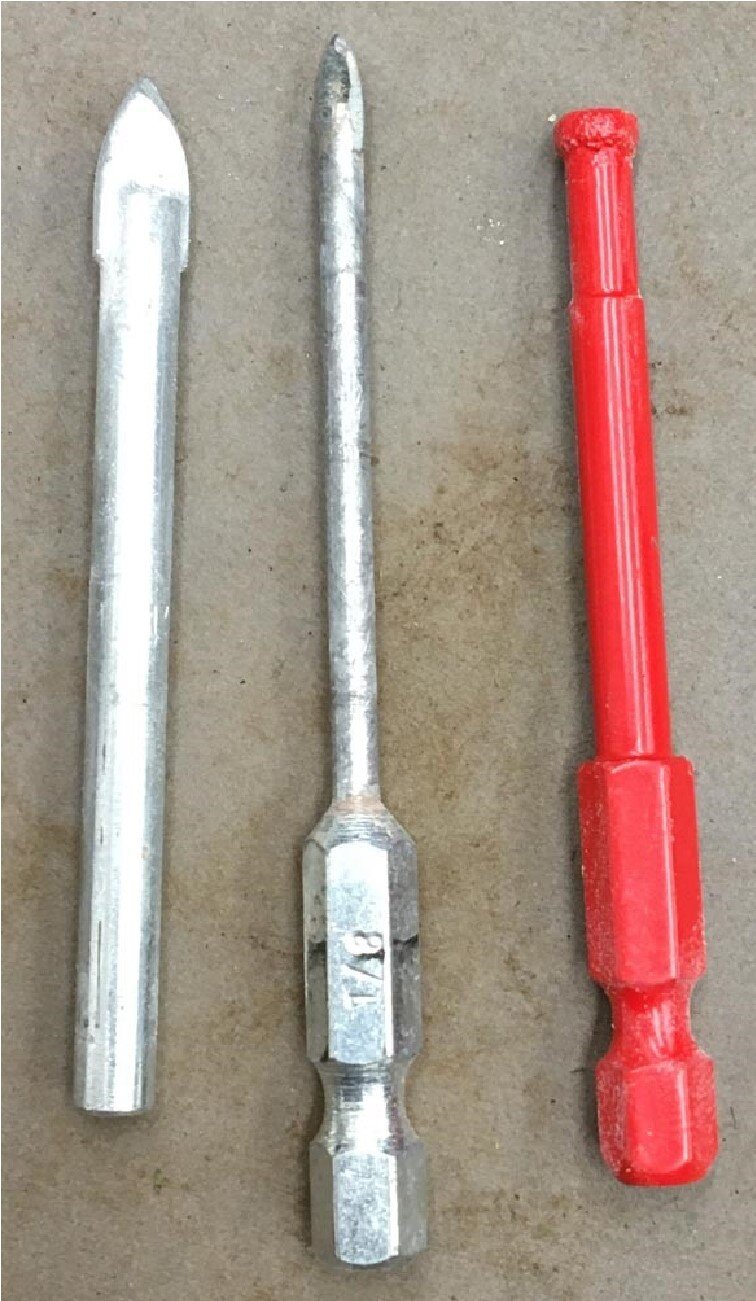
Left to right: 1/4“ spade bit with straight shaft, 1/8” spade bit with quick load, 3/16 diamond tipped bit  

Diameter is everything. This is really hard material that we are drilling through, so make the hole only as big as you need to. I often drill a hole only one eighth inch in diameter if I need to just pass an anchor wire through a container. Enlarging the hole to just a quarter inch is really about four times harder to drill. You get the picture. Strategy comes to play here also. Anything above a quarter inch and the soil will fall through, so I would have to add a screen to it, making more work. So, for my new diamond bit, I chose 3/16” size to make sure my soil stays intact.

202012_02.jpg

The glass and tile bits come in two shapes. One is angled but with flat sides, the other, the spade bit, is rounded to a point and is what I prefer. I have not noticed a difference in brand and as you can see in the photo, I have both straight shaft and quick load versions. The one thing you absolutely do not want is a concrete bit, shown in the photo. It is easily identified by the flanges protruding beyond the shaft.

They are designed to be used by a hammer drill to pound concrete to powder. We have to be much more delicate with our high-fired bonsai pot clay. The spade bits do break occasionally, and they do dull. I would armor yourself with more than one, because they will break at the most inconvenient time – like when you already have a tree bare rooted and waiting for its new home. I use spade bits to quickly add holes to high-fired Japanese terra cotta training pots. These pots are much harder than conventional Italian terra cotta, but softer than high quality bonsai pots and the spade bits go through these like butter. I have used the spade bits on bonsai pots with varying results. They almost always work, but the pots seem to vary greatly in their hardness.

Diamond bits are a newer arrival but they work great. You can get them in just about any size, and if you want anything larger than about a quarter inch, they are your only option. They work by having the diamonds glued around the tip of a circular shaft, so you are really cutting a ring. At our small size, that is really insignificant. The good thing is that they cut more reliably than the spade bits, and gives us another option.

Concrete bit

202012_03.jpg

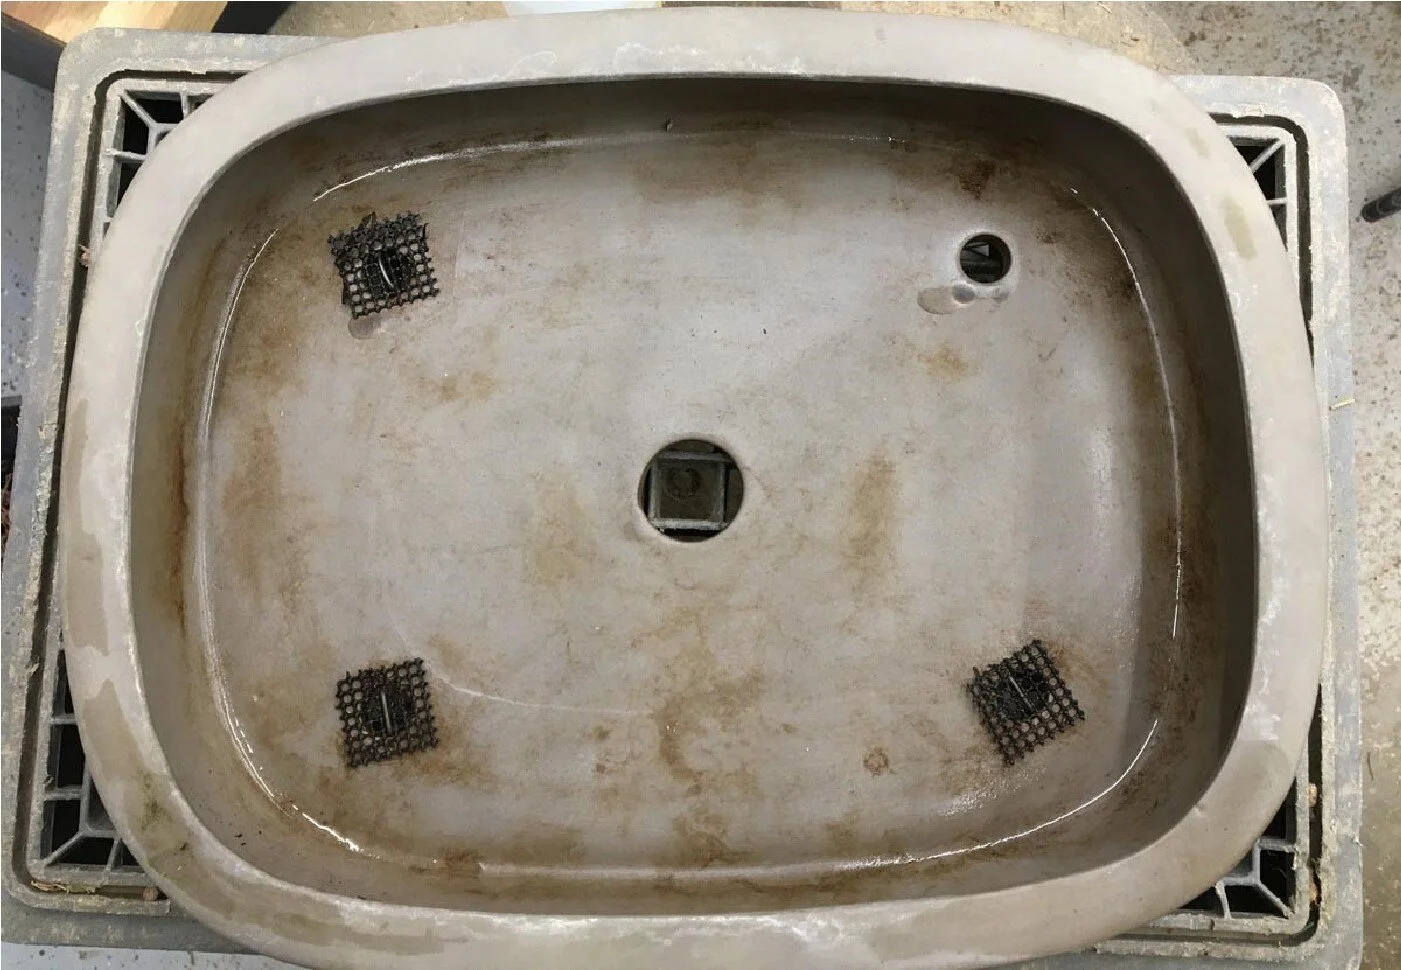
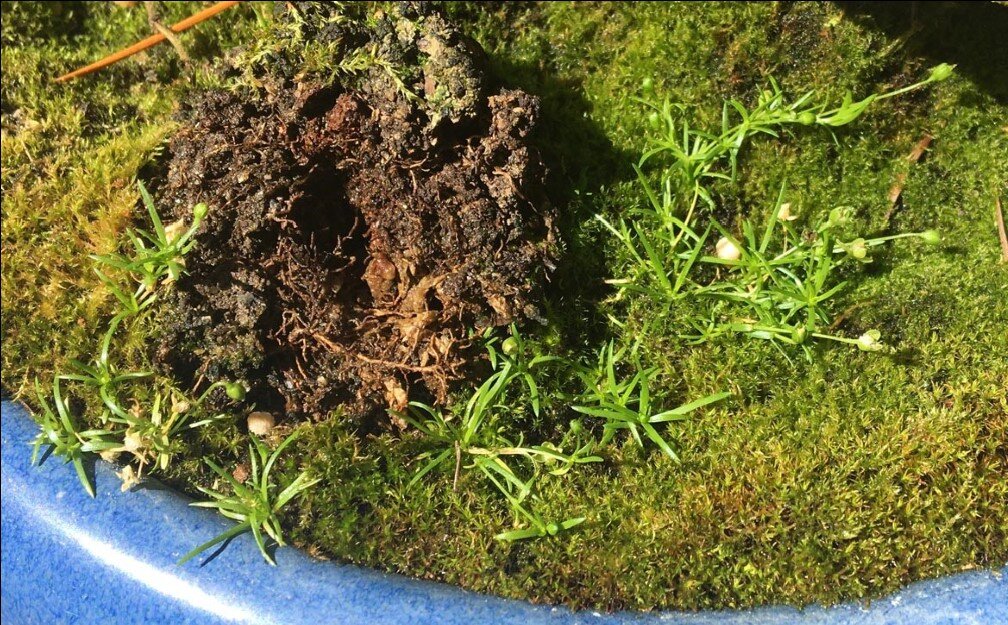
Korean pot ready to drill

I took this opportunity to make a bit-to-bit comparison between spade and diamond bits on a pot that could use some holes. This is an older Korean pot with walls maybe a quarter inch thick and very hard. I cleaned the pot first and then proceeded.

Taking Andrew’s hint from Saturday, I placed a piece of duct tape on the back side of the hole to be drilled to prevent blow out. With the diamond bit, it is better to start at about a 45-degree angle and grind a small hole to start the bit and then work yourself to a full vertical angle. I always have a water spray bottle to lubricate and cool the drill bit. I only needed to spray once and the bit went through in a minute or two of work.

Switching over to the familiar spade bit, I could go straight in because of the pointed tip. However, progress was very slow. To be fair, the bit was used quite a bit, and slightly larger in diameter, but I have to say that the diamond bit worked much better on this harder clay.

202012_04.jpg

Drilling in progress
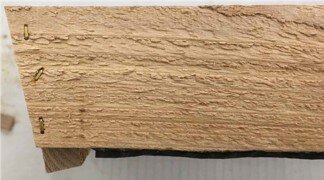
202012_05.jpg

New hole

At that point, I just switched to diamond bit to finish things up. This hole did have some blow-out, as pictured, but I did not use the tape on it, wanting to compare the difference. The technique to prevent blow-out for a spade bit is to listen for the change in pitch as you are drilling. This sound change means that the bit has reached the other side and is starting to emerge. Stop immediately and begin drilling from the back side. Though it is not exactly that easy to execute on a softer pot, when I am drilling fast and hard, I usually don’t care on those. But you can try the duct tape trick.  
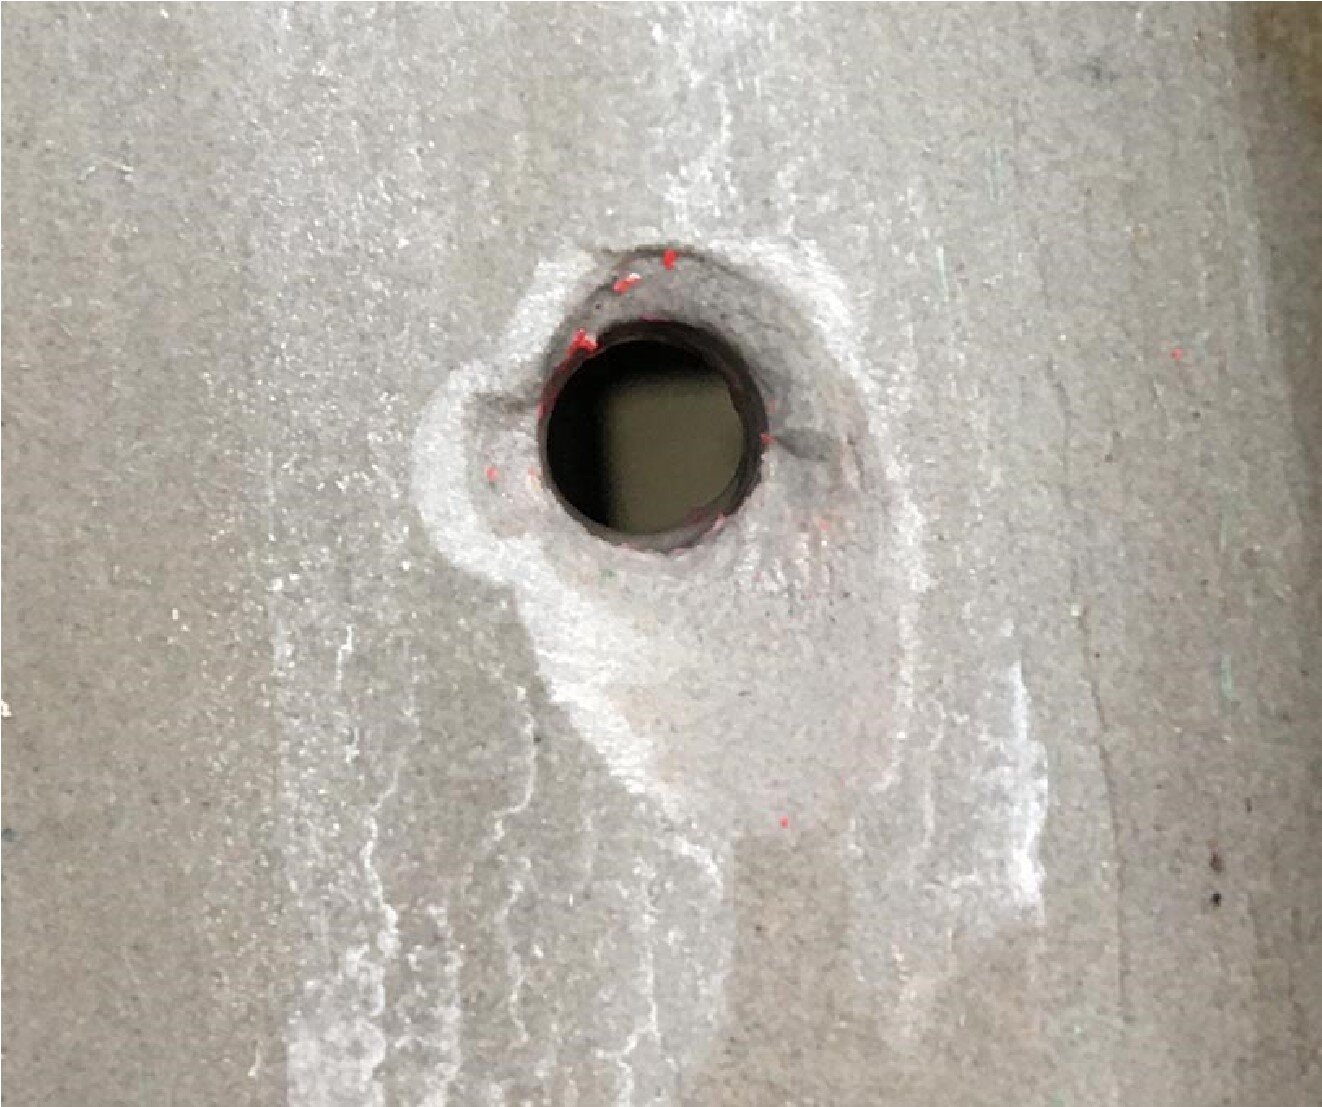
Blow Out

Blow Out

It was also mentioned that you can drill under water, but this gets operationally a little tricky. It’s unneeded in most circumstances, but might work nice if you have a lot of pots of the same size to drill. This whole process makes a great winter project so that you are ready to go for spring repotting.

Happy Drilling, Scott Elser

Bud Size for Health

Click for Branch Tips index

Now that fall has come in full force and we are surging into winter, it may seem that because we have no leaves that we have no way of determining the strength of our trees. In reality, we have all the information that we need tied up in the buds that are already set for next year. I don’t think that it was until I started doing bonsai that I realized that all trees set their buds for the next year not in the spring when they elongate, but throughout the year. If you have ever pinched a spruce tree you can already feel next year’s terminal bud in that brand new, bright green growth. If we make a close examination of the winter buds on each branch, we can tell exactly how strong it is, where we can prune, and exactly what to expect come next spring.  

First off, any branching that we see at this point is a result of the strength that a tree had last spring, and on through the summer. It is not a direct reflection of the current strength and health of an individual branch or tree at this time. For instance, a tree could have grown poorly in spring, but you adjusted your water balance, fertilizer, etc… and the tree recovered and became strong. That will be demonstrated by robust buds. Conversely, a tree could have grown strongly in the spring, but then ran into problems later in the year. That would be shown in strong branches, but weak new buds right now. As we prune, wire, and otherwise care for our trees, evaluating bud strength becomes crucial. Here is a list of points to consider, in rank of importance;  

1.  Number of buds at one location

2.  Total number of buds on a branch

3.  Length of the bud

4.  Diameter of the bud

5.  Color of the bud

I have quite a few examples to walk you through for both deciduous and coniferous trees. Keep in mind that we can’t cover all trees, and that species vary wildly in their behavior. But these principles are pretty consistent. Take a quick look at a tree. Pines would be the most obvious if you have one. The buds will tend to be very strong at the top and weaker as you work down the tree and into the interior. A strong branch will have multiple buds in a single location, and they will be large.  

Think of bud strength as total mass of the buds that are present. The more bud mass you have, the stronger the branch. One branch may have its strength distributed over two medium buds and another branch concentrated in one super large bud, but the branches are nearly equal in strength. The buds may not be that much larger than on other parts of the tree, but if you have 4-5 in one spot, it’s very strong. The tree is telling you that it feels so good about that branch that it has invested a lot of resources in that one spot.  

Our goal in bonsai is to end up with the same amounts of resources, the same level of growth on every single branch. Now is not the time to mess with that balance – we have techniques for that in the growing season. But we do have a great insight into what is going on right now.  

Let’s look at a Japanese Red Pine. The first photo shows an extremely strong branch tip at the top of the tree. It has nice, large, multiple buds. They are nicely pointed. The second photo shows a medium strength branch, with a bud the same size as the strong branch, but there is only one present. Ideally, we would have two buds at any one location. The third photo shows a relatively weak pine bud. It is small and rounder in appearance. This is not the branch that you want to make into a new leader or to use for grafting. But is still viable and still useful.  

Red pine, strong bud  (left),  Red pine, medium bud (right)

Red pine, strong bud (left), Red pine, medium bud (right)

Red pine, weak bud (left), Subalpine fir, weak bud (right)

Red pine, weak bud (left), Subalpine fir, weak bud (right)

Next up we have the Subalpine Fir that we worked on at the last club Zoom meeting in October. The buds on this tree are small and relatively weak. The foliage is strong, so we are OK, but we know that we are going to have to pay particular attention to the winter care and spring growth on this tree to get it strong again.  

Compare this with the stronger buds of a different subalpine fir. The buds are larger and there are two. Then we come to the interesting case of the super strong buds in the next photo. Strong buds on any true fir will make a sort of hammerhead effect of several buds massing together as you see here. But notice that the foliage here is shorter, from the same tree. It did not growth as strong in the initial push last year, but has made up for it through the summer and fall and set itself up nicely for next year  

Subalpine fir, strong bud (left),  Subalpine fir, super bud (right)

Subalpine fir, strong bud (left), Subalpine fir, super bud (right)

And just in case you think I was going to leave the deciduous trees high and dry, here ya go. Let’s look at a standard Japanese maple. On this single branch, we have three different strengths in the buds. Notice the very robust buds at the tip. We are in great shape there. If we are in refinement (which this tree is) then this bud may be too strong for our needs. The buds on the far right are actually a pair, and are of medium strength with a nice short internode. On the middle bud, you can see where a shoot was pruned back during the summer, dying back to the next node and producing a single weak bud. We can still use this bud if desired, but it demonstrates well how the strength is distributed on the branch.  

Japanese maple, buds of varying strength  (left),  Garry oak, very strong cluster of buds (right)

Japanese maple, buds of varying strength  (left), Garry oak, very strong cluster of buds (right)

Next up we have a Garry Oak with a VERY strong cluster of buds for next year. I can hardly wait as this tree is still in development.  

Styrax, green bud

Styrax, green bud

I also wanted to show you a Styrax as the buds are green. Just about every year I am fooled into thinking that it has started to grow prematurely, but this is just it’s appearance. It will stay just like this very reliably until next March or so.


We also have a European Beech for you with medium strength buds. By no coincidence, this is from the middle height of the tree. Note how the beech may keep it’s leaves through the winter to protect its buds. The next photo shows weak interior buds. You can’t tell easily, but these are about a third of the size of the previous photo. The one on the right is healthy, but not vigorous. The one on the left is very weak and at risk of perishing. The color is great though. Be careful of small stubs as they may not have a viable bud on the end. Just because there is a point doesn’t mean it will elongate in the spring.  

Beech, medium strength bud (left), Beech, weak interior buds (right)

Beech, medium strength bud (left), Beech, weak interior buds (right)

Here we have a coastal Douglas Fir. This tree has grown into a rock star the last few years, mostly because of Ryan Neil’s mid-summer pruning technique. Each shoot was pruned as short as possible, while still leaving two tiny, immature buds on each branchlet. Those minute buds have now matured into full blown buds, pumped with energy to be released next spring. Even though it was cut back in the summer, many branches still produced three strong buds. Medium areas typically develop one bud where I cut back to (I cut just ahead of the second bud on the branch, making the new tip) and usually one somewhere behind it.  

Doug fir, triple buds (left), Doug fir, medium buds (right)

Doug fir, triple buds (left), Doug fir, medium buds (right)

In the last photo, we see where I was able to cut all the way back to the base of the branch, leaving a bit of foliage, and ending up with a pair of buds. This may seem counter-productive, as it is would seem that it puts me right back where I started the season. However, in this instance, I now have two branches instead of one in that location, and I have kept the tree smaller, which believe me, is the challenge with this tree.  

Doug fir, back buds (left), Engelmann spruce, no bud (right)

Doug fir, back buds (left), Engelmann spruce, no bud (right)

Last up we have an Engelmann spruce. This is “Liberace” for those interested. This tree was pinched last spring, as the buds emerged. Pinched shoots on native spruces do not usually produce a bud at the pinch site, as confirmed in this photo. However, the foliage is still strong and contributing to the energy of the tree, so don’t cut it off. It just will not produce growth next spring. Compare that to the last photo where we have a very strong shoot, with the new buds nearly hidden in the needle mass, but they are there.

Engelmann spruce, buds

Engelmann spruce, buds


I hope this quick lesson helps confirm the state of health of your trees and gives you a road map of their care for the upcoming seasons.

Scott

Weedageddon

Click for Branch Tips index

I hope that everyone is having a great summer and that your bonsai are doing well. I know that I have really missed the BSOP meetings and am anxious to get back at it and see you all. In the meantime, I have been hard at work, pruning, watering, fertilizing, and spraying. Occasionally I do the bonsai shuffle, either chasing or avoiding the sun, all to keep my trees maximizing their growth and health at this time of year.

Beginnings of a pearlwort invasion. Tiny green stars with satellites forming.

Beginnings of a pearlwort invasion. Tiny green stars with satellites forming.

One of the biggest challenges that I have faced over years is keeping my trees weed free. Last year I vowed to kick my arch nemesis, pearlwort, in the you know what. He took it on the chin and it certainly was a knock down, but not completely out. I am back at it this summer with tweezers in hand. The challenge being too many trees and too little time. That, and the fact that open, well-watered bonsai soil provides ideal conditions for weeds to proliferate. When things get out of hand, it’s time to break out the big guns and leave no tiny weed unscathed. Last year I began some experiments that were very successful, so I wanted to share the results with you here.

Total infestation in a pot.

Total infestation in a pot.

The idea started forming in my head when I recalled that the First Lady of Shohin, Anne Spencer, mentioned that she used a small paintbrush to apply Roundup (Glyphsophate) to individual leaves of weeds to kill them. I am not sure of any other conditions, but her collection was immaculate, so whatever she did, worked. That said, my first line of defense against weeds is always the tweezer. Angled tweezers to be exact. You need one with a broader head so that it does not merely cut the weed off. The first test of my recent carpal tunnel surgery was in fact, a 45-minute session of pulling weeds, pain free. Not something I could do before, but now my excuse is gone (Doh!).

Roller and tray set up. The coke can is just for size comparison.

Roller and tray set up. The coke can is just for size comparison.

But then life does randomly, and all-too often, get in the way of best intentions and we are overwhelmed by the weed onslaught. I knew that I did not have time to use a paint brush (in previous years I tried a wide, flat brush, which did work, but lacked control), so I thought I would try a little mini roller, that you might use in painting small projects. I am including a photo here so that you can see my set-up. The roller is only about 3 inches wide.

At this point, I have to put in a disclaimer. This is what I consider a very dangerous and risky procedure. Use it with caution. Many, many years ago I tried Roundup on a wisteria to kill some weeds and ended up slowly killing the tree. I made two critical mistakes at that time. The first is that I used a spray bottle. That meant that I had an excess of chemical that was able to penetrate into the soil, and down to the roots. Secondly, all my wisteria sit in tubs of water during the summer. That excess of water, I believe, acted like a wick and pulled the Roundup into the soil mass. That is something that does not happen in regular application. The combination was deadly. I knew going into it this time that it was going to be risky, but sometimes you need a calculated risk to come out on top. Enter in the roller, which I could use to apply the chemical in smaller, evenly controlled amounts.

Dead pearlwort and green moss.

Dead pearlwort and green moss.

Roundup works on contact with the leaf surface, so once it hits the soil and dries, it becomes basically inert. I can’t speak any more authoritatively on that aspect. But the leaves absorb the chemical which is then translocated down to the roots, eventually killing the plant. This process can take several weeks, so don’t expect immediate results. I use this method on Pearlwort. Sagina procumbens, also goes by the name of Irish or Scotch Moss (not a true moss), but you can use it on any weed. But not moss. That is what is so great about Roundup in particular for this use is that it only works on higher order plants, but not moss. Your moss stays nice and green.

Roundup has been a source of controversy for a long time, and I must let you know that after many years, there was a recent successful lawsuit about Roundup. I have no details on that, so you can research this if you like. I always wear protective equipment, like nitrile gloves and protective eyeglasses when applying the chemical. For dilution, the easiest thing to do is use what you might already have mixed up in a sprayer for landscape applications. If not, use the proportions stated on the label. Use the minimum amount of chemical needed to cover the weeds. I roll it out onto the weed and go back and forth in different directions to make sure I get it covered. Warning, you will get lots of debris on the roller and in the tray, but it doesn’t really matter.

The aftermath of wholesale pearlwort slaughter

The aftermath of wholesale pearlwort slaughter

The first thing that I do in the process is to make sure that the trees are well watered. The last thing I want is to come back and water my trees five minutes after applying a chemical of any kind. I water first, so that any chemical applied to the surface of the pot or to the leaves has a chance to thoroughly dry. Don’t apply the chemical on rainy days as it will wash off, making it useless and possibly harming your trees. There are other weeds that this can this can be applied to, like oxalis (clover) and violets. All three of these weeds have deep tap roots and tend to tear off when you pull them. Killing them chemically allows you to come back later and pull out the remains cleanly. This brings up another crucial point. Once the weeds are dead, you still have to remove their brown carcasses, but it very easy to do at this point.

Roundup gel

Roundup gel

You might be reading along and at this point, or much earlier, thought that I am really, really crazy. Well, the idea is strong enough that Roundup actually makes a product that works in a similar way. It looks like a large underarm deodorant stick. I found it on the shelf at Wilco and thought I needed to give it a try just for this article. It works similar to some deodorants. You turn the knob on the end until a gel pops out of the many holes, which you then smear on to the leaves of the weed of your choice. I don’t think that it works nearly as well as the small paint roller. Plus, you can’t really tell how well that you are getting it on the weeds. I think the product is doomed anyway.

If you are a person who will get down on your knees to put that particular product on a weed in your lawn, you are probably a person who will just pull the weed out while you are there. I am not expecting it to be the next big fad in gardening. Which brings me full circle to my weed maxim. Tweezers are still your best friend and number one weapon in the fight against weed tyranny.

Scott Elser

Springing into Summer

Click for Branch Tips index

Now that we are passing through the middle of June, our work is starting to shift. Pinching is a thing of the past and we are in the middle of Post-Flush, Hardened Pruning. What a mouthful, but accurate way to describe where we are. We touched on this last month quite a bit, especially with deciduous trees. However, by the time you read this, you should already have decandled any multi-flush pines, and started pruning other pines and elongating species. More on that in a moment.  

What PFHP (my new acronym) is taking advantage of is the fact that plants have made their initial, and sometimes only, flush of growth for the season. As all or part of this growth hardens off (becomes darker, more rigid) it starts to contribute resources back into the plant. It is still in a foliar growth mode, rather than the vascular mode that it shifts to in the fall. What we are doing with pruning at this time of year is to stimulate the tree to put out another flush of growth that can harden off before next fall.  

All pruning at this time of year will slow the tree down. Just keep that in mind with your goals. Most deciduous trees will respond well and give us another push of growth with shorter internodes, smaller leaves, and thinner twigging. Some will even do it a third time. A few, not at all. Most conifers will not flush again, but we can use pruning at this time of year to balance strength and set our buds exactly where we want them for next year.

If you look at all of these techniques in a broad sense

, they are ALL really a form of partial defoliation, even the conifers. In all forms, we are just removing parts of the existing foliage, with variations that come in the amount and timing. I have pruned many of my trees in past years during the months of July and August and not had that great of a response. What I did not realize is that some of these trees had already shifted into vascular growth, so their foliar response was minimal. I also had not fertilized to build adequate resources for the tree to push again. A great example is Doug Fir, where we know that we have a thin margin of about two weeks in late June/July that we can prune to existing, but rather minute buds, and have them activate and set up for next year.  

Otherwise those back buds just sit there and do nothing, ever. We ride the fine line transition from foliar to vascular growth to force the desired result. Luckily, most trees are not so finicky. We do have a time now that we can prune back to any existing bud on almost any tree and be safe. I will be pruning my spruces next week, just as soon as this brace gets off my wrist (Carpal tunnel surgery last week, thank goodness. A long time coming. It makes typing this a real bother, though). And my Doug Firs and true firs also.  

Junipers will wait until the heat of the summer when I will also work on restyling them. I am just about finished pruning with my deciduous trees, and am experimenting, and hopefully keeping record of partial defoliation on species I have never tried, nor anyone else that I know of. A bit of a gamble, but I think most will pay off. Crabapples, Hawthorns, Persimmon, Wisteria, and Katsura, to name a few.  

As you go about pruning, remember that if you prune your fruit and flowering trees past July, you may get new growth, but you are likely pruning off the flower buds for next year, or cause the tree to abort flower bud production and concentrate on foliar production. If you are in development, there’s no problem. Just no flowers next year. Also, try to keep more foliage on any tree as we head into the heat. Think of the foliage as a big radiator. The more foliage, the more heat the tree can remove from its system and stay cooler. That’s almost counter intuitive for me.

Now back to multi-flush pines (Essentially just Japanese Black and Red Pines) that are in a refinement stage. Remember, it doesn’t do much good to decandle a tree unless it is styled and you have a plan for refinement. Otherwise, you are just pruning blindly and may actually inhibit the development of your tree. The same could be said for most pruning. Make sure you have a clear plan. That plan can change based on what the tree gives you, but you must start somewhere.  

On June 1st, right on schedule, I went to work on several of my red pines that I have raised from seed and wired and styled for the first time last fall. Now, I thought, I am finally ready for refinement. But as soon as I got my scissors in hand began to inspect a little closer, I noticed that I didn’t have any back buds, or almost none, on any branches. We are talking Shohin and Chuhin sized trees with no buds for 3-4 inches. And therein lies the great deception.

Most of us have always thought that decandling a multi-flush pine will generate back buds. But I have to say that after twenty years of continuous decandling efforts, I am not sure that I have ever seen that happen. Here is where discipline kicks in. I need to let all of the shoots on those still-in-development red pines extend so that I substantially increase the foliage mass – I pruned a lot off when setting the branch structure for the first time. Now that they are pushing strongly, with a much larger foliage mass, they will begin to create greater vascular tissue, building highways for nutrient transport, which will then stimulate the precious back buds that I seek.  

Then I can begin the cut back and decandling process, sigh, next year. All of this you may know, but it really struck me that after all my efforts over the years to accumulate technique, that I really needed to apply myself, as well as my newest gained knowledge, and let patience have its perfect work. I know that by maintaining my water balance and a steady stream of fertilizer and sunlight that I will be rewarded with copious back budding in the fall. This I have seen at times, but not realized exactly why, and now all the pieces are starting to fall into place. It’s highly gratifying to know that I recognized a situation and applied the correct knowledge and used restraint, rather than the blade.

Scott Elser

Late Spring Tips

Click for Branch Tips index

Well, here we are, rather stranded by COVID. For many of you, including myself, it has led to more time with the bonsai. I am really looking forward to seeing the results in your trees with all of this time at home. I know that my bonsai have really taken off this spring at an unprecedented pace and I have been barely been able to juggle repotting, pinching, pruning, styling, etc… The spring weather certainly has been cooperating with a mild winter and a dryer and warmer than usual spring. This has accelerated the development calendar by a few weeks so that buds on different species have emerged and elongated nearly simultaneously, it seems. I barely get my maples in refinement pinched then the spruce start running and it’s time to pinch them too.  Then there are the firs and hemlocks. 

I actually started experimenting with extending my pinching regimen to species I usually just pruned after hardening. Many of those are now transitioning from a developmental mode into a refinement mode. Which really means that I am moving from developing the trunks into developing quality branching, especially on deciduous trees that I have grown from scratch. 

A refined Sargent’s crabapple with its first crop developing

A refined Sargent’s crabapple with its first crop developing

Let’s start with fruiting trees. My regular habit is to prune off any fruit that starts to form so that it does not take any energy away from my primary goal of developing trunks or branches. However, I was very pleased to see tiny apples forming on one my shohin Crabapples in refinement for the first time. The fruit only develops on second year spurs, so as I pruned for refinement year after year, I was pruning away all the flower buds. This was a known tradeoff, but the results are worth it. This year I pruned the branches just past the fruit to check their growth, and am praying that the tree does not respond by aborting the tiny, quarter inch apples. So far, so good. 

But I regularly prune off all the flowers of my plum trees, knowing that a few escape and develop fruit anyway. These trees are now getting close to where I would allow them to develop fruit. However, the fruit tends to ripen mid-summer when there is no one around to share it with, but the birds, so off it comes. I did get to enjoy the sweet flesh myself, one year. Full size apples and pears pull a lot of energy from the tree. Be wary about what you let grow. 

Placing tall plants inside of a second container to prevent blowing over.

Placing tall plants inside of a second container to prevent blowing over.

You must also consider how great a target they make for critters, who seeking sustenance, wreak havoc trying to get at your fruit. A huge black crow landed on a newly repotted juniper yesterday and I was so glad that it was both tied into the pot, and tied down to the bench. I would have hated to lose the new pot after just a few weeks. 

At the time of this writing, most of my deciduous trees have hardened off their initial growth and are continuing to push. I have some of the aforementioned shohin crabapples in development that have rather tall spikes of growth (3 feet) to thicken up the trunks. Because I am developing them as shohin, the pots are still small, so the wind likes to blow them over. In the past, I took this as a cue to repot the tree into a larger pot. 

The same shohin tree in development under all those long branches.

The same shohin tree in development under all those long branches.

The problem is that the tree does not have enough foliage mass to take up all of the water that a larger pot will hold and they stay too wet. Since I am growing these trees in terra cotta pots, one of the simplest ways to handle this is to simple place it inside a pot of the next size up, them just a quick wire around to keep everything together. This has proved very effective and set me up perfectly when I prune off the sacrificial spur, being left with a small tree again.

My fertilizing has been a little off this year. I haven’t really started until now, because I wanted to keep my trees more in refinement. However, there are some trees that I really want to make some hard prunes on to redirect growth and initiate a dynamic and profuse response. Those I should have been fertilizing since they first started growing. My mistake in the past has been to make a big prune without fertilizing appropriately. The response I would get from the tree is meager and not consistent. So, while I want to prune really badly, I am going to wait a few weeks and build up their strength. 

What I do have going well for me is that I did fertilize strongly in the fall, which is why everything has pushed so well this spring. I will start by pruning my Japanese maples, the ones that I want to keep in refinement. With those, I have already pinched, and pinched, and pinched  again, as new growth continues to respond to previous pinches, from strong to medium to weak. 

Now that it is hardening off, I am going to take off one leaf of the any pair of leaves, and leave only one internode, unless it is impossibly short (less than a quarter to half inch, depending on tree size). Generally speaking, the tree does nothing in response. We are getting more light to each leaf that is left, so it is doing just fine and it is happy to stay right there for the rest of the year. 

A cherry, pruned, then leaves further defoliated by cutting in half.

A cherry, pruned, then leaves further defoliated by cutting in half.

However, if we want to elicit a growth response, for a new set of growth, we can go back and cut each remaining leaf in half. Remember, anything that is left is still photosynthesizing. So instead of complete defoliation, you end up with about 75%, which should stimulate the tree to put out new growth. You can apply this principle to most deciduous, and even some broadleaved evergreen trees. However, we usually only do this on larger leaved varieties. See the example of the cherry in the photo.  

We also need to address watering at some point here. This is the most critical time of year for watering. We have a lot of factors that are in continual flux until things sort of settle down to a regular routine in early summer. As the trees push their buds out, they begin to use more water. Sometimes an immense quantity in just one day. All of the new foliage the tree is adding does not have a cuticle formed, so it can lose moisture rapidly. We have to be spot on with water until the foliage hardens off and is able to retain moisture consistently. 

The next challenge we have with water is the darned weather. It rains, then it’s hot, then it rains some more. Trees with a heavy canopy may not receive that much water. I have a large Norway Spruce that sits under the neighbor’s Norway Maple and both the maple and spruce’s own canopies prevent it from receiving much rain water. The neighbors must think that I am crazy, out there watering just one tree when the rain has been going on for hours. 

I find that even after raining all morning, that some trees need water in the afternoon, just because they are growing and transpiring rapidly. And the more developed a tree, the more water it will need. And now, here is where caution needs to step in. Once we start pruning, defoliating, etc…, the amount of water the tree needs with temporarily decrease. Also, as the tree hardens off, its need for water will decrease, so we really need to pay attention every day to its changing requirements. 

Since the leaves on most of our trees are beginning to harden off, this is also a great time to make air-layers and make large, hard cuts to the trunk or branches. Now that trees are back into an energy positive, where the brand-new leaves that they have just invested in can pay back, the tree is in a position to make a positive response to drastic action. In the case of air layers, the tree can use these new leaves to power the generation of new roots. In the case of drastic trunk chops and defoliating, and drastic pruning, the tree has recharged its batteries so that it can channel energy into generating new buds, redirecting growth, or compartmentalizing and healing wounds. 

What do we mean by hardened off? You will see the color of the leaves change and the leaves become firmer. This will start at the base of the branch then continue out to the newest leaves. If we have allowed a shoot to elongate and it has, say, ten leaves on it, we can start to prune back anytime we have four or five leaves at the base that have already hardened off. That’s all we need. 

Be aware when you prune that many species will not generate a bud from the first leaf or two. These basal leaves are usually small and it can be better to just remove them, rather than rely on them. They are often a totally different shape than the regular leaves. But sure then, to end up with at least two good leaves when pruning, whether at the same node with species of opposite leaves, like maples, or two separate nodes in alternating leaved species (Almost everything else but maples).

And finally, I know this is getting long, be ready for the water shift in the summer. As we mentioned, plants will begin to harden off and reduce their water usage. Some plants also shift into semi-dormancy, further reducing their water usage. Another shift will occur any time we perform decandling or defoliation techniques. Each tree is different and will shift at different times. 

Have a great, growing spring. I look forward to seeing all of you and your bonsai results soon.

Scott Elser

Triple Trunk Redemption

Click for Branch Tips index

Many years ago, early into my bonsai journey and my attachment to BSOP (those two are nearly concurrent), I encountered a tree which held me rather spellbound. It was a triple trunk Mountain Hemlock (Tsuga mertensiana) from club member Edris Stryker. Edris was a die-hard member of BSOP for many years and lived in Longview, Washington. She and her husband Ralph regularly made the trek to Portland for meetings and Edris shared her trees at every show. Ralph was a timber cruiser by trade, so they made it into the hills quite often, I think. This tree ended up coming home from one of those excursions. 

april01.jpg

As her bonsai career began to wind down and she had to find new homes for her welldeveloped collection, a few folks were interested in this tree, among them her son and myself. Since her son did not do bonsai, care of this tree was entrusted to me, somewhere around 2002. Yes, much longer ago than I might have imagined. 

I have many bonsai now from Edris, and for every single tree, my first task was to repot each into a new container. That usually meant a vessel significantly larger than its current home. For this particular tree, it went into an oval, which meant I had to round the corners so to speak. I don’t have a photo available for what it was like when I first received it, but it was in a generic rectangle from Japan. 

Freeing the tree from the pot was a huge challenge and Edris used just fir bark and lava for soil, what we all at BSOP used at the time. When I did get it out of the pot, it was literally a brick. This was my first instance of using a reciprocating saw on a bonsai root ball. To get into a new pot and free up some space for new soil, I used the saw to cut about a ¾ inch slab of packed mud and root off the bottom. When she saw the result, she was amazed that I was ever able to get it into the pot. The result is what you see in the first photo, from 2004. Just beginning my studies with Boon, you can see one of the very first uses of “Boon Mix” in Portland, with lava, pumice, and akadama. 

April02.png

Now that I had the tree in a new container, my next mission was to style the tree. Edris didn’t employ too much wire in her bonsai training, but I obviously do and you can see the results of the first training in the 2006 photo. The structure was set and improved with the foliage fairly well balanced and thinned out. Mind you, the tree has probably already been a bonsai for at least twenty years at this point. Then it began to fill back in and was shown at the Japanese Garden Show at least once during this time period. 

april03.jpg

From here, I began to acquire more and bigger trees that took much of my available time. I realized that, although I had initially fallen in love with this tree, the trunks were all of equal size and had relatively little movement, leaving the bonsai a bit static, and to me somewhat boring. Then the worst thing that could happen struck. I simply didn’t know what to do to further the design of the tree. I was at an impasse. That was disaster, because I then started to lose a little interest and then I didn’t pay enough attention to the tree. As a result, the wire started cutting in and the tree started outgrowing its pot. Notice in the 2013 photo that the tree is growing roots up out of the pot – those coils you see on the surface. The top of the main tree was dying off, being strangled by the wire. At this point, Lee helped me unwire the tree during one of the Japanese Garden Shows. But I still did not know what to do. 

I did know that it needed to be repotted, as the tree had lost percolation, the ability to accept water. That nice big root base and compacted soil was preventing it from taking in water, so its health started to decline. I got the idea to incline the group to make them slanted to start to get more movement. So being who I am, I tried to stuff it into an even smaller pot and change the angle at the same time. Just the thing to do when is already suffering, eh? I really had to work the root ball and I barely coaxed it into staying healthy. But I still hadn’t really solved the percolation problem. I was trying to soak and soak the tree to get enough water in.

april04.jpg

Then I hit on the idea of a rope dam. See the “Dam It” article from September 2017 on this very  tree. You can see I am still using it in the last photo here. 

After that, the tree was still struggling, but the rope dam helped immensely. In 2018 I pruned out all of the weak and dead branches so that the rest could get stronger. In March of this year it went through a new restyling. I slanted the trunks even more and rotated the group about 10 degrees so that the left, lead tree was significantly in front of the others.  The trunks have gained in girth and texture over time, so I decided that any improvement I would attempt there would only damage the best qualities of the tree with little gain. 

There were no big bends to accentuate, just a soft and gently meandering quality, and that wonderful base. I haven’t seen a hemlock with such a developed base, and it is by far the best quality of the tree. Once I had the tree tilted, my wife gave me the best feedback, as she always does, and that was to swap the priorities of the number 2 and 3 trees respectively. The left tree had been number 2, but because of the tilt, it was now almost even in height with the number 3. Why fight it? I shortened the left trunk and lengthened the right which made a lot more sense.

I began the process of styling the branches without any clear idea of where I was going. It took quite a bit of time and courage to wind my way through. I worked mostly on the left tree first, then to the main tree. From there I sort of stair stepped in chunks from left to right, working up each tree. I was able to be very disciplined for once and worked on only the main branches, and maybe a secondary or two, to see what the structure was going to be before getting caught up in any fine detail. 

I cut off many, many branches and made not a few into jin. Those tops that died had all been wired into shapes, so they made nice, attractive jin now. I think that I cut about 60 -70 percent of the foliage off. After awhile, and before I finished the top, I began to wire and style the secondary and tertiary branches to get a better idea of the movement, length, and density that I was achieving. I know that hemlocks will bud back decently, so I was not too worried about generating more foliage. It won’t happen overnight, but quicker than I can imagine, as I found out the hard way before. The photos of the Front and Right Side give you a better idea of how the structure plays out. There is a new Vicki Chamberlain pot awaiting in the wings for next year, when it has recovered from this operation. 

I didn’t feel like the final photos really did the tree justice, so I took another from the patio, looking up into the trees.  From here, you get a little bit more of an idea of what I told my wife Lisa. This is the first time I had ever created something where I felt that I was standing in the midst of a forest. When she challenged that thought, I clarified to say that unlike most bonsai that bring us to a solitary place on the mountain where a tree is surviving the rigors of nature, this composition puts me squarely in an alpine forest, with the light dappling through. 

april06.jpg
april6.jpg
april07.jpg

I now feel like I have come full circle with this unique tree, propelling it forward to something beyond what maybe Edris herself had envisioned. It has a way to go in this current iteration, but it will be there soon and I can share it with you all. I feel somewhat now, that I have redeemed the trust that Edris placed in me so many years ago.

Scott Elser

Annual Repotting Update

Click for Branch Tips index

It seems that each year since I started this column, over six years ago, that I have written about repotting in the Spring. Since repotting is such an essential part of our bonsai regimen, I thought that I would recap a few things and maybe pass on a few new tips. I just finished teaching several workshops specifically on repotting, with one more to go. Seeing a few common misconceptions, and some really good practices brought a few things to the forefront of my mind. I am sure that you are well into your repotting season by the time you read this. I started just last week – about March 1 on my trees.  

The first point to consider that this is the only time that you get to work on the roots for at least two years. That is for deciduous. For conifers it might be 5 years. The work that you do now has to last the tree for that period of time. We have several times to correct branch structure by pruning, wiring, etc… during any one season. However, this is the only opportunity that we have work on the roots, correcting flaws, changing the soil or container and setting up the health and growth of the tree for the next several years. It’s worth getting it right, to the best of our ability and knowledge.

First and foremost is the aftercare, so I am starting at the end, rather than the beginning. Make sure that you can keep any tree that was repotted this season from freezing, or at least the root portions. It’s also best to be able to keep them out of the rain for several weeks until you see the tree starting to use up the moisture in the container. That means that it has recovered and is ready for the transition to our great Pacific Northwest spring weather. Rain.  

For the first time in 30 years of bonsai, I built a heat bed to facilitate the recovery of plants after repotting. I mention the 30 years, because it is not in any way essential – I have made it fine this far. However, I can tackle the aging and declining root balls of some very old, collected trees with confidence. I started that process last year with great success and am now moving onto harder specimens That may be the subject of a future article. What makes my heat bed a little different is the fact that it is not in a greenhouse, but just out in the open on my patio. I love it already after just one week.

Next up is, have a plan. Do you have all of your soil components sifted and/or mixed and ready to go. Do you have the pots? More importantly, do you have the time? I am finding that just taking a pine from a six-inch pot up to an eight inch, with pruning, etc… is taking me about half an hour at cruising speed. I can’t seem to do a medium size tree in less than two hours. And since most of my trees are larger, you can do the math.  

If you run short on time, wrap the root ball in a wet towel and finish it later – within a day. Or you can heal it into a mound of something you might have, like old soil, bark dust, etc… Just make sure that it’s moist. Once you have the tree popped out of the old container, work on the new one before you start on the root ball. The less time your tree is out in the air, the better.  

If it is going back into the same container, take time now to rinse it out and let it drain and dry. If you know what pot you are going to use, put the drain screen in. The point really is to be looking ahead at what you are going to need to do to finish the repotting. Do you need to sift more top dressing? Do I need chopsticks of a different size? You get the idea.  

My next point is to be gentle. Use a root hook only when necessary and with great care. Slow going with chopsticks or angled tweezers is much easier on the tree. The soil should be moist but not wet. Handle roots with care. You can decide later what to cut off, but if you mangle them, the choice is made for you. And remember that we don’t want to bare root a conifer. It’s chances of surviving, let alone thriving, go down really fast. Also remember that you don’t necessarily have to cut roots to fit them into the pot. If you feel that you need to keep more roots for the health and vigor of a tree, you can simply fold them gently into the pot and address them in another few years when you have more root mass to utilize.

What soil you use is quite the conundrum and I am always seeking to improve what I have for each tree. There is no doubt of the effectiveness of Boon mix for bonsai, a 1:1:1 mix of Lava, Pumice, and Akadama screened to between 1/16 and ¼ inch particle size. But it can be tweaked. And a lot. Take out the 1/8-1/4 for shohin, or the 1/16-1/8 for trees that like it a little drier, like mountain pines. But there’s more. I have mentioned in the past that we can to use up to 100% Akadama on deciduous trees. I am getting mostly favorable results with that – better than the standard mix.  

But then there is Michael Hagedorn who favors just Pumice and Akadama, and our own Dennis Vojtilla that uses Lava and Akadama. They are leaving one component out and you can hardly argue their practice, looking at their trees. So, experiment on what works for you. I just had a workshop with the Eugene club, and their president, Tom Fincel (An outstanding bonsai artist and even better person to get to know) had a large container each of sifted Pumice and Akadama (A student of Michael’s) with which he could easy mix up whatever proportions he likes for any particular tree and I really feel myself gravitating to that approach.

The last thought that I leave you with is what was hammered into me (albeit it gently) by Boon. Neatness counts. It carries through the whole process. It starts with the preparation of the pot. Make sure the screens are fastened neatly into a clean pot. My screen clips are always oriented perpendicular to the front of the pot to offer the lowest profile, so no one sees them hanging down in a show. The tie down wires likewise, running front to back instead of side to side, which uses less wire and is usually hidden by the pot’s feet. I have to do all of this anyway, so it really is not any more time to make it tidy. Why would you tie a crooked tie, or leave your shoes half tied?  

On a finishing note, make sure that you do not mound the soil too much. This is a consistent trait with beginners. Level off the soil where the roots start and taper it down to where you have a good ¼ inch lip around the edge of the pot. This not only looks good, but makes it so that the water stays in the pot when you water.

Happy repotting.  Scott Elser

Wooden Boxes

Bounty of Boxes – 10x13 boxes with screen bottoms

Bounty of Boxes – 10x13 boxes with screen bottoms

Last spring, I decided that I needed some shallow containers for deciduous trees that I was growing and the easiest way to get those was to make wooden boxes. These would provide me with several different sizes of containers to transition out of deeper terra cotta pots while continuing to facilitate the best development possible (not necessarily the fastest). The results were fabulous and I want to share with you how I went about it. My attempt here is to give you an idea of my techniques, materials, tools and my thought process that went into these so that you can formulate and build your own. First of all, the purpose of these boxes was to grow trees larger while developing a flat, finely divided root system. Wooden boxes work great for this as they are inexpensive, easy to customize, and allow the roots to breathe very well. I built approximately ten in one Saturday morning, with all of the variations that you see.

Angled Sides (Side View) – Sides of box showing the canted side and end piece extending down to act as a foot. Stapled screen is also visible.

Angled Sides (Side View) – Sides of box showing the canted side and end piece extending down to act as a foot. Stapled screen is also visible.

The first chore was to rip some long strips of 6-foot cedar fence boards on the table saw for the sides and ends. My big tip here is to buy your boards at least a week ahead of the work. Bring them into the garage and stand them up, spacing them apart so that they can dry out. I am not sure if they are wet from weather, or their own sap, but the wet wood really slows you down, make very rough cuts, and dulls your saw blade. A little drying goes a long way to making this an easy process. I cut the sides 2” wide and the end 2.5”. The next step was cutting these boards down to pot lengths. I started small, with my final outside dimensions coming in at 10x13 inches. That gave me an inside size of about 8.5x11.5, roughly a sheet of paper. This was the main size that I was after, so I made about 6 of them. The ends were very easy, as I just straight cut them on the saw (table saw or chop saw will do) The sides were a little different story. I had seen many photos of wooden boxes from Japan and noted that they had a canted side, which I really like. I made mine about 10 degrees. That’s about all that you need for a nice presentation. This is where the old saying of measure twice, cut once comes in handy. Those angles can really fool you, but these don’t have to be too precise.

Finished box (Top View) – without the lat-er added strut. Note the screen stapled to the inside on the ends.

Finished box (Top View) – without the lat-er added strut. Note the screen stapled to the inside on the ends.

Once you have your sides and ends cut, all that remains is assembly. There is no doubt in my mind that the one tool that really made this whole project possible is a pneumatic stapler. I used narrow crown staples, meaning that they are only about a 1/8” wide. You are go-ing to need a length of at least 1”, but use more than 1.5” and you may poke out side-ways. Although safety with saws comes with-out saying, staplers can be a bit tricky and shanks can shoot out the sides if not angled properly, or they hit another staple, so make sure your hands are well clear of anywhere a staple can reach. Then it’s a snap. Bing, bing, bing, one side, bing, bing, bing, the other. These only need to hold for about two years, but should last about five.

Corner Construction (Bottom Corner) – The side and end are joined, with screen stapled to the bottom of the sides.

Corner Construction (Bottom Corner) – The side and end are joined, with screen stapled to the bottom of the sides.

All of the above may seem fairly straight forward, but here is where the fun begins. I started experimenting with different bottoms. I had some really large drainage screen that I never use, so I thought it would be nice to use it up here. In the photos you can see how I notched out the corners of the screen so that I could staple it to the bottom of the sides, but tuck it up into the ends. This helped maintain the all-important air space below the box.

Easy peasy, that is, until I went to pot something. Turns out that although I had lots of air space, the bot-tom was very floppy and there was no place to anchor any wire to tie down the tree. Disaster. So, I improvised and cut a narrow strut to go across the center under the mesh, making sure the pot didn’t rock on it. Phew! But I still had to carefully thread tie-down wire through the mesh and across the strut for a minimum of support. Luckily, all the trees that I was planting had well established root systems. Crisis averted. Before I discovered this little problem, I had made some larger models, using regular size mesh. But for these I used evenly spaced wooden struts across the bottom. A big improvement but it used a lot of mesh that was not needed.

My last versions used a full wooden bottom. I cut the boards to length AFTER I have as-sembled the main box, so that I could get the dimensions correct. If you take a look at the pho-tos, you will see that I used two different scenarios for mounting the bottoms. The easiest to perform is flipping the box over and stapling the boards to the bottom of the side rails, overlap-ping them to the outside edge. The problem here is that my end pieces that double as feet did not take this into account, so bottom sits maybe just 1/16 of an inch off of the bench. Not ideal. On the next model, I cut the boards to fit the inside of the box, then had to elevate or hold them as I stapled them into place.

At these small sizes, strength is not really a factor, but this construction would hold the bottom in longer, and stronger, whereas the first method makes a more rigid box overall. But again, not really the issue here.

As I worked my way up in sizes, I noticed that I was getting really close to the size of an Andersen flat. My problem with Anderson flats is that unmodified, they will rot out your benches fairly fast, and they are not stable enough to keep the roots from moving. It’s not their fault as this isn’t what they were designed for. So, taking a cue from the previous work, I cut four strips and stapled them to the bottom from the inside, curing both caveats. Stability and aeration are now mine.

Three Styles (3 Boxes) – One box with a screen and strut bottom. One with the bottom boards stapled be-low the sides, and one with the bot-tom stapled into the side, raising it higher.

Three Styles (3 Boxes) – One box with a screen and strut bottom. One with the bottom boards stapled be-low the sides, and one with the bot-tom stapled into the side, raising it higher.

Anderson Flat (Anderson flat) – Anderson Japanese Flat with four cleats stapled to the bottom.

Anderson Flat (Anderson flat) – Anderson Japanese Flat with four cleats stapled to the bottom.

One year later (Maple in box) – This maple is happily growing in its new home.

One year later (Maple in box) – This maple is happily growing in its new home.

Most of you will not have the power tools that I used to create these boxes. However, if you are interested in making some of these, I suggest that you work out the sizes and number that you need, and then approach a bonsai buddy or two and share resources. You can spend a Saturday morning making boxes and swapping bonsai war stories and everyone comes out ahead. Four hands and two heads really do make things go together easier.

Scott Elser

Preventing Shoulder Injury

Click for Branch Tips index

I admit that the title of this article might sound a bit like it belongs more in Golf Digest than it does in the Tree Line, but bear with me a bit. What we seek is not for ourselves, but rather for our trees. This article is all about how to wire our trees and protect our precious branches from being savagely ripped from their sockets. Learning how to wire well may seem like a daunting task, but it really rests squarely on a few simple principles that are then applied with careful consideration.  

That said, this article is not about the basics, though you will see them peeking through at times. My attempt here is to convey a very simple concept that took me hundreds of hours and too many damaged or detached branches to learn. That principle, is that I must at all costs protect the shoulder of every branch I intend to bend. I need to support the branch in such a way that it can’t possibly get damaged in the styling process.  

Low and behold, when I do that, the branch is very secure and can be bent into any reasonably desired position and it stays there. No wobbling or bouncing back up. It is very gratifying to wire and style a branch and have it resolutely stay in the exact position intended, and stay there until it is time to remove the wire.

The following is a bit of a photo essay as I wire up a spruce branch that I snipped from a garden tree. This is not an actual bonsai branch, but is of a very appropriate species and scale. Also, I must note that it is styled as an alpine branch similar to most elongating species in that it is very narrow instead of broad like many pines, etc… That is a matter of personal taste. I also did not wire every little branchlet. The point here is the fundamentals and that wire would be applied the same way whether it was a spruce, pine, or maple.

Figure 1. The Spruce branch before any work has been performed. Lots of possibilities here.

Spruce Branch_1.jpg
 
Spruce Branch_2.jpg

Figure 2. The branch after cleaning off the old needles and pruning to alternating branchlets. This is standard procedure. I stop pulling needles when they don’t come of easily, so you will see different amounts on different branches.  


Figure 3. The primary structural wire with a few bends already in place. Always style as you go, before applying any more wire. This allows you to determine the best course for the next wire. Note that I stop with copper wire on a conifer about the time the diameter of the wire equals that of the branch.

Because I know that I am going to be applying wire to the rest of the branches, I confidently know that I will have a smaller gauge to more delicately wire out to the tip. The purpose of this structural wire is not only to bend the main branch, but also to create a strong spine that supports the secondary wiring.  

Spruce Branch_3.jpg
 
Spruce Branch_4.jpg

Figure 4. Now that I have the primary wire in place, I begin to apply secondary wire starting from the tip and working in. Since all of the branches are of a similar size, this works great. If some were larger than others, I would start with the largest first.

Here you can see that I am pairing a side branch together with the tip, using at least two turns of the primary wire to support and lock in the secondary wire. Note that I leave the wire long to aid in styling, then trim it when I am done. It really helps to have the longer length to help guide the wire around all those needles.


Figure 5. This is a close up of the previous photo showing how the secondary wire is applied parallel to the primary wire. Always. Notice how the secondary wire crosses over the top of the branch fork and makes first contact with the secondary branch on the outside of the fork, closest to the trunk. The wire is also going outside of both branches without crossing over the primary branch.

No matter how much you bend the secondary branch, the wire stops you from going too far. Since we want acute angles, it is not so much of a problem here, but there are many situations where the desired direction is in direct conflict with the main branch, so the secondary branch must be well supported.

Spruce Branch_5.jpg
 
Spruce Branch_6.jpg

Figure 6. Now we start pairing other branches together. We apply the wire starting on the secondary branch closest to the trunk. I like to start with a few wraps of wire on the branch that already has wire – the primary branch in this case, so that it is properly anchored before moving out onto the more vulnerable secondary branch. Once the wire is secured, I move out onto the first branch, closest to the trunk.

Our junction is very similar to the first branch we wired. I follow my rules and parallel my wire along the primary wire and move out to the second branch in the pair. However, as we reach the second branch, we see the gap between the wire and the main branch, giving us a clue that this branch is unsupported with the present configuration.


Figure 7. If we continue to wire the branch and start to bend, this is what can happen. Total disaster. This is especially a problem when you are using a heavier gauge wire (note that this branch is a little smaller than the first one in the pair) than is required for that branch. Yikes! I have done this way too often.

Spruce Branch_7.jpg
 
Spruce Branch_8.jpg

Figure 8. Here is the alternative and my preferred situation. I cross over the main branch. Gasp! I know that breaks the main tenets of clean, aesthetic wiring. But I am more concerned about my branch at this point. Also, I will only do this with secondary or tertiary wiring. Never, never with primary, structural wire.

The gauge that crosses over is always one or more gauges smaller than the primary. But as you can see, the branch is now fully supported, meaning that I can move it into just about any position desired and it will not break off.  


Figure 9. Here we see the third pairing of secondary branches. In this case, I actually started by crossing my secondary wire in order to support the branch. As I finished onto the second branch of the pair, I was able to land on the shoulder of the branch in a perfectly supporting manner. That makes this configuration just the opposite of the first instance.

Actually, that second pair of branches would have been better supported by crossing the first turn of wire also. But this shows you the variety of ways that the technique can be applied and in what situations.

Spruce Branch_9.jpg
 

Figure 10. Here is the finished branch, wired and styled.

Spruce Branch_10.jpg

I hope that all of these made sense to you. If they don’t, take another look and read carefully. It will give you a lot more confidence in your wiring and thus, your styling of trees. There is a very simple rule that can be applied here.

Always enter the shoulder of a branch from the trunk side of branch.

This automatically puts you on the outside of the branch, supporting it, but you may have to cross a wire to accomplish this. Happy wiring!  

Scott

Six Essential Tools for Bonsai

Click for Branch Tips index

Since we have so many folks that are new to bonsai, I thought I would talk about the tools that are essential for your success. I also thought you might print the article out to read and then casually leave it in a conspicuous place for your spouse to discover, who might need some holiday gift giving suggestions ;-) These six tools that I am covering are the ones that I use over and over, almost every time I touch a tree, whether it be conifer or deciduous, large or small. I’ll cover what to look for and in some instances, what might make a good substitute.

I would rarely buy a bonsai tool online. Only when I am familiar with the quality and consistency of a brand would I do that. There are many great tool makers out there, like Joshua Roth, Futaba, Kaneshin, Fujiyama, and a new upstart, American Bonsai, which are all American made. American’s tools are very consistent and I would check them out. I am trying them myself. Because the markings are often in Japanese, I have a hard time tracking which brand of tool I actually have.

One of my own limitations to some tools are my relatively large hands, so I always have to check and make sure that they actually fits in my big mitts. That pertains mostly to scissors. Then I open and close the tool to see if it is too loose or tight. A tool should barely fall open when you hold it horizontally. If it’s too loose, you can give the rivet a tap. But a word of caution, there is no way I know of to loosen a tight tool except by using it over and over. My next test is to hold cutting tools up to the light to see how the edges meet and if there is a gap letting light through. Root cutters, concave pruners, and knob cutters all work in a bypass cutting fashion. That means that the edges slightly overlap each other. They do not meet perfectly. So they have to close far enough for the cutting edges to pass, but not have a gap when they do. Stainless steel as a material is often nice, but not needed. Most of my tools are not. Now on to the tools themselves.

Number 6 – Angled tweezers This is easily going to be the cheapest tool to acquire of the lot, but it does come in quite a few grades. A good pair of tweezers is a godsend and a bad one is just frustrating. We are talking here about the type with a bent or angled tip. These often come with a small spatula on the end and the cheaper models are just spot-welded together. But really, you don’t need much more than that. Oh, I do have a really nice pair that I love, but my original pair is still a workhorse. If you use them in repotting like I do, in place of chopsticks, you can wear them down over time.

Their chief duty is pulling weeds and general clean up. Make sure to get a pair with not too narrow of a point. Otherwise, they just act like scissors and cut the weed in half rather than pulling it. This is especially important if you also get a straight pair. Here’s the difference; Angled tweezers are great for pulling weeds, repotting, and general work. The straight tweezers are better for pulling needles and leaves. The elbow of an angled pair will accidentally grab onto adjacent foliage, which can be quite hazardous.

Reprinted from December 2016. Ideas for bonsai Christmas presents.

There are lots of occupations and hobbies that use tweezers, so you might be able to find something that you already have, but they really do need to be eight or so inches long for reaching under the tree. Ideally, they only open about 1/4-3/8 inch, otherwise you have to keep applying the pressure to get in between other leaves and such, which just tires your fingers. Also, the metal needs to be stout enough to apply some good pressure when pulling needles. With cheaper tweezers, I sometimes squeeze hard enough to touch the sides together. If so, I just bend them out farther.

Angled Tweezers

Angled Tweezers

Number 5 - Root Cutters Though I have a smaller pair of root cutters, I use my large pair almost exclusively for root work and any large pruning short of using a saw. They really are very versatile. Use them to cut taproots flush, as well as any other large roots. This tool is essential for creating a great root base and enables you to get your trees into shallow bonsai pots. Even though I regularly cut through pumice, lava, and the like, I have never had to sharpen mine. That’s not bragging, it just means that they are very durable and can take the punishment, but mine probably could use a touch up.

Root Cutters

Root Cutters

Number 4 - Wire pliers I use wire on every single one of my trees, so this tool can become very important. You can use just about any small pair around the house, but in my book, nothing really compares to a bonsai designed pliers. The type that I have pictured work excellently at a fair price. The rounded tip allows you to apply power with pinpoint accuracy and without getting a part of the branch stuck in there. The tapered/rounded handle allows you to twirl the tool in your hand easily when tightening a guy wire or removing wire. Almost all of the inexpensive models have straight handles and are hard to use. Their tips also are not very strong and they become hard to use. At workshops, I have picked up pliers from students that were nearly worthless. Be picky here with the real deal, or just get a sturdy pair of Stanley’s and save your money.

Wire Pliers

Wire Pliers

Number 3 - Wire cutters There are quite a few different designs for wire cutters. Pictured are my favorites for small work, but every other pair I have tried works. There really is no other tool for the job out there. Bonsai cutters are made to cut right up next to the branch without damaging it. Plus, they concentrate the power out on the tip for that same reason, instead of needing to cut in the crotch of the tool, like many electrical dikes.

Wire Cutter medium

Wire Cutter medium

Number 2 – Concave Pruners You really have two choices here; regular concave pruners or spherical cutters. The difference being that regular concaves are curved on a single axis and spherical cutters are curved on two axes making a truly round cut. The difference between a concave pruner and the root cutter or knob cutter is that you can cut from the side of the branch. This is your workhorse pruner. Invest wisely and note the suggestions at the beginning of this article on how to choose one that works well. The is one thing that you need to keep in mind for any pruners. You are only going to be able to cut a branch about half the diameter of the actual blade. This also depends greatly on whether you are working with conifers or deciduous trees. I can cut twice the diameter of a pine as I can a crabapple or maple.

Concave Pruner

Concave Pruner

Concave pruner side view

Concave pruner side view

Spherical pruner side view

Spherical pruner side view

Number 1 – Scissors Did you guess this one already? This is not the pair that you have in your junk drawer in the kitchen. This is the tool that will make thousands of cuts each season and vital for your bonsai success. Choose wisely. There are lots of variations in shapes, but make sure you get one that fits your hand, and can make hardy cuts. The smaller and narrower versions are for bud cutting only and should be considered as a alternate pair in your kit, not the primary one. Great scissors abound at decent prices, so finding one should not be too hard. With your main pair you want to be able to do light pruning, maybe up to a quarter inch branch at times. You also need a narrow point to get in between tight spaces. That’s why you need dedicated bonsai scissors.

Scissors

Scissors

What you don’t need Now that we have gone through all of those essentials, how about the things that you don’t need? There are lots of tools out there, but some of them are not very practical, or rarely used, so I am here to help you keep a little more money in your wallet for better trees, or better tools. So, here are the tools that you don’t need.

1. Bending clamps. I bought several of these and even used some once or twice. It took my maple ten years to recover from the experience. There are better ways to bend a branch. I have never seen a pro use one.

2. Branch splitters. These are similar to root cutters, but with narrower and longer blades. I bought one twenty years ago and never used it. If I did need one, I can make the root cutters do the work. Come to think of it, in all that time, I have only heard of someone actually splitting a branch once or twice.

3. Bending jacks. These can be of use in larger sizes, and many pros use them this way. Most often they make it so that you can get the work done with one person. But the smaller ones are really unneeded.

Branch Splitter

Branch Splitter

Bending Clamp

Bending Clamp

4. Jin pliers. These are similar to the regular straight pliers mentioned above but these have a canted head. That means I can’t use them to twist wire, but I can use my wiring pliers to make jins. That means these are redundant.

Jin Pliers

Jin Pliers

And last but not least, if you do large bonsai or are getting more advanced, here is what you might need to add to your assortment.

1. Compound wire cutters. You can buy larger, more expensive bonsai wire cutters, but why when these guys are a fraction of the price. It will cut 4 gauge hardened copper wire and won’t be damaged by steel wire. Buy the Knipex brand. I bought a cheaper $20 version and they hurt my hand and were trashed by steel wire.

Compound Wire Cutter

Compound Wire Cutter

Knob Cutter

Knob Cutter

2. Knob cutter. I almost put this as my seventh choice for a tool. I use it mostly on deciduous trees, and it really gets a workout to clean up all my cuts so that things heal over nice and smoothly. Look for a pair where the two cutting edges meet to form a nice, smooth curve. I have not used them, but too many I see these days meet at an angle and I can’t see how they will make the kind of smooth cut I need.

3. Saw. Many, many types here. A narrower body allows you to get between branches, but can buckle easily. So some have a thicker blade and teeth. This one is my first choice. I have a large folding landscape saw that I use on larger cuts, and several models in between.

Scott

Fertilizing Application

Click for Branch Tips index

I am going to say it right away so that you can’t miss it. Fertilize now. Like, right now. Stop reading and go do it! Seriously, early fall is the best and most important time to fertilize all of your bonsai. The only trees that you would not fertilize right now are those that are sick. Your best bet there is spot on watering. Health aside, our trees are now entering a phase of vascular growth in which they bulk up the trunk and branch tissue by adding that thicker, light colored ring that you see in a cross section. Spring growth is elongating and making solar collectors (leaves) and fall is about bulking up and storing sugars for winter hardiness and next spring’s growth.  

That also means that this is the time of year that wire can really start to bite in. My fall initiative is to be disciplined and not design any new trees until I have checked, removed, and/or replaced the wire on all trees that I have styled. Ooh that’s tough to swallow, but I gotta do it. No sense in ruining my hard work.  

But I digress. I have often said that the bonsai cycle starts in the fall, and fertilizing is a firm foundation. We covered fertilizing quite a bit back in April of this year with a handy reference sheet. This time I want to talk more about how we apply fertilizer.  

I have been working on some casual experiments for a couple of years, trying many different methods for fertilizer application. Though these are not as scientific as I would like, they may give you some ideas on how to treat your own trees. My purpose here is not really to talk about the fertilizer itself, or schedule, amounts, etc… We did that in April. I will say that I have been using some Bio-Gold, mostly Portland Rose Society Fertilizer (RSF), and some of my own - homemade poo balls. I am tending to migrate to the two premade types, just so I don’t have to keep all the separate ingredients around. I had 50-pound bags of fish meal still around after 10 years and that is enough. So, my last custom batch I just threw everything in, emptying out 4-5 bags and mixing it up. Fish meal, bat guano, bone meal, blood meal, cottonseed meal, etc. It is all low level organic, so precision is not really a factor.   

First off, I am going to look at are tea bags and the like. The reason we use tea bags is that most of the organic fertilizer that we can get our hands on is dry and granular. If we just put it on top of the soil, even in a pelletized form, it disintegrates, spreads out, and clogs up our nice bonsai soil. Now this is going to happen to some degree no matter what you do with an organic. By the winter it turns into a slimy black goo. Not the best scenario, but we can control it to some degree.  

One option is to use something to contain the particles from slipping too quickly into the soil. And wouldn’t you know it, tea bags are designed just for that task. There is only one catch. The fertilizer has to be broken down by microorganisms before the tree can utilize the nutrients. It’s possible that the tea bags can block the microbes from gaining access to the fertilizer. So, we may be stuck in between. This is where I had wished I could be more scientific in my experiments.  

I have tried several different types of tea bags and it is really hard to tell how much each has affected the success of fertilizing. In photo 1 you can see several types. The common drawstring type, a fold over, and a sachet bag. Some tea bag materials are made of paper, but some seem to be of a spun polyester or something, with holes stamped in. What you want is something that either has existing holes small enough to hold the fertilizer in, yet larger enough to let the minerals leach through, or let the microbes through. Or something flimsy enough like paper that it breaks down very quickly to let things pass through. This is one case where you might actually want the cheapest, low quality solution.

Synthetic Drawstring Tea Bag, Folding Tea Bag, Sachet Bag

Synthetic Drawstring Tea Bag, Folding Tea Bag, Sachet Bag

Tablespoon for filling and bin of bags ready for placement.

Tablespoon for filling and bin of bags ready for placement.

The good news is that you don’t really need a microscope to see what is going on. If the system is working and the microbes are breaking down the fertilizer, then it simply disappears. Your evidence is the fact that it is gone. This works really well and is very obvious with a large pellet like Bio Gold, which does not just disintegrate with water but dissolves over time. To tell the truth, I don’t get to see the fertilizer simply disappearing enough with my trees. Still working on that balance of water and oxygen.  

Another option that Boon put me onto a few years ago are sachet bags, or wedding gift bags, whatever you might call them. They are incredibly cheap and I get them on the internet, though my first attempt fizzled out and I lost my $25. I got black because I thought they would look a lot better. Though I have to say, all fertilizer methods bring curious looks and questions from visitors to the garden. I thought that I might reuse the sachet bags but gave up on that gooey mess. My initial thoughts are that they work just as well or better than the tea bags with their larger openings. I use them exactly as tea bags. What is so great about a bag is that you can nail it to the side of rock plantings, at funny angles, etc…, so they will always have a use.  

The poo ball method works very much like Bio Gold. After I mix up a batch nice and wet, I let is sit for a day so that it starts to bind together and then I just use a scoop to place a fresh, wet ball in several locations on the soil. I do this right after watering so that it has a few hours or day to set up and it is just fine after that. They hold their shape. No need to pre-dry in the sun. In fact, you don’t really want them dry. As Andrew Robson mentioned in his recent talk, we really want that fertilizer to stay wet and active.   

Bucket of homemade Poo ready for placement.

Bucket of homemade Poo ready for placement.

That brings me to my next method, with plastic cups. There are a lot of different forms here and I think I can be a bit more definitive on what works. I had already started to use some cups with my small quantity of Bio Gold to help keep it in place and away from the birds. But Greg Brenden really gave the idea that supercharged the use of RSF.  He talked about it, so I am just picturing it here and giving my own twist. I use the cups that are designed to be inverted.  

Types of fertilizer cups

Types of fertilizer cups

Tray of filled cups

Tray of filled cups

The problem with the Bio Gold is that I had to invert them really quickly or spill the pellets. The problem solved is to set out a whole tray of cups and then fill them ¾ full of RSF, or any other organics. Only partially full because as you water them, they swell. So now that you have them filled, water them several times and let them soak for a few days. I slid mine inside a plastic garbage bag to hold the smell and heat.  

The watering does two things. It activates the fertilizer – you can see in the photo that they were already producing mold before I applied them, and the swelling pellets and granules coagulate together to hold firmly in the cup and make application much easier. No mess or waste, and it is preactivated.  

There are two sizes and I use the smaller ones for shohin. My little twist is hold them down with nails. The tabs provided are not enough to deter birds and squirrels I use a 6 D, 2inch plain box nail. 6 D or 6 penny is the diameter, which barely fits through the holes, but is the smallest size to get that 2 inches I need to hold it down. I’ve found the nail 100 percent effective with established soils.  

In newly planted trees, the little buggers simply dig around the fertilizer cups, so I am still working on a solution for those. I also use nails to hold down tea bags. For those, I use the 4D, 1.5-inch size, since I can push those right to the soil level. This makes the bags very easy to remove.  

Large and small cups filled and starting to mold

Large and small cups filled and starting to mold

Critters dug soil around cup but it stays in place

Critters dug soil around cup but it stays in place

There are other plastic holders which I have pictured. The one is very similar to the inverted cups. It has a spike on the bottom and lid on top. I found that I had to cut half the spike off because I could not penetrate the soil with lava and pumice very far with it. They maybe work OK, because I can drive them right to soil level where there is better contact, but nothing like the inverted cups. The third one looks really cool, but it keeps the fertilizer suspended in the air. I sort of feel like this putting the fertilizer in a pinata and the microbes are swinging at it, just hoping that they get lucky. To be sure, some of the fertilizer washes down. I tried it with Bio Gold, but can’t recommend them over the other methods.  

Cup (round 1) Poo Ball (Round 3) Tea Bag (Round 2)

Cup (round 1) Poo Ball (Round 3) Tea Bag (Round 2)

Tea and sachet bag

Tea and sachet bag

In the last few pictures you can see that I have used all different methods. The inverted cups went on about May. I didn’t have enough to go around, but I did not want to fertilize some trees anyway. The next round was some of the tea bags in July. And lastly the poo balls that went on just a week or two ago. There is no problem mixing methods and it conveniently tells me when I applied it. You can see this in the last photo how fertilizer is spaced out and the last application placed between the first two. Now, go forth and fertilize. See you at the Jamboree.  

Scott

Spider Mites

Click for Branch Tips index

One thing that I have noticed throughout the years in bonsai is that trends seems to come and go with each season. In some years, the summers are nice and hot which the pines and junipers love. Some years are a bit milder, like this year, allowing the deciduous trees a chance to excel. There also seems to be cycles on the more negative side. Ever notice how one year you deal with one weed in the garden and the next year it’s a completely different weed that you have never seen before? It seems to happen to me a lot. The same is true with insects and diseases. One year I battle a disease, the next it’s some new pest. A few years ago, it was an invasion of the Marmorated Stink Bug, and just two years ago the Ash White Fly. Luckily, neither was of much importance to my bonsai. This year and old foe has reared his ugly head in my garden with a voracious appetite. The positively evil Spider Mite.

Spider mites and I go back quite a few years. Whenever I would get my big black pine ready for a show, it would seem to get attacked at the most inopportune time by spider mites. And any attack on a conifer means that you are going to take two to three years to switch out the damaged foliage for new. The damage may be mostly visual, but it certainly is unsightly. Arghhhh! The challenge for me is that mites are so insidious. They always sneak up on me and before you know it, I have a full-blown epidemic. This year they are back and I think the early warm weather we had opened the door; hence the purpose of this article. I want to save you the heartache. This year they decimated a prize Engelmann Spruce and it will take me a few years to rebuild it. More on that later.

I need to make one thing clear before we go any further. There must be no mercy when it comes to spider mites. There is no learning to get along and coexist. Only total annihilation will work. Here are a few statistics to drive the point home. There are several varieties of Spider Mites, which are members of the spider family, but we mostly deal with the red, or two-spotted, spider mite. A female is able to lay up to 20 eggs a day. These will hatch in three days, and can be sexually active by the fifth day. So, if females live two to four weeks, they can lay over 500 eggs each and mite population explodes. This means that before you know it, they have destroyed a tree, at least for that season. They can, and do, kill bonsai. This is not just cosmetic damages. So, no fooling around. We are fortunate in that our wet climate keeps them relatively at bay, naturally.

Photo 1

Photo 1

Take a look at Photo 1. This is the leaf of a Skimmia plant in my back yard. It shows the tell-tale signs of spider mite infestation. Stippling of the leaves which make them look pale and dull.

 
Photo 2

Photo 2

Photo 2 is an Engelmann Spruce and you can see how the color (Chlorophyll) has been literally sucked right out of it. No chlorophyll, no photosynthesis, no tree. Notice also the light webbing, demonstrating the mite’s link to spiders.

 
Photo3

Photo3

Photo 3 is a Douglas Fir from this spring. I have never had them attack a fir before and they went after both of my Doug Figs with abandon. Though not shown, the first tree they went after was an Asian Pear. Go figure. I guess they decided they liked both pizza AND ice These photos also show how the mites sneak up on me. There are not any big holes or wilting foliage to notice. The foliage just slowly changes color over time, and since I have that tinge of color blindness, I don’t always notice right away. And since it has been years since I dealt with mites on my bonsai, it’s not really on my radar. Well, it is now. I seem to sort of scratch my head, hmmm, those leaves are changing color, wonder what that could be. Duh! So, on we go. A few years ago I wrote about lacebugs on azaleas and the damage looks very similar to mites.  

 
Photo 4

Photo 4

So how do we confirm the presence of spider mites? It’s very simple and easy. You may all know this too, so forgive me if I am boring you. We are getting to the solution soon. Take a white sheet of paper (your hand will also do). Hold it under the tree and tap the branches a few times. You will get some detritus landing on the sheet, and probably some small specs. If those small specs are moving, you have mites. If nothing is moving, use your finger to swipe the specs across the page. If there is a smear, then they are alive and well. Rather than being the size of pinhead, they are more like a pinpoint, so very hard to see the body with the naked eye. Photo 4 nicely shows their color, shape, and webbing on a cherry tree. A full-on infestation.

So, if you have made it this far, your reward is near. Spider Mites are one of the few things that systemic chemicals like Imidacloprid with not take care of. Of course, the best defense against any insect or disease is a healthy tree. The spruce that was attacked was definitely weak after last year. You can go online and find all kinds of so-called natural remedies for mites. The problem is the most of them are dealing with landscape plants that have a much higher tolerance than our bonsai. I liken our bonsai to the fighter jets that my dad used to repair. Fighter jets live on the edge and push the boundaries of existence every day. They are regularly called to push to the limits and that is what we do with growing gargantuan trees in incredibly tiny pots.

The trees natural defenses are more limited, so we have to go the extra bit to protect them. I have tried things like Neem oil in the past to almost zero effect. Trying to blast them off with water just means that they are going to go hop onto another tree.  

One thing that I have found very, very effective, as in one hundred percent, is Bifen. Never heard of it? Boon put me on to it and it has been rock-solid for mites. Bifenthrin is a pyrethroid insecticide, as in a synthetic version of the chemicals found in Chrysanthemum flowers. It was originally a termiticide, and I get mine online at pest control sources like, Do My Own Pest Control. You are not going to find this at the big box stores. I just follow the directions for spraying on the label. It’s a lot milder solution than an organophosphates like Orthene/Acephate, which I find damages new, tender growth.  

There is, however, a caveat to any mite solution. Remember how we talked about the rapid reproductive cycle of mites? That means that they can relatively quickly adapt to any chemical solution. To combat that, we have to act quickly and thoroughly. It also means that it’s a good idea to rotate your insecticide after only a couple of uses. So if you don’t knock them out after two or three applications, you may have to switch to something else to be effective. I have had good luck because the infestations have been isolated to certain trees in any one season, thank goodness, and I have been able to eliminate the entire problem quickly.   

You have to stay on it when you start. The development cycle of the bugs is very quick. After hatching they go through several intermediate stages called instars, in which they molt into a new body. Miticides are usually able to only attack adults, eggs, or certain stages of the instars, but not all. This means spraying regularly on a roughly 7-10 day interval so that you are able to stop the cycle, then finish them off before they mature enough to start a new cycle. I am not yet sophisticated enough to tank mix both an adulticide and ovacide together, to do it in one operation. That would require a lot of research and is beyond my scope. But maybe one of you can do that and share. I know that Mirai is using this approach. Good luck and keep an eye out for that little speckling on the leaves.  

Scott Elser

Formal Upright Inspiration

Click for Branch Tips index

Living in the great, and I do mean great, Pacific Northwest, it is easy to take for granted the inspiration that is all around us with grand Douglas Firs, muscular Red Cedar, a myriad of true firs and beloved spruces and hemlocks. Those trees are the model for the most difficult and under-utilized style in bonsai, the formal upright. In my thirty some years of bonsai, I have never tried to grow one. Maybe I was too intimidated, or maybe no material really presented itself. I now think that you have to go looking for it. That part aside, I was recently quite surprised by some other awesome examples of formal uprights. My wife Lisa and I have been very blessed to be able to visit several national parks in the past few years and I have been able to report to you what we saw, especially as it relates to our favorite subject, bonsai. If you have made it this far you have probably guessed that we just made it back from another trip, this one to Yosemite, which is almost three quarters of the way to Los Angeles, tucked away in the Sierra Nevada. We tried to avoid the crowds by hitting it after Memorial Day, but before all the school’s let out for the summer. Not sure we were all that successful on that count, but it sure was worth the very, very long drive. We arrived at the park on Monday morning and saw all the famous sites in the valley, like the jaw dropping El Capitan, and iconic Half Dome, as well as Yosemite Falls. They have somewhere between 150-175% of normal snow pack this year. That meant that all of the waterfalls were in full force, thundering away. It also meant that my dream of traversing Tioga Pass over the Sierras would have to wait for another trip, as well as Mount Lassen, and Crater Lake, too. However, on Tuesday we were able to take the road to Glacier Point, which at 7,200 feet overlooks all of the valley, which is a frightening 3,000 feet straight down below you. The road had been closed by snow just the week before. By Wednesday of our trip, the crowds were amassing and after watching two shuttle buses pass us by fully loaded, we headed south out of the valley down to the Mariposa Grove of the Giant Sequoia.

The grove is accessed near the community of Wawona at the southern entrance to the park and we were fortunate to stay at the 140-year-old Big Trees Hotel. It was a great experience, but in 1879 they had no running water in rooms, or air-conditioning, so be forewarned. It was 90 degrees that day, of course. But the real treat was the Mariposa Grove. It has been closed for two and a half years after a fire to rebuild and reorganize the experience. There is now a nice big parking lot with a shuttle bus to take you up the winding road to the hiking trails. Very nice facilities. And we definitely left the crowds behind. As we hiked on our trial (oops, is there such a thing as a Freudian typo?) trail, folks started to drop off rapidly after half a mile and we were left virtually alone. I was in this same grove about thirty years ago, back in my college days. But of course, I was not yet doing bonsai (soon, though) and I didn’t remember a thing. By far the biggest surprise was not the size of the Sequoias, nor their age, etc… It was the fact that they were growing in a very mixed, open forest of many species that were also growing very large. My first real encounter with most of these species, though we do have similar trees in the northwest. I think this is really going to surprise you, so I will work through the list here. But a warning, this is thoroughly conifer country, with just a smattering of black and live oaks.

Incense Cedar – You see this tree in your Christmas garland and wreaths with all of the light-colored pollen tips. It grows very tall and slender in Yosemite, not as bulky as our own Western Red Cedar. Thickly furrowed bark. A wonderful tree.

Sugar Pine – This is frequently mentioned as a construction material for many of the lodges. It has crazy looking branches that look like bent up pipe cleaners.

Ponderosa Pine – not the same variety that you see coming from the Rockies. These are big, tall, and straight as an arrow.

White Fir – Tall and majestic. The branch tips are rather blunted, as if they had just been pruned, giving an odd look. Needles splay out flat, rather like a Grand Fir.

Western White Pine – Fewer of these and I don’t know too much about them.

I also observed in other parts of Yosemite the following species, Douglas Fir, Mountain Hemlock, Jeffrey Pine (close cousin to Ponderosa) Lodgepole Pine, and Red Fir. There were also Black Oaks in the valley, along with Big Leaf Maples. I didn’t see a single juniper the whole trip.

So why did I list all of these species out? For one, all of these giants were living together. Something we can all learn from, I suppose. But more importantly, they were all in bonsai terms, formal uprights. Yet their forms were vastly different, especially as they aged, and most notably in the crown. I thought a photo essay and brief study of what was happening would be useful. The first photo i(below, left) s a very large Sequoia. I was able to get this shot because the path was wide and straight (an old road). Unlike our own Pacific Northwest forests, these areas in the Sierras are very open with almost no undergrowth and very few young trees. Combine that with the fact that many trees had been recently hit by fire or disease, but with their ramification still intact, giving us a great view into the structure of ancient trees. The trail network also ran up a hill, with most of the Sequoia in a long draw, enabling me to get some elevation relative to the tops of trees. Notice that little Y shape down at the bottom left? That’s Lisa, arms outstretched and giving you a little size perspective. Yes, the largest trees on planet earth.

Photo two (directly above) gives you a nice comparison between young and old. Pyramidal saplings at the bottom are surrounded by generations of elders, contrasting the angular uniformity and fullness of youth with the rounded asymmetry of age. The foliage of Sequoias is not unlike that of a juniper or cypress. It is scaled in long strands that come together in billowy tufts.

Photo three (below, left) offers us an interesting comparison. I was taking a picture of the three species in the central part, but later noticed that I got the bonus fourth species on the left. Note that they are almost all the same size, height, and scale. They are from left to right, Ponderosa Pine, White Fir, Sugar Pine, with the crazy branching, and finally, Incense Cedar. Most of these are old, but not yet ancient trees and retain their pointy apices for now. That will change in years to come as they grow older, and more asymmetrical.


Photo four (directly right) demonstrates the difference between what I am calling old, or mature, and ancient. Here we have two Sequoias and notice that they are approximately the same height. That is where the similarities end. They are separated in age perhaps several hundred years. The tree on the right is still very symmetrical and slender. The foliage is evenly distributed and crown rather pointed. The Sequoia on the left, in contrast, is much bulkier, both in the trunk and branch thickness. There are gaping holes in the foliage and the crown is very much rounding out.

Photo five is the Grizz,(below, left) and better known as the Grizzly Giant. This is where we start to get interesting and are forced to take another look at what we call old, ancient, or formal upright. The trunk is straight as an arrow, but that is the only thing uniform about the tree. Thick, contorted branches everywhere. It is even growing a new top from a branch. That branch, on the right, is over seven feet in diameter. Craziness indeed, but it’s what the tree has had to do to survive. There is almost no discernable apex or even a branching pattern. It’s all just random, and above all ancient. Not old. Just plain ancient, but it looks perfectly healthy. And yes, that’s Lisa again at the bottom of the photo. Behind her you can see the hollow left from a fire. These trees survive upwards of 800 years because of their ability to resist fire, and recover. An ancient cross section of a fallen giant at the parking lot revealed damage from a fire that the tree then took 117 years to heal over, but it did, and lived another couple of hundred years before falling. An incredible story. The other species in the area do not have nearly as thick or insulating of bark. Throughout the region I noticed that where there had been a fire, just the lower five to ten feet of trunk had burned, but this was enough to kill the tree, but leaving the upper structure intact. There have been some very large and numerous fires in the Yosemite region the last several years and the results have been devastating. The fire that swept through this grove several years ago was just a few yards from where we were standing. In fact, it made the hike a bit warmer, since their shade was gone. But that is the way Sequoias like it, open with no competition.

Lest you think I am going to slight the rest of the species, photo six (above, right) features a nice, mature Ponderosa Pine that I would call old, but not at all ancient. However, you can start to see asymmetry taking hold of the tree as it gets older.


Finally, one of the many dead trees revealing its structure. I believe that this was a White Fir by the bark, (directly right) but I won’t argue that it could be something else. The point here is that I saw many of these examples and this one was fairly interesting as it repeatedly divided itself, creating new apices as it was unable to push water any higher, thus limiting its total height. This is how the tree starts to round out its crown and give us a hint into how to construct the same on a bonsai scale.

I hope you have found this interesting and I invite you to search the details in the photos for yourself, as there are more than I can write in this space. This also informs our other styles of bonsai, so there are many insights to be gained. Above all, consider an inspirational trip for yourself.

Scott

Pinch to Grow an Inch

Click for Branch Tips index

That’s a familiar saying with absolutely nothing to do with bonsai. Or might it? It certainly recalls to mind Dennis Vojtilla’s rule of thumb. At least my thumb, which works for my larger trees, and is as you guessed, one inch wide. And right now, I am sure that whether we are growing conifers or deciduous trees, we are all in the middle of pinching season. With that in mind, I wanted to remind you about some ground rules on pinching and what we are trying to accomplish with the technique.  

When it comes to spring growth on our trees, we have several choices on how to handle it. The first is maybe not obvious, and probably the least understood. That is, do nothing. Let your tree grow. You might want to do this if you are propagating stock via seeds, cuttings, etc… Or you might be trying to increase the tree, or more specifically, trunk mass. Or we might be growing a single flush, long-needle pine (Ponderosa, White Pine) and if we pinch or prune, we can cause excessive needle elongation. Maybe you are just trying to get a tree healthier and stronger. Whatever the reason, doing nothing at this time of year really is a valid technique. The other things we can do are pinching and pruning.  

When I think of pinching, the very first tree that comes to mind is a Japanese maple and by the time you read this, we are pretty much past the first flush of growth. The idea behind pinching is to remove the central shoot and by doing so we control the strength of the shoot and prevent it from elongating. Pinching controls the inter-node length. It mostly stops elongating once you pinch it. If you miss that window, then you have to fall back on pruning techniques, and if has gotten too long, you have to prune off all that you gained so that you can regrow a piece of ramification to the desired length. And if you are like I was last year and miss that window over and over, pruning again and again, the result is a knob that then has to be pruned off even farther back.  

But all of this assumes one thing. That you pretty much have the “size” and shape of the tree that you want. If you start pinching before the tree is ninety percent there in terms of trunk and major branch structure and size, you are just not going to get there. Pinching slows down development to a crawl, which is exactly what we want for a tree in refinement.  

I got a lot of “feedback” at the last meeting about the lack of pinching in the Deshojo Maple that I displayed. I had to explain to several folks that I was purposefully trying to elongate one side of the canopy, as well as the overall size of the tree. Later, I will work on those branches with pruning. However, I will say that those shoots were longer after the meeting than before. Things were moving quite fast indeed, and those shoots were nipped the very next morning. By the way, with my one-inch thumb, I like to use a small pair of scissors when “pinching”. I can see what I am doing much better and I don’t damage the tender leaves.  

But that brings up the next, very important point. If your tree is not styled, either by wiring or pruning, or whatever, you won’t know what to pinch, or prune for that matter. If the tree is not styled you won’t know if that branch needs to be longer or shorter. Furthermore, the tree really can’t take advantage of your pinching and pruning work.  

I was recently asked if wiring inhibited back budding and my reply was that it was necessary for back budding. When a tree has its branches styled appropriately, each branch will receive the maximum amount of light, or energy from the sun. Styling exposes more branch surface to the sun at an angle of incidence to maximize all those precious rays. It’s really hard to convince the tree that it needs more branches when it is not getting light there to support them.  So how does a tree react to pinching? We’ve taken the strength out of the stronger parts and redirected it to the weaker parts. That’s why we need to pinch over a broad period of time. Shoots can emerge a week or two after the general pinching, or even a month, and we have to keep on top of those. But those shoots were activated or accelerated by the previous week’s pinching exercise. We use pinching to move strength from strong to weak buds.  

However, pinching does not generate new buds. It only strengthens or activates buds that are already there. Need more buds, go back to strategy one. Style it and let it grow, grow, grow. Once it gets strong, it WILL back bud. Then you can think about pinching. This strategy also works well in other species, including conifers like spruce, firs, and short needles pines. It is very effective at balancing strength. I am in the middle of conifer pinching right now. I must use pinching on something like a Doug Fir that is extremely apically dominant. If I don’t, those top shoots hog all of the resources the tree has to offer. My job is to keep that from happening, and redistribute energy. Sort of the socialism of the tree world.  

Heading into May and June we enter the pruning time of year. After the leaves have hardened off, which you can tell by their darkening color, firm attachment to the tree, and general thickening, it’s time to prune. By the way, when we say leaves, we mean broad leaves, needles, and any other foliage types. This is where species are more similar than different. And once again, we are back to just what are our objectives? By not pruning, even if we pinched earlier, we leave the tree with some strength. Again, this is a very valid strategy for building a tree. But if we have new branches that have hardened off and are strong enough, we can prune back to these, always.  

On a deciduous tree, we can usually prune back to any set of leaves and get a second flush of growth. But do not count the first set of “pre-leaves” on a shoot. They may not develop a bud and make sure to leave at least a pair leaves or shoots at any location, or you do not gain any ramification, and you will likely lose too much strength. This is also another way to reallocate strength to another part of the tree. At times, I allow the tree to grow unchecked until May, accumulating energy, and then make my major pruning cuts so that the tree has plenty of strength and time to respond during the summer season.  

You can extend this all the way to the severe “trunk” chop. Just make sure in any case that you provide ample protection from the sun which can now burn leaves, branches or especially trunks if their protective canopy of foliage is removed. For some reason, it took me more than one experience to figure this out and I would like to save you the heartache.  

There are many species specific techniques and timing to pruning and we can’t really go over all of those here. The point of this article is that if you are actively developing trees, whether they are in refinement or developmental stages, you can use pinching and pruning to effect rapid development of your trees. Stay happy, water well, and fertilize!

Scott Elser

Utah Jazz, Part 3. Zion

Click for Branch Tips index

This month we wind up our trip to southern Utah with a stop at Zion National Park. Before we left on our trip in October, I talked to a friend who spends the winter months in this part of the world hiking and such, and based on that, I prioritized spending more time in Bryce Canyon and less at Zion. I got it dead wrong. Now not to take anything away from Bryce, but it’s more of a cute fairy land in contrast to the jaw dropping scale and beauty of Zion. Now I know WHY they named it Zion. Of course, that came from the early Mormon settlers, but they got it right. 

We entered Zion from high elevation in the northeast corner, coming from Bryce and Kodachrome. From the moment we entered the park, we began to enjoy a landscape unlike anything we had ever seen. Soaring, huge, beautiful slabs of sandstone in a myriad of formations and colors. Trees dotting these slopes like pepper on your mashed potatoes. And more Utah red rock and Utah blue skies. 

The road wound around through a maze of mountains and cliffs. We stopped for a photo op of Desert Bighorn Sheep. Then stop. What’s this, a line? This must finally be the famous tunnel. We take a quick break and then see cars coming from the opposite direction. Time to jump back into the car and we start rolling. The tunnel was built back in the twenties, so there is only room for one-way traffic with our modern trailers and motorhomes. We pass the guard and enter the tunnel and click clack along. The road starts to curve and wind. Down we go, dotted with the occasional window in the rock. It goes for 1.1 miles but seems longer.  

Nothing I say can prepare you for what comes next. The road simply opens out at the base of a thousand-foot cliff, with a view of the entire Zion valley that sucks the breath right out of you. Partly because you are immediately plunged into steep switchbacks to descend another 500 feet to the valley floor. I am including some photos, but nothing I have done can capture the 360-degree experience. 

Since we went in October, I can’t imagine what the summer must be like, with heat and many times the number of travelers. Actually, I can, since I barely got reservations a month ahead to stay in the lovely little town of Springdale. We are not really campers these days, so the town was perfect, with many places to stay and eat, along with galleries and craft emporiums around every corner. We really wanted more time to explore there. The town butts right up to the entrance of the park and each has their own shuttle system. Both are free. You stay at a motel, which are generally more expensive the closer you get to the park, then just take a shuttle back and forth as there is really only one road in town. We hop off at the end of the shuttle line in town, walk across the parking lot, entering the park again, and jump on the park shuttle to sightseeing and the lodge. 

You are unable to drive into the main Zion valley in your car at any time except the winter. If you have been to very many parks, you are probably used to this by now and it makes things easy and enjoyable.We made a quick afternoon/evening run into the valley and did a little hiking. Like any stream laden valleys, it is lined with all sorts of deciduous trees in a flat plain. We hiked up the famous Zion Narrows but stopped where the trail ends and wading begins. That hike we are saving for the next trip when we bring our boots and waders and have more time.

The Watchman at sunset, viewed from in town

The Watchman at sunset, viewed from in town

Majesty – The grandeur and majesty of Zion. This is what it looks like everywhere you turn.

Majesty – The grandeur and majesty of Zion. This is what it looks like everywhere you turn.

Angles – The sandstone in Zion often looks like God just smashed a bunch of rocks together.

Angles – The sandstone in Zion often looks like God just smashed a bunch of rocks together.

Zion Slope – Trees emerge straight out of the sandstone slopes.

Zion Slope – Trees emerge straight out of the sandstone slopes.

Desert Bighorn – A group of Desert Bighorn sheep.

Desert Bighorn – A group of Desert Bighorn sheep.

Zion Pinyon 1 – Pinyon Pine emerging from the sandstone.

Zion Pinyon 1 – Pinyon Pine emerging from the sandstone.

Zion Pinyon 2 – Perfect bonsai inspiration in a Pinyon.

Zion Pinyon 2 – Perfect bonsai inspiration in a Pinyon.

Live Oak – Foliage of a small Live Oak, unknown variety.

Live Oak – Foliage of a small Live Oak, unknown variety.

Cacti – it’s that dry

Cacti – it’s that dry

Viewpoint Trail – The Overlook Trail. The trail follows the base of the red rocks. The catwalk can be seen at the middle left of the photo where it swings out, then under the rocks.

Viewpoint Trail – The Overlook Trail. The trail follows the base of the red rocks. The catwalk can be seen at the middle left of the photo where it swings out, then under the rocks.

Zion Tunnel – The Zion Tunnel as seen from the Overlook. You can see the zigzag switchbacks in the road and where it enters the mountain at the base of the cliff on the left.

Zion Tunnel – The Zion Tunnel as seen from the Overlook. You can see the zigzag switchbacks in the road and where it enters the mountain at the base of the cliff on the left.

Overlook View – The view from the Overlook. The view is much wider than this. It has been compressed with a wide angle lens to get it all in

Overlook View – The view from the Overlook. The view is much wider than this. It has been compressed with a wide angle lens to get it all in

The next morning, we were able to head out early and drive back up on top where we had entered the park the previous day. Doing our research, our first destination was the Overlook Trail. Sounds promising, eh? The trail starts right where the tunnel begins. Be prepared. This is the most enjoyable short hike I have ever been on. Now to frame that, I love trees, I love the outdoors, I love exploring new vistas and scenery. 

The trail is not hard and we made it out and back in an hour, with a twenty-minute layover to boot. The trail winds around a steep canyon, including a catwalk out over the canyon that swing back under an overhang. Around every turn there was an interesting tree (both deciduous and conifers) or interesting rock to scramble across, or a great view into the jagged canyon. The trail then gently climbs over a saddle to reveal the entire Zion valley as a reward. You see where the tunnel emerges from the cliff and realize how big that mountain really is. You can almost see both ends of the tunnel at once. The top is also broad enough to invite more exploring of trees, rocks, and scenery and open enough that no path is needed. Seeing the trees growing in these environments is simply marvelous and bonsai inspiring. I hope you get to make the journey soon.  

Repotting 

And just so that we can ease our way back into actual, applicable bonsai, here are a few thoughts on repotting. First of all, once you get all of that work done to get the tree safely into a bonsai pot, take care of it. Do not let it freeze. The act of repotting has taken away much of its winter hardiness, so they must be protected. 

Secondly, give a very good watering after repotting, until the mucks washes away and water runs clear. Then don’t water until it needs it. That might be a week or more in our weather. The tree’s uptake system has just been pruned back, so it is not able to absorb as much moisture. It is sort of like cutting the sponge in half. It will only take half as much now. As the tree reestablished itself, it will tell you it needs more by drying out a little. The last thing we want to do is drown the roots and start a cycle of decay that is hard to break. Give it just what it needs.  That means no fertilizer for a month either. Not only are you wasting it, and your time, the tree can possibly suffer. So, hold off for a bit. I always try to keep my trees out of the rain by putting them under the eaves for a week or two after repotting to make sure they don’t get too wet and this is a great jump start for the new tree/pot/soil system. If you are able to provide bottom heat, that would be even better.  

Scott Elser

Utah Jazz, Part 2. Kodachrome Basin

Click for Branch Tips index

Last month’s article on our trip to Utah, specifically, Bryce Canyon, has generated more buzz, or jazz, than any article in the Tips column so far. Thanks for the great feedback and support. I hope you get to make the trek someday. This month we pick up the trail from Bryce and head just a half-hour southeast to a much lesser known park, Kodachrome Basin State Park. And just in case you are wondering, yes, they have approval to call it that, which it well deserves. Most of that half-hour drive is seeing the Bryce Canyon from the bottom end and it’s a pleasant little jaunt. A friend back home who frequents this area put us onto it. 

20190109_1.jpg

Kodachrome Basin is home to more sandstone formations, but it has portions of harder rock. So not only do you get the hoodoos that occur in Bryce, but you get these formations they call pipes rising from the softer sandstone. They were usually white and cylindrical in nature. There are a full 70 of these pipes that rise up to 170 feet in the park and as stupendous as they were, my full attention, or at least 90% of it was on the trees. My wife Lisa said, you can’t take pictures of all of them, but ahhhh, I can try! But more about that in a minute. 

20190109_2.jpg

Since we were short on time for such a beautiful place, a quick glance at the map and we decided to take the Angels’ Palace Trail. This trail is only 1.5 miles long and 150 feet gain in elevation. There are several other very worthy trails in the park, but the choice of this one was serendipitous. From the parking lot we crossed the road and immediately forded a small stream and started picking our way through a very narrow but not too tall canyon. Visions of an ambush around each corner, ala Butch and Sundance, were dancing in my head. 

It had been raining the two days prior, during our visit to Bryce, but now the clouds had lifted and there was this very recognizable Utah blue to the sky. It’s very interesting how distinctive it was. Sort of like Oregon gray. The result was a bit of mud and muck on the trails to avoid. This type of sandstone, so typical in southern Utah, is called slickrock. When it’s wet, you easily find out how it got the name. 

In just a few minutes of scrambling we were out on top of the formation, with views of the surrounding park areas. By the way, we would have loved an all-wheel drive car on this trip. Our little rental sedan forced us to abort a trip to a second trail in the park due the muddy road. 

Out on top, I immediately began to spot gorgeous trunks of Pinyon Pine and Utah Juniper around every corner. The thing is, they were relatively small. A few were definitely in bonsai range, and the rest were larger, but less than 8 feet tall. They were in a size range that I could easily relate to bonsai. 

That’s when I went photo crazy. Snap here and snap there. I really could not turn around without seeing another, and another. I think the thing that struck me the most is how similar the trunks were on the two species. The same sort of warping and distressing had happened on either one. 

20190109_3.jpg
20190109_4.jpg

This whole area on top is a semi-level but irregular shaped plateau that you are free to explore. I walked out onto a narrow outcrop that was about a 100 foot drop down each side, on which Lisa refused to accompany me. In a later description she claimed it to be a mere two feet wide, but photos proved that it really was a very safe ten feet wide. I say very safe, but I was being very careful as I tiptoed out on the loose gravel. These days, I am very conservative myself. We were able to wander around about 45 minutes before heading down the same trail that we came up. A very quick and tasty trip with lots of sights. Minute for minute, the best bonsai inspiration of the whole trip. 

Next month, the last stop in the trip, Zion National Park. 

Scott Elser

Utah Jazz, Part 1. Bryce Canyon

Click for Branch Tips index

This month’s article is likely to turn into more of a photo essay rather than hard core bonsai knowledge. What it is meant to be is bonsai inspiration. More than that, I am planning on a three-part series, so strap yourselves in for the dreaded family slide show. It may seem strange that I am including photos of myself, or my wife, Lisa, but when I do it is solely for scale. So, what brought me to this? A wedding. Two years ago, Lisa’s cousin’s daughter Alicia married in Scottsdale, Arizona and after we attended that event, we headed north to the Grand Canyon, which I reported in these pages. 

Fast forward to this October when Alicia’s younger sister Emily married her beau in Sedona, Arizona, land of the red rock. So, of course we took the opportunity to take in a few more National Parks, heading north above the Grand Canyon and crossing into Utah. Almost twenty years ago I postponed my trip into this area of southern Utah to take one of Boon’s intensive courses. That led to three years of study with Boon, which is really what catapulted my bonsai world. A fair trade indeed. But now it was time to resume the trail to the deserted, desolate world of beauty and wonder that national parks of Utah hold. 

Emily’s outdoor wedding barely escaped a heavy thunderstorm the night before and as we headed out of Sedona, it was still raining. We drove north through the stupendous Oak Creek canyon and on to Flagstaff. We were fortunate to avoid a 200-mile detour from a washout earlier in the week. Crews had just repaired the road a day before our drive. As we drove, there were fewer and fewer trees. 

Nearing Page, Arizona, I spotted small sign that said Horseshoe Bend. To the left across the highway through barbed wire fence there was a gravel road across the dry grass with a bunch of cars parked about 200 yards away. I thought, could it be? Naw, can’t. But if it is, I can’t possibly drive by, so my blinker went on and we dove in for the adventure. Not knowing exactly what was going on, we struggled to find a spot to park amid the tour buses and cars parked in the red sand. Then we spotted the long line of folks trudging up the barren hill. The busloads of Asians were great. One guy spent five minutes as we were parking making sure that his hair was just right. Others were trekking out in the desert in their snuggies and slippers, while there was still drizzle in the air. 

When we got to the top of the hill, I could see that we were in the right place, but the view point was another quarter mile down across the swale, with hundreds of folks passing each other back and forth. Our destination was Horseshoe Bend, where the Colorado River makes a 270-degree turn, almost reaching back to touch itself. But the thing is, it’s about a thousand feet down to it! I had seen it many times in photos while doing research for work, but with conflicting info, I had no idea what state or river it really was. And here I am, all of a sudden standing at its edge. The distortion in the photo comes from the fact that I had to use a wide-angle lens to get it all in. I have some great, clean shots, but this one shows you just how awesome the view was. It is the single most impressive site I can remember seeing, and it was just an impromptu minute off the road. It was the unexpected delight of the trip for me. But enough of rock and water. We need to see some trees! 

Horseshoe Bend of the Colorado. 1000 feet to the bottom. 270 degree turn.

Horseshoe Bend of the Colorado. 1000 feet to the bottom. 270 degree turn.

Now we were back on the road again to Bryce Canyon. We drove all day through a bleak landscape, going hours at a time without seeing trees of any kind, or at least it felt that way. Then we would see empty stands where native Americans sold their wares during the summer and realized this was the land they were left with and expected to survive on with zero resources. A sobering moment indeed. 

It was still raining when we arrived at our little cabin after dark. The next morning as we drove into the park, it began to snow. Would we even see the canyon? We retreated to the visitor center, then decided to make a go of it. 

On our first stop, we decided to go for broke and hike into the canyon. It was an otherworldly experience and the only way to really appreciate what the canyon was like. From above, Bryce is just peering over the edge like the Grand Canyon, but on a much smaller scale. But that smaller scale means that you can access its beauty on foot and it isn’t really apparent until you get down into Bryce. 

It rained our whole hike, so the photos were marred with raindrops, but our spirits were high. The canyon like the rest of southern Utah is sandstone. But the stuff here is soft and eroding, leading to the formations that we see. I started snapping pictures almost non-stop. The trees seemed like the original inspiration for exposed root style bonsai – as they grew larger, the grounds slowly diminished below them. 

Part of Bryce Canyon. The trail we took can be seen meandering in the middle of the photo.

Part of Bryce Canyon. The trail we took can be seen meandering in the middle of the photo.

A Pinyon Pine with the sandstone crumbled away, leaving the roots exposed

A Pinyon Pine with the sandstone crumbled away, leaving the roots exposed

A Ponderosa Pine with more exposed roots. What a great bonsai example

A Ponderosa Pine with more exposed roots. What a great bonsai example

Getting up close and personal to the rock formations

Getting up close and personal to the rock formations

More great Bryce scenery on the trail

More great Bryce scenery on the trail

Foliage of Utah Juniper with berries

Foliage of Utah Juniper with berries

The orange is mistletoe on a Utah Juniper

The orange is mistletoe on a Utah Juniper

Yes, this was the climb out of the canyon. Over a dozen switchbacks

Yes, this was the climb out of the canyon. Over a dozen switchbacks

We were hiking in a fairy land with impossible formations of both rocks and trees abounding. I think that most were Ponderosas and Utah Junipers. At higher elevations there were Doug Firs, and some Pinyons, too. I just can’t stress enough how inspirational this all is to a bonsai person – to any person. You can see a few of the hundreds of photos that I took that morning, and they will explain some of the awe and wonder we experienced. 

We never knew what the next turn would yield walking around and between all these formations with tunnels and switchbacks. We spent the rest of the day, driving along the rim up to Rainbow point, which at 9,000 feet is getting pretty high, and there was definitely snow there. On our return, I was trying to check out Inspiration Point, with the mega-view, but the wind was blowing so hard that the snow was coming up the canyon into my face so that I couldn’t even peer over the edge. But then a half hour later, I got some great light for some great photos. It can be so unpredictable. 

If you haven’t guessed, my purpose here is to get you to go, get out. See. Explore. Make a connection to the outdoor world. It is really helping me pursue and define the type of bonsai that I really want to do. Something that is expressive of wild nature and the land that we are blessed to live in. Next up will be a trip just a half hour down the road from Bryce to Kodachrome Basin, which is very aptly named. There will be a lot more photos of trees in that installment! 

Scott Elser

Deciduous Tree Development

Click for Branch Tips index

After last month’s presentation on developing deciduous bonsai, I thought it would be great to review some points and amplify others. While reflecting after the meeting, I realized what I was providing was a very wide overview of the process, but it was akin to talking about Junipers, Pines, and Spruces all at once. There is a lot of variety and nuances to deciduous trees that we were not permitted to even touch on, so I wanted to mention some other great sources of information that you might want to review to expand on the concepts that we talked about. 

First off, there is the article from this column called Bonsai From the Ground Up, where I talk about some of my experience with field growing trees in the backyard. You can find it on the BSOP website under Resources; Scott’s Branch Tips. There are also two programs on Ryan Neil’s Asymmetry pod casts, via Mirai Bonsai. On one, Ryan talks deciduous development with none other than our own Dennis Vojtilla, and on the other he talks with Chris Kirk and Gary Wood on field growing techniques and strategies. They make great listening while working on your trees. 

We started our conversation last meeting with the acknowledgment that you can’t just go collect a great deciduous tree, like you might a conifer, or run to your local shop and expect to find really great material. The most dependable method is to simply grow them yourself. It follows then, that the earlier you start in a tree’s life, the more success you will have. Nothing beats the movement that you can put into your trees when you start with seedlings or rooted cuttings. That initial movement is so important. No matter the tree species, conifer or deciduous, I never allow a tree to grow straight out of the soil. It always emerges at an angle. And that means that I am already working on the root structure that is so critical for deciduous trees. 

It definitely means some root pruning and if there is a tap root, or an overly strong root of any kind, this is the best time to give it its walking papers. It’s gotta go or the whole tree suffers. So be ruthless. Better to make a hard cut now, than to set the tree back after ten years of hard work. Grow the tree in a pot for a couple of years to get that movement and root based established before moving it to the ground. If it grows too fast, at least it grew with great curves. 

Straight trunks, no matter what size, don’t really have a place in my garden. When you make curves, think of the size of tree that you want to make. A large tree requires larger curves. A shohin tree may only move an inch or two to one side or the other while a larger tree might shift almost a foot in any one direction. Don’t forget to make it move in three dimensions – front to back as well as sided to side. Also, wire well beyond what you think you will want. The extra length will actually help you bend the sections you desire and provide you with a bit of cushion for shape. You never know for sure how a tree will develop. You can make the decision of where to cut it next season. 

When you are ready to enter the next stage of development, you can move up to a larger pot, place the tree in a wooden box, or plant it in the ground. Things grow many times faster in the ground, but that is not always helpful. If you want a large, bulky, masculine trunk, it will really help. However, it is much more difficult to manage that growth while it’s in the ground. If you want a more delicate, feminine line, it may be better to employ a wooden box or larger pot that you can watch on the bench. Boxes are an underutilized tool, especially by me.

You can also use them to rejuvenate a lagging tree. 

So now that your tree is well on it’s way and things are growing along and the trunk is getting the proportions you desire, it may be time to make a big cut and redirect the growth in a new direction. This of course does two things – it builds good taper into the design as well as introduces more movement. The tricky part here is to not slow the tree down. That’s why I never prune heavily until I have a branch of sufficient diameter to take over the sap flow where the cut is. This can be very subjective, but as a rule of thumb we might say that it needs to be at least 20% of the size of the main trunk. If it’s not, then let it grow some more. 

And never rely on just a bud. They can easily wither away and then you are back to square one. The main point here is to not cut right where you want it to end, but rather at least one trunk diameter above the new leader branch. This will allow the tree to compartmentalize the wound. The following year you can reduce it either to where you want, or to where the tree has died back. This is a much, much safer technique and leads to complete healing of scars and predictable results. Do this process as many times as you need until you have your desired results.

You may have a tree in the ground from 3-10 years, so you will have plenty of time to practice. I used worked on my trees in the ground twice a year in order to get what I wanted. 

Be sure to keep working on the roots. I like to prune roots every other year. This allows the tree to really gain some strength from growing in the ground but limits certain roots from growing too fast and sapping strength from the others. We are looking for balance. That way, when we pull it out of the ground or a wooden box, we can move it right into a bonsai container. Happy growing!

Scott Elser

What I have learned from Mirai Live

Click for Branch Tips index

Well, it’s been a good year and a half since Ryan Neil’s Mirai Live launched at BSOP. I had eagerly awaited this development and decided to bite the bullet and sign up for the full, Tier 3 membership. That means that I can go back and view old videos, take part in the Q&A, or whatever they might be offering. I began to think back about all that I have learned in that past year and a half and it is astounding. Not that it should surprise you, as the content is awesome. Ryan has a way of breaking down ideas, principles, and techniques into an easily understood manner.

But, you need a little background into the aforementioned learning. I was fortunate to be in Ryan’s very first Defining Concepts – Pine series. This is where he began to develop his teaching style and curriculum. We used a small white board and met in the tiny original studio in the converted garage. Just three of us and it was awesome. I went on to take a series every other year on Junipers, then elongating species, and finally, special studies. I drank the Kool-Aid, so to speak, and my bonsai have never been the same. 

I had previously taken an entire study course with Boon – ten three-day sessions, which also had a tremendous effect on my bonsai experience, catapulting me upwards to finally grasp bonsai at a high level. So with all of this experience, both with Ryan and Boon, my jaw has just about dropped to the floor over the last 18 months as to what I have learned and assimilated. Lots and lots of loose ends tied together and flagging ideas shored up. 

Then there are the brand-new ideas. I can’t really list them in order of importance, but many of them are just, duh, it was there the whole time. Did I not listen the first time? Or in many instances, it is brand new technology and thought applied to bonsai. Either way, after almost 30 years of very actively pursuing bonsai, I really have some tools to take another leap forward. But be forewarned, that usually means more time and energy spent. Most of these are NOT time saving techniques but rather principles to take design and horticulture to a higher level. I can really only mention the general subject matter. I am making no attempt to explain them. That’s Ryan’s job, and he does it well. This kind of information is not free, but it’s, oh, so worth it.

1.     Always prune leaving at least two buds. Duh. Pruning a Japanese maple makes this automatic, but not alternating species like hornbeam and beech. I kept pruning my beech back to one bud every year to keep it in check, but in the process, I ended up with long and leggy branches, losing ramification. Not anymore.

2.     The purpose of pinching, to redirect strength. Small to medium to weak. Ah, got it.

3.     The continued important of water and oxygen balance. Can’t be understated. I understand why some of my trees were strong and others weak. Now they are stronger than ever. This should probably be number one in importance on this list.

4.     The difference and timing between foliar growth and vascular growth. I knew about this, but now I know how and when it works and use it to my advantage.

5.     How to apply large wire. I have used more 4-gauge copper than just about anyone in BSOP and now it’s a lot easier. I saw old videos of Kimura wiring when I was at Boon’s, and noted what he was doing, but didn’t know why. Now I do. My hands love you Ryan.

6.     Less is more with wire. Already a concept I learned from Ryan on wiring, but it has been so great to be able to zoom in and see exactly how he works his hands. Less wire means 

more time for me and a more natural appearance.

7.     Using foliage mass to power root development when repotting raw stock BEFORE styling the tree.

8.     Detailed application of fertilizer.

9.     Unlocking the secrets of Douglas Fir. I have two buds on every single branch on both my large Dougs, after pruning. And no more die back. STUPENDOUS. Ryan dug this out and developed the technique himself. Won’t get it anywhere else.

10.  Unlocking the subtleties of long and short-needled pines. Too much to go into, but the clarification on timing, fertilization, watering, and purpose has been great.

11.  Timing of late season pruning on multi-flush pines to generate predictable buds.

12.  How to accomplish rock and slab plantings. Just in time for me to perch an Engelmann on a basalt slab I have been carrying around for over 35 years.

13.  Detailed application of raffia – where and when, refining my technique.

14.  When to prune my redwood for great results.

15.  OK, I have to stop somewhere, or I will never finish.

Suffice it to say that most of these that I mention are adding on to my existing knowledge and technique. Mostly, it’s learning how to manipulate the biology of the tree to get what I am after. Now it might seem like this is an article-long advertisement for Mirai Live. That’s not my intent and you can spend your money and time as you wish. But, if you want to take your bonsai to the level of art, this is going to really add to your arsenal of tools. 

If you are like many folks who attended the Rendezvous and don’t have the advantage of having a club like BSOP that offers great basic classes or can’t afford or get into regular classes with folks like Ryan or Mike Hagedorn, this is a must and a steal. So much information for so relatively little price. I had to pay for airfare back and forth to Oakland to study with Boon, along with the study fees and hotel! But this I get it in the comfort of my own home and on my own time. And I can go back and review when needed, which I have done. I never had any concept of knowing it all, but I didn’t realize that there was so much more that I could know. That it didn’t have to be a mystery and it wasn’t just happenstance.

One last word. Q&A’s. Usually once a week, Ryan goes to the white board and answers questions live. He is up to number sixty or so now. That’s over sixty hours of just answering questions. They are indexed by topic in each session, so you can somewhat search for what you are looking for. This is the hidden gem in the whole thing. I have asked a few questions myself. Some questions come up over and over and Ryan handles them adroitly and politely. These Q&A’s really help cover what isn’t addressed in the main streams and allows him to talk about other species, other hemispheres, or differing climates. It also makes him the epicenter for the transfer of bonsai knowledge around the world.

Ok, enough on that. Darn him. Now my trees take even more effort, but they are rocking forward on a fast track and I now have the tools for artistic expression through bonsai. Have fun viewing.

Scott Elser

Mid-season Pruning

Click for Branch Tips index

There will always, always, be a place for a Japanese Maple on my bench. If I could have but one tree, that might be it. It would be a tough battle though, with pines. The varieties and types of maples abound, and there are lots of techniques out there for handling them. The goal for refining any Japanese Maple is to create a light and airy feeling full of grace and suppleness, even when growing a rather masculine or stumpy shohin, the branches are still delicate. These trees naturally grow in the mountains of Japan. We have our own vine maples which grow from the sea to the cascade crest and they will help inform the graceful shape of a maple. I was recently in downtown Lake Oswego and saw perhaps the largest specimen of Japanese Maple that I have ever seen with a trunk diameter probably over 24 inches. It was like unto a towering oak. The reason I mention it is to say that we can find substantial examples of mature trees to observe and learn from. 

I have several varieties of Japanese maples. Without a doubt, my favorite is just the plain, standard species with its delicate and lovely green leaves. I have about a dozen from shohin to medium and large size trees that I am growing from scratch. Other varieties include a Shishigashira (Lion’s Mane) that was begun by Edris Stryker, and a red Deshojo developed by Anne Spencer. Lastly, I have a pair of Okushimos that were started from cuttings. All of these trees have their pluses and minuses, and their own unique growth habits. So that is the subject of this month’s Branch Tips. 

The standard operating procedure for Japanese Maple care when I first started, that was touted in all of the books, was to entirely defoliate the tree in late spring or early summer. The goal was to create a second flush of growth with shorter inter-nodes and smaller leaves. There are several problems with this technique. First of all, if your tree is not strong enough, you might kill it, or at the least lose some branches. Enough said there. Secondly, if you have pencil size trunks and you perform this technique, they will remain pencil size indefinitely. No one ever told me to do it AFTER you get it to the size you want. This is a maintenance technique, not a development one. And thirdly, you risk burning the trunk or branches and doing permanent damage to the tree. So, entire defoliation is a bad idea. I can’t think of a situation where I would recommend it. 

Then along came Boon and offered a big upgrade to this technique. Instead of removing all of the leaves, remove one leaf from every pair across the tree, cutting across the petiole. You can leave both leaves on weak interior shoots. If you have particularly strong leaves, you can cut the outer portions off to reduce the solar surface area. The effect is twofold; first, since you have only removed half of the foliage, the tree is not forced into making new shoots and is happy to live the remainder of the season with what it has, and secondly, it reduces the amount of sugars and starches being produced. This keeps the branches from thickening too much and becoming coarse, preserving the light and airy feeling that we cherish so much in maples. Be  sure to be aware that although all maples have an opposite branching habit, they alternate in orientation. This is to say that one set of buds aligns vertically, the next set horizontally. Ideally, they would all align laterally, so keep this in mind when pruning. If the inter-nodes are really short, then you have some options to choose the orientation that you need. This has become my de facto standard technique for maintaining already developed maples, and many other deciduous trees as well. 

So this technique is all well and good for regular, species maples, but the varieties that I mentioned above present some unique growth habits that require us to alter our technique. The general idea is to create a short inter-node (recalling Dennis Vojtilla’s rule of thumb – about ¾ to 1 inch) and we do this by pruning back to the first set of leaves on a maple. Since they produce opposite pairs of leaves, there is always a fork or bifurcation at any node we prune to. When we come to a species like Shishigashira, which grows very slowly, the nodes may only be 1/8 inch apart, or virtually absent. If we continually cut back to the first node, we get nowhere, and the nodes are too close. Here we do the opposite of all of your bonsai training. We cut the leaves on the inner shoots closest to the trunk and leave the pair of leaves at the point where we want the next set of branching, which is most often the very last pair. This can be tedious work but leads to a ramification that develops more quickly and is more maintainable in the long run. 

Our next guest on the turntable is the Deshojo variety. This is an older cultivar and has beautiful deep coral foliage in the spring as shoots emerge that contrasts beautifully with the mature white bark. There is nothing quite like it. Alas, the foliage the rest of the year causes one to wonder why you are growing it in the first place. It’s sort of a mottled, drab, greenish affair. It also happens to be a fairly weak grower, like many of the special varieties. It often has droopy foliage and only a few elongating shoots. For this specimen, I still remove every other leaf, but I leave more leaves in the weaker areas, like the lower branches and interior shoots. I wire up the weak shoots so that they can get more light and gain enough strength to hold themselves up and I make sure to not remove any leaves, except to shorten the overall length. This process has really improved the overall health and strength of the tree. 

I can detect no graft union in either the Deshojo, or Shishi but they are often propagated by this method. Most special varieties do not propagate true from seed, and they often have a weaker growth habit necessitating the need for the graft onto the stronger, species stock. An exceptions to the rule are the two Okushimo trees that I have been growing, like forever. Both were from a set of about ten, two-year old rooted cuttings by Wright’s Nursery, which is no longer in existence. Two each of five species. I won them in a raffle at my very first convention, in 1990, before I was even a member of BSOP. Maples are difficult to root from cuttings, so these are very much an anomaly. That is borne out by the fact that the other eight trees died within two years. That may also reflect in my lack of skill, but I did keep everything else alive. These two grow really slowly. I had them in the ground for several years and they barely grew. I gave one to my grandfather and it passed back to me when he died. They have the strangest leaves, which are not to everyone’s taste. But I like ‘em. Since they were grown from cuttings, the roots emerged on just one side, so I have in-arch grafted species roots to fill in the bases. In all that time, these trees are still only an inch and half in diameter. They are growing stronger than ever though. They really want to send all the energy to just a few shoots, so I use pruning to redirect that strength more evenly. 

Lastly, I would like to mention our own native Vine Maple. I love these guys too. These are the closest relatives to Japanese Maples outside of Japan. Try the same techniques, but a few words of caution. They prefer dappled sunlight in the summer. They naturally grow in the margins of the forest to deeper shade. I keep mine in full sun in the spring until sometime in June, then it’s under cover. These trees are coarser than their Japanese cousins, so they tend to get very thick and long inter-nodes if allowed to rage on. 

When I prune in late spring to early summer, I sometimes cut off entire nodes because they have gotten too long or heavy. I take off every other leaf on the rest. During this pruning I make sure to space out the remaining leaves such that there is equal distribution to light. This requires a little thinking ahead and watching the area as much as an individual shoot. There is also a large discrepancy in leaf size, so I often resort to cutting off the exterior leaf mass to make them more equal. 

I even showed this tree in the fall after cutting the leaves down to size but matching the overall leaf shape with five points. No one noticed! In situations where the whole shoot has been pruned, the tree responds with new shoots. In the long distant past when I entirely defoliated the vine maples, they just sat there the rest of the season and waited until the next spring to grow again. Be aware of that thought but temper it with the fact that I did not fertilize much and they were very small trees growing on a rock – not many resources. Now that the tree is in refinement, that drastic technique is not needed. 

So jump in and prune your maples to direct development and protect them a bit after you do so. Stay cool.  

Elongating species Japanese Maple in development. Let it grow!

Elongating species Japanese Maple in development. Let it grow!

Okushimo. These leaves are certainly unique

Okushimo. These leaves are certainly unique

Deshojo Maple. Note the red leaves, just like spring growth, that emerged after flush pruning.

Deshojo Maple. Note the red leaves, just like spring growth, that emerged after flush pruning.

Shishigashira before pruning. Note the extremely short internodes – really isn’t one.

Shishigashira before pruning. Note the extremely short internodes – really isn’t one.

Shishi after pruning. We cut the leaves nearest the trunk. Since we have another branch nearby, we eliminate the weak shoot. For scale, see my fingers!

Shishi after pruning. We cut the leaves nearest the trunk. Since we have another branch nearby, we eliminate the weak shoot. For scale, see my fingers!

Vine Maple. The overall size of the larger leaf has been reduced to match the smaller leaf.

Vine Maple. The overall size of the larger leaf has been reduced to match the smaller leaf.