
Many years ago, early into my bonsai journey and my attachment to BSOP (those two are nearly concurrent), I encountered a tree which held me rather spellbound. It was a triple trunk Mountain Hemlock (Tsuga mertensiana) from club member Edris Stryker. Edris was a die-hard member of BSOP for many years and lived in Longview, Washington. She and her husband Ralph regularly made the trek to Portland for meetings and Edris shared her trees at every show. Ralph was a timber cruiser by trade, so they made it into the hills quite often, I think. This tree ended up coming home from one of those excursions.
As her bonsai career began to wind down and she had to find new homes for her welldeveloped collection, a few folks were interested in this tree, among them her son and myself. Since her son did not do bonsai, care of this tree was entrusted to me, somewhere around 2002. Yes, much longer ago than I might have imagined.
I have many bonsai now from Edris, and for every single tree, my first task was to repot each into a new container. That usually meant a vessel significantly larger than its current home. For this particular tree, it went into an oval, which meant I had to round the corners so to speak. I don’t have a photo available for what it was like when I first received it, but it was in a generic rectangle from Japan.
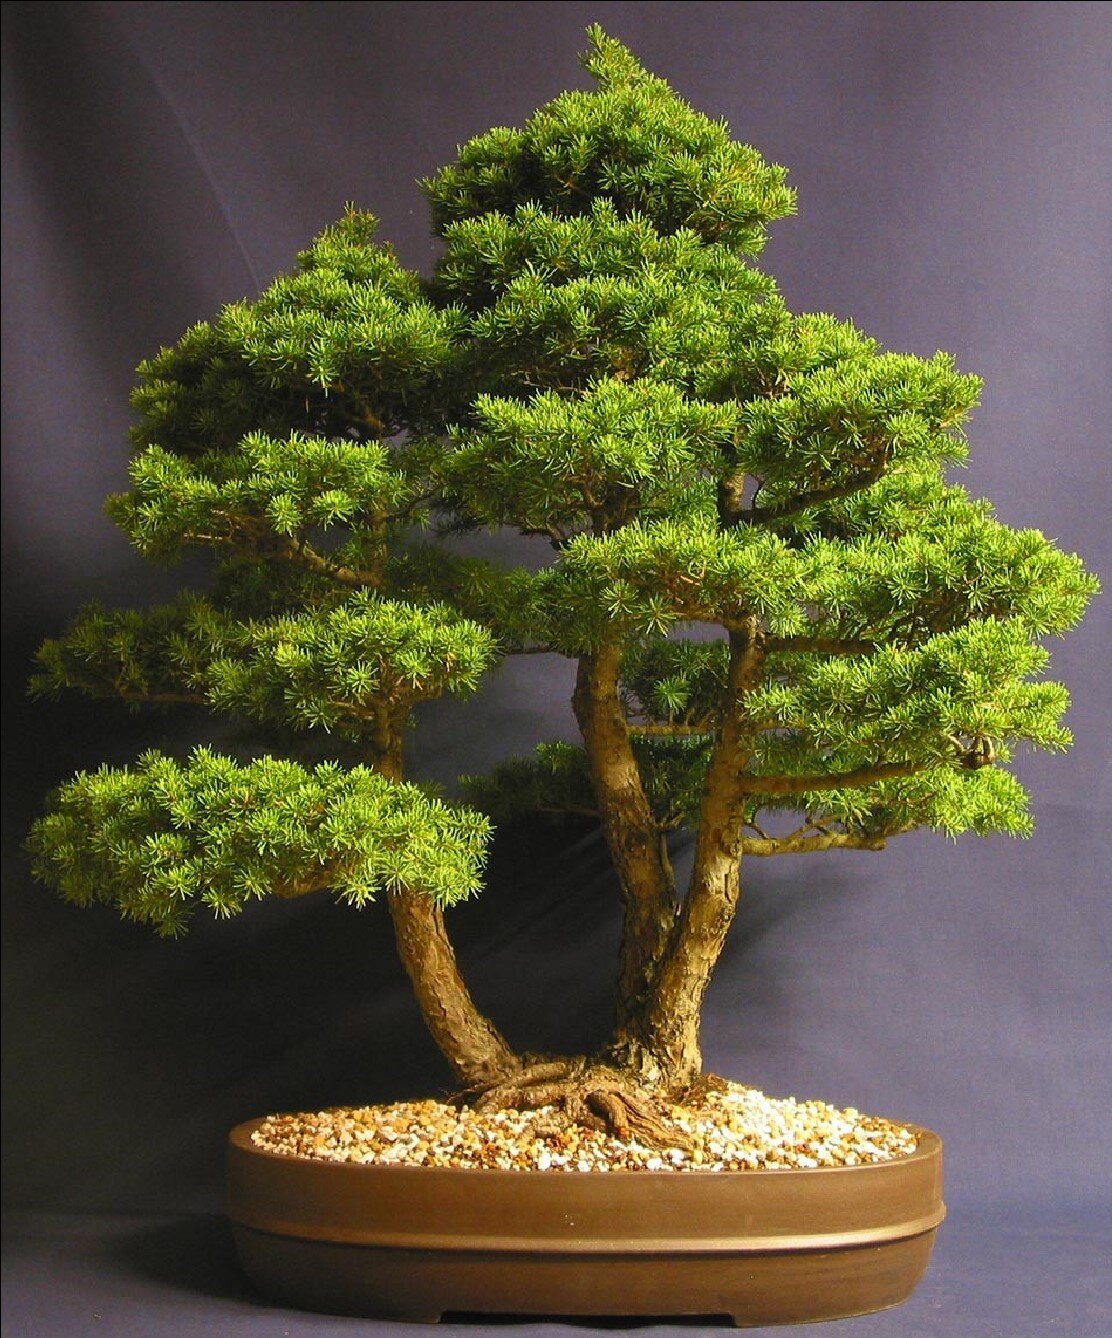
Freeing the tree from the pot was a huge challenge and Edris used just fir bark and lava for soil, what we all at BSOP used at the time. When I did get it out of the pot, it was literally a brick. This was my first instance of using a reciprocating saw on a bonsai root ball. To get into a new pot and free up some space for new soil, I used the saw to cut about a ¾ inch slab of packed mud and root off the bottom. When she saw the result, she was amazed that I was ever able to get it into the pot. The result is what you see in the first photo, from 2004. Just beginning my studies with Boon, you can see one of the very first uses of “Boon Mix” in Portland, with lava, pumice, and akadama.

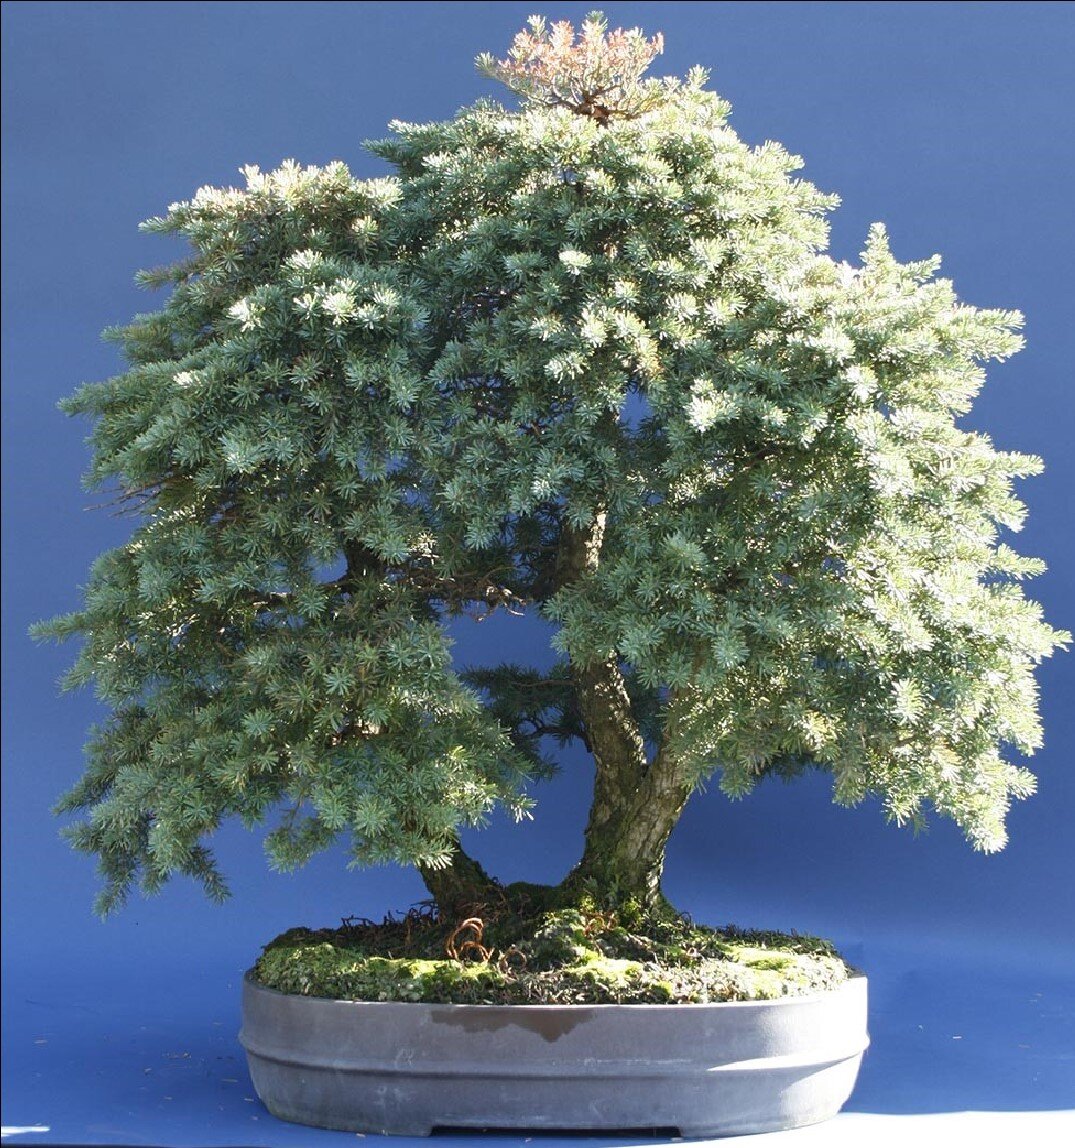
Now that I had the tree in a new container, my next mission was to style the tree. Edris didn’t employ too much wire in her bonsai training, but I obviously do and you can see the results of the first training in the 2006 photo. The structure was set and improved with the foliage fairly well balanced and thinned out. Mind you, the tree has probably already been a bonsai for at least twenty years at this point. Then it began to fill back in and was shown at the Japanese Garden Show at least once during this time period.
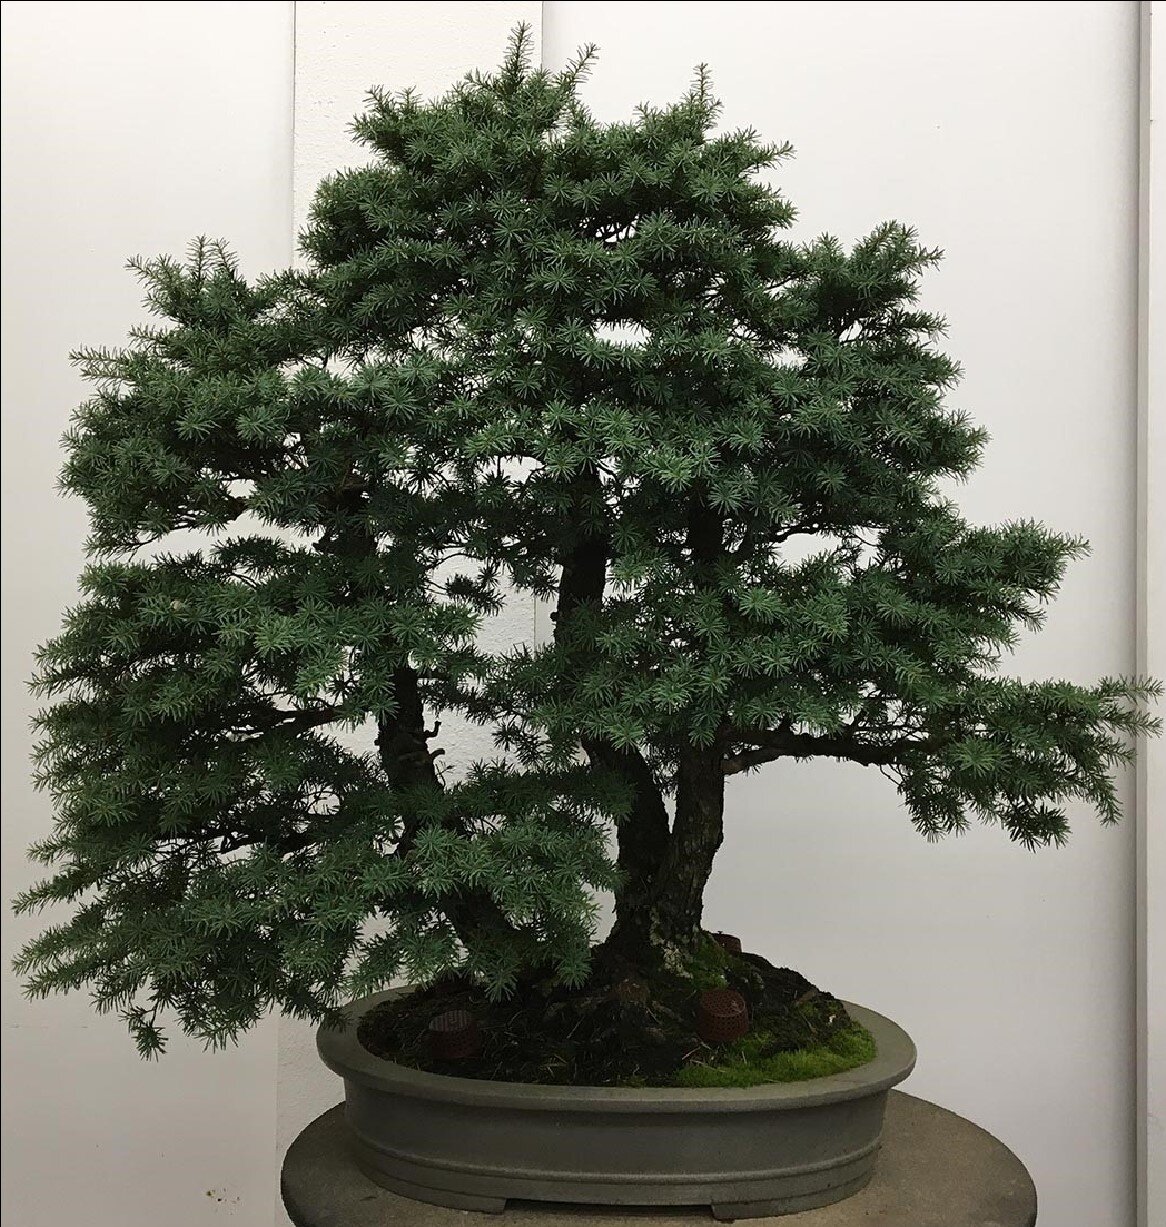
From here, I began to acquire more and bigger trees that took much of my available time. I realized that, although I had initially fallen in love with this tree, the trunks were all of equal size and had relatively little movement, leaving the bonsai a bit static, and to me somewhat boring. Then the worst thing that could happen struck. I simply didn’t know what to do to further the design of the tree. I was at an impasse. That was disaster, because I then started to lose a little interest and then I didn’t pay enough attention to the tree. As a result, the wire started cutting in and the tree started outgrowing its pot. Notice in the 2013 photo that the tree is growing roots up out of the pot – those coils you see on the surface. The top of the main tree was dying off, being strangled by the wire. At this point, Lee helped me unwire the tree during one of the Japanese Garden Shows. But I still did not know what to do.
I did know that it needed to be repotted, as the tree had lost percolation, the ability to accept water. That nice big root base and compacted soil was preventing it from taking in water, so its health started to decline. I got the idea to incline the group to make them slanted to start to get more movement. So being who I am, I tried to stuff it into an even smaller pot and change the angle at the same time. Just the thing to do when is already suffering, eh? I really had to work the root ball and I barely coaxed it into staying healthy. But I still hadn’t really solved the percolation problem. I was trying to soak and soak the tree to get enough water in.
Then I hit on the idea of a rope dam. See the “Dam It” article from September 2017 on this very tree. You can see I am still using it in the last photo here.
After that, the tree was still struggling, but the rope dam helped immensely. In 2018 I pruned out all of the weak and dead branches so that the rest could get stronger. In March of this year it went through a new restyling. I slanted the trunks even more and rotated the group about 10 degrees so that the left, lead tree was significantly in front of the others. The trunks have gained in girth and texture over time, so I decided that any improvement I would attempt there would only damage the best qualities of the tree with little gain.
There were no big bends to accentuate, just a soft and gently meandering quality, and that wonderful base. I haven’t seen a hemlock with such a developed base, and it is by far the best quality of the tree. Once I had the tree tilted, my wife gave me the best feedback, as she always does, and that was to swap the priorities of the number 2 and 3 trees respectively. The left tree had been number 2, but because of the tilt, it was now almost even in height with the number 3. Why fight it? I shortened the left trunk and lengthened the right which made a lot more sense.
I began the process of styling the branches without any clear idea of where I was going. It took quite a bit of time and courage to wind my way through. I worked mostly on the left tree first, then to the main tree. From there I sort of stair stepped in chunks from left to right, working up each tree. I was able to be very disciplined for once and worked on only the main branches, and maybe a secondary or two, to see what the structure was going to be before getting caught up in any fine detail.
I cut off many, many branches and made not a few into jin. Those tops that died had all been wired into shapes, so they made nice, attractive jin now. I think that I cut about 60 -70 percent of the foliage off. After awhile, and before I finished the top, I began to wire and style the secondary and tertiary branches to get a better idea of the movement, length, and density that I was achieving. I know that hemlocks will bud back decently, so I was not too worried about generating more foliage. It won’t happen overnight, but quicker than I can imagine, as I found out the hard way before. The photos of the Front and Right Side give you a better idea of how the structure plays out. There is a new Vicki Chamberlain pot awaiting in the wings for next year, when it has recovered from this operation.
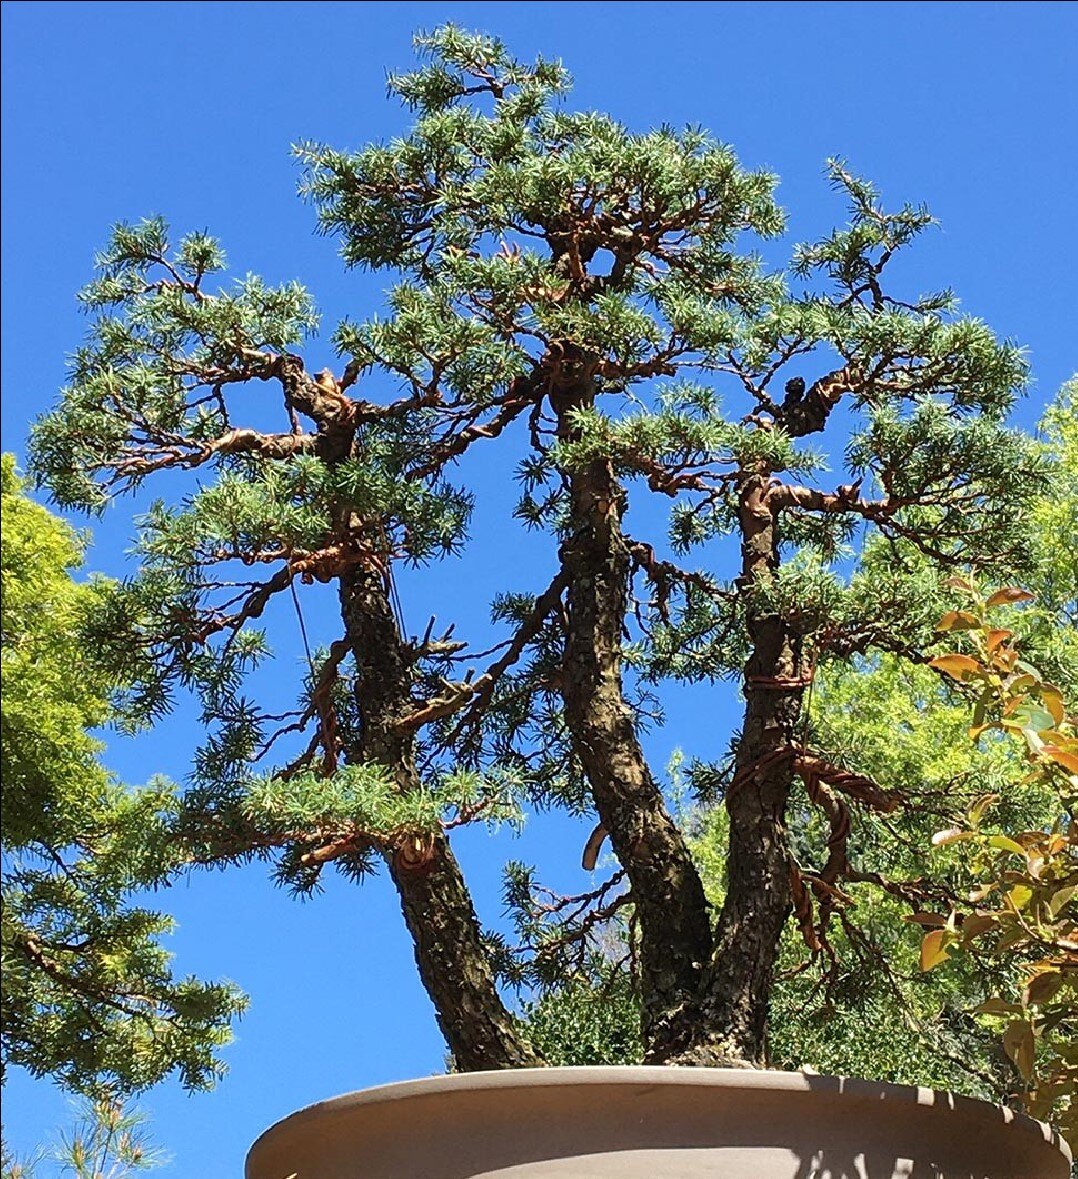
I didn’t feel like the final photos really did the tree justice, so I took another from the patio, looking up into the trees. From here, you get a little bit more of an idea of what I told my wife Lisa. This is the first time I had ever created something where I felt that I was standing in the midst of a forest. When she challenged that thought, I clarified to say that unlike most bonsai that bring us to a solitary place on the mountain where a tree is surviving the rigors of nature, this composition puts me squarely in an alpine forest, with the light dappling through.


I now feel like I have come full circle with this unique tree, propelling it forward to something beyond what maybe Edris herself had envisioned. It has a way to go in this current iteration, but it will be there soon and I can share it with you all. I feel somewhat now, that I have redeemed the trust that Edris placed in me so many years ago.
Scott Elser


