For those of you who tuned into last Saturday’s Zoom session on winter care, here is the article that I promised. One of the challenges of winter care that we talked about was the fact that it can rain incessantly during our Oregon winters, to the point of compromising the health of our trees. This can be especially true during our wet springs and just after repotting.
One way to combat that challenge is to tilt the tree up on one side so that you increase the height of the water column inside the pot, which will drive the water out. As Andrew Robson noted in our Zoom meeting, be sure to switch sides once in awhile or you will start developing a one-sided root system. There is only one hitch in this scenario. You have to have a hole in the right location to drain all that water out. Sometimes you have one, and sometimes you don’t.
Most contemporary American potters, like our own Vicki Chamberlain and Nao Takutake are adding many holes to the bottom of their pots for both drainage and anchoring, which is an ideal situation.
But many older and imported pots don’t have those holes. Many of the antique Chinese pots that are so valued in the bonsai world have just one single, large hole in the middle of the pot. Making things worse, they often sagged before firing, when drying upside down, so the middle of the pot is raised creating quite a swampy environment for our bonsai.
A couple of years ago I started adding what I call the Oregon Hole to my pots. That is, one small diameter hole on each side of an ovular or rectangular pot, which will end up at the bottom of the tilt. I have been adding holes to my pots for many years to anchor trees down. This is pretty much the same technique, with just size and placement that varies.
The most important thing to consider is that we are drilling through stone – usually high-fired clay, which is super hard. To get through that material, you need specialized drill bits. I have been using spade shaped glass and tile bits for many years with great success. After this Saturday’s Zoom, I decided that I had better try a diamond studded bit. Here is what I have found about both.
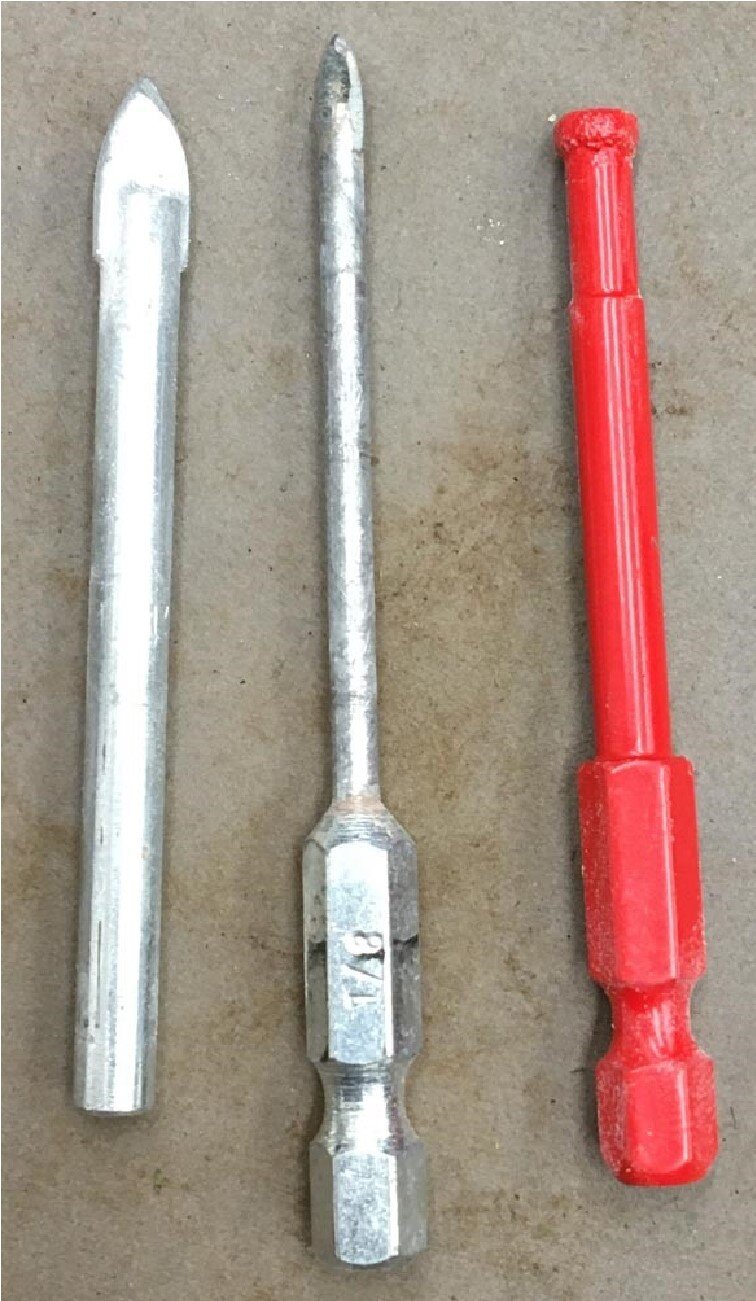
Left to right: 1/4“ spade bit with straight shaft, 1/8” spade bit with quick load, 3/16 diamond tipped bit
Diameter is everything. This is really hard material that we are drilling through, so make the hole only as big as you need to. I often drill a hole only one eighth inch in diameter if I need to just pass an anchor wire through a container. Enlarging the hole to just a quarter inch is really about four times harder to drill. You get the picture. Strategy comes to play here also. Anything above a quarter inch and the soil will fall through, so I would have to add a screen to it, making more work. So, for my new diamond bit, I chose 3/16” size to make sure my soil stays intact.
The glass and tile bits come in two shapes. One is angled but with flat sides, the other, the spade bit, is rounded to a point and is what I prefer. I have not noticed a difference in brand and as you can see in the photo, I have both straight shaft and quick load versions. The one thing you absolutely do not want is a concrete bit, shown in the photo. It is easily identified by the flanges protruding beyond the shaft.
They are designed to be used by a hammer drill to pound concrete to powder. We have to be much more delicate with our high-fired bonsai pot clay. The spade bits do break occasionally, and they do dull. I would armor yourself with more than one, because they will break at the most inconvenient time – like when you already have a tree bare rooted and waiting for its new home. I use spade bits to quickly add holes to high-fired Japanese terra cotta training pots. These pots are much harder than conventional Italian terra cotta, but softer than high quality bonsai pots and the spade bits go through these like butter. I have used the spade bits on bonsai pots with varying results. They almost always work, but the pots seem to vary greatly in their hardness.
Diamond bits are a newer arrival but they work great. You can get them in just about any size, and if you want anything larger than about a quarter inch, they are your only option. They work by having the diamonds glued around the tip of a circular shaft, so you are really cutting a ring. At our small size, that is really insignificant. The good thing is that they cut more reliably than the spade bits, and gives us another option.
Concrete bit
Korean pot ready to drill
I took this opportunity to make a bit-to-bit comparison between spade and diamond bits on a pot that could use some holes. This is an older Korean pot with walls maybe a quarter inch thick and very hard. I cleaned the pot first and then proceeded.
Taking Andrew’s hint from Saturday, I placed a piece of duct tape on the back side of the hole to be drilled to prevent blow out. With the diamond bit, it is better to start at about a 45-degree angle and grind a small hole to start the bit and then work yourself to a full vertical angle. I always have a water spray bottle to lubricate and cool the drill bit. I only needed to spray once and the bit went through in a minute or two of work.
Switching over to the familiar spade bit, I could go straight in because of the pointed tip. However, progress was very slow. To be fair, the bit was used quite a bit, and slightly larger in diameter, but I have to say that the diamond bit worked much better on this harder clay.
Drilling in progress
New hole
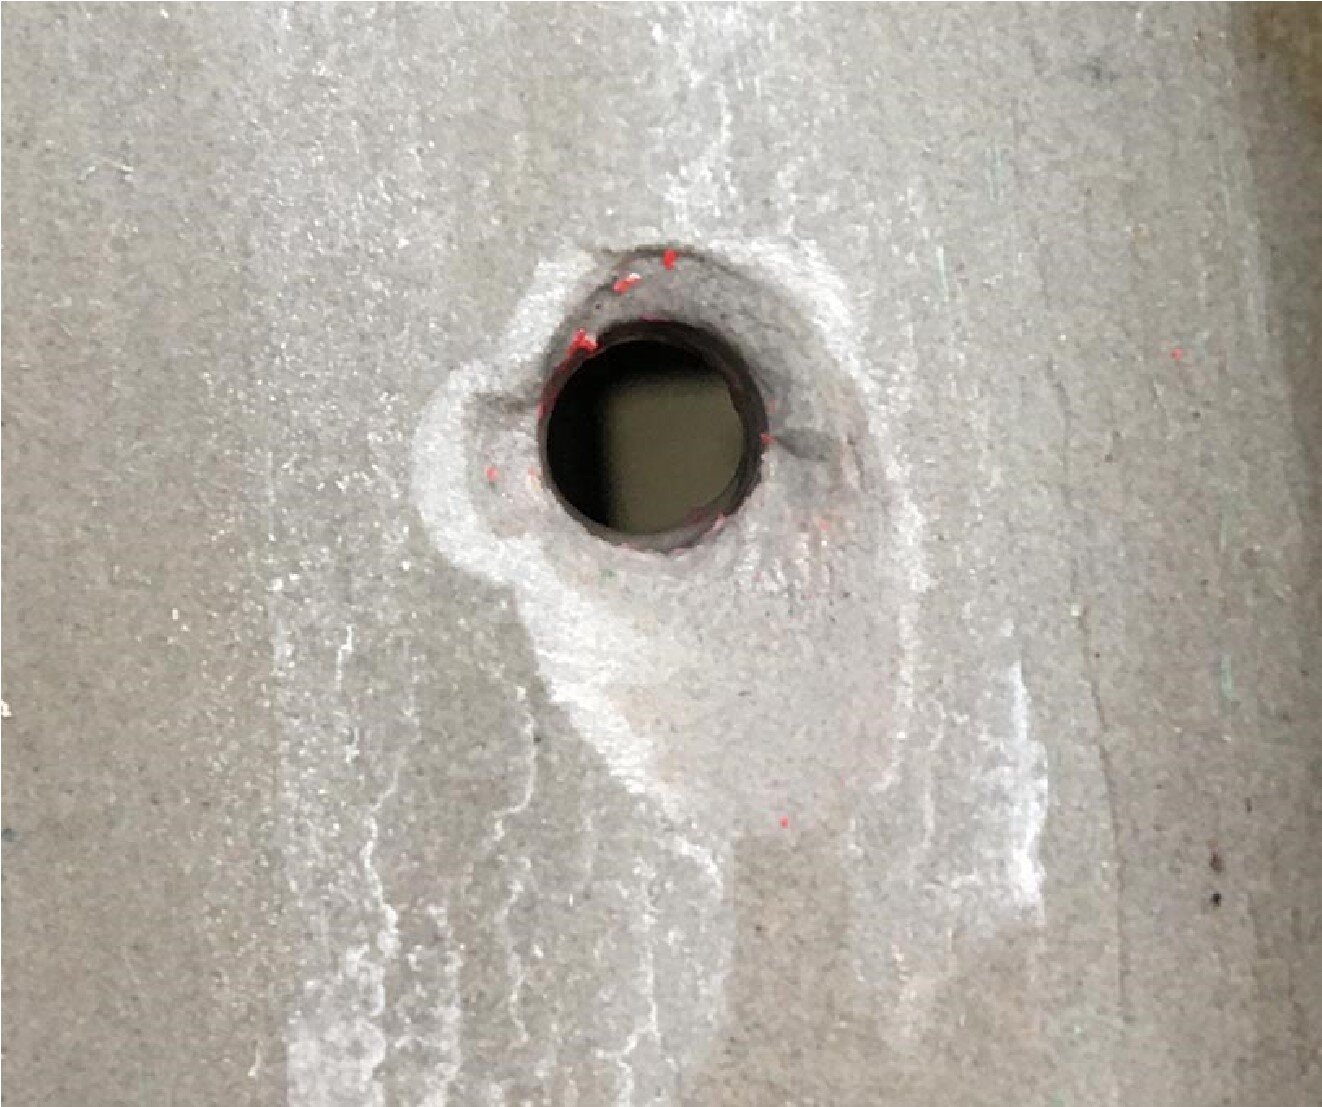
At that point, I just switched to diamond bit to finish things up. This hole did have some blow-out, as pictured, but I did not use the tape on it, wanting to compare the difference. The technique to prevent blow-out for a spade bit is to listen for the change in pitch as you are drilling. This sound change means that the bit has reached the other side and is starting to emerge. Stop immediately and begin drilling from the back side. Though it is not exactly that easy to execute on a softer pot, when I am drilling fast and hard, I usually don’t care on those. But you can try the duct tape trick.
Blow Out
It was also mentioned that you can drill under water, but this gets operationally a little tricky. It’s unneeded in most circumstances, but might work nice if you have a lot of pots of the same size to drill. This whole process makes a great winter project so that you are ready to go for spring repotting.
Happy Drilling, Scott Elser


