The Resurrection

Click for Branch Tips index

I have two wisteria that I have been growing for several years. Their varieties are different but they are usually tracking on the same schedule and routine throughout the year. I was a bit alarmed this spring when one blossomed and leafed out as usual, but the other one did nothing. I did see a few balls of green, where a few wimpy flower buds were slowly surfacing – that’s the first thing that you see in spring on a wisteria. The flower buds usually swell to almost golf ball size before elongating. But these were more like a pencil eraser. 

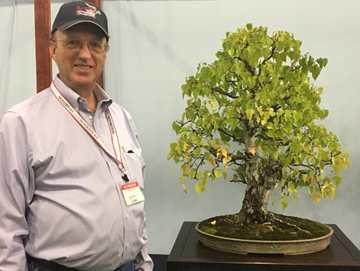
I told my wife that the tree was probably toast, and I was a bit sad as it came from my long time bonsai buddy, Alan Taft. But I left it on the bench and kept watering it, though cautiously. The branches were very dry looking, very dead. I had been having trouble with both wisteria the last two years, as with some other deciduous trees, not being as vigorous as I had hoped, so this was not a complete surprise. But later in the spring, I started to see more little green dots appear on the wood, which was quite unexpected. Then I started seeing more specks and they began elongating. You see them in the first photo. 

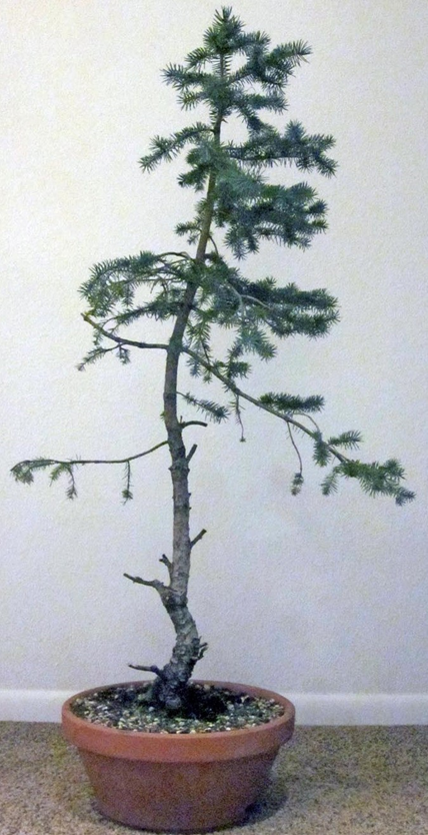
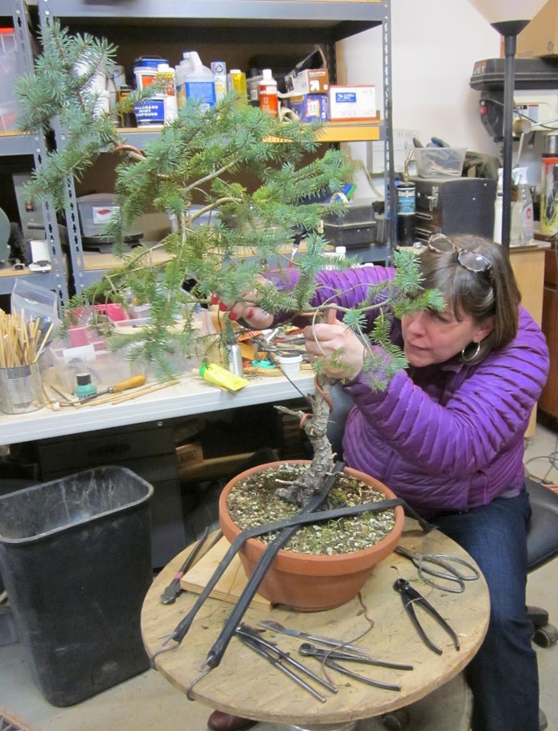
Notice the dead buds at the tip of the branch. Those were flower buds last fall. This is happening all over the tree, and once it began, the trees eschewed the few flower buds for foliar growth. It’s growing gangbusters now, maybe growing twice as fast and more vigorously than it ever has. If you look at the second photo, you will see it is crowding everything out on the bench. The other wisteria is to the left, with simple, restrained growth (low fertilizer). The tree in question though, is busting out all over. It usually puts out but a few tendrils a year, but you can clearly see them crawling all over everything at the moment, reaching over to other trees on adjacent benches. You can kind of tell that it’s a semi-cascade by looking where the end of the bench stops, and the tree just keeps on going. 

Now, I have no real explanation for what has happened with this tree, but similar things happen once in a while. Something known or unknown impacts the tree to where it is near death or appears to be. Then it summons all of its power from within and bursts forth with new growth. We have to be careful, as it is expending all its reserves to survive. When it happens, the tree is usually budding back on older wood, many times in a place where we were unable to make it bud previously. It can be fortuitous. We sort of do this in a controlled, predictable fashion when we decandle a black pine, or defoliate a maple tree, and to lesser degree with regular pruning. Rarely though, do we impact a tree beyond where we have total confidence of recovery. I would not induce this on purpose, but it can actually turn out making the tree better in the long run – if it doesn’t die in the process. 

All of this is a long introduction into summer care. What could I possibly be talking about? If you have grown bonsai for even one season, you have probably had the experience of a tree beginning to wilt, and then watering it and watching it perk back up. That’s usually in the spring as a tree is elongating and hasn’t hardened off yet – that is, built the outer protective  

bud.jpg
wisteria.jpg

layer called a cuticle. But then there is that instance during the summer where inevitably there is going to be a tree that gets scorched in the hot sun and acquires a bit of color, like when we get some sunburn ourselves. We just deal with it but it’s not life threatening. Then there is that time when things start to get crispy. That’s bad news. Sometimes it’s just a portion of the tree, or in other cases, the whole shebang. So my admonition is to be patient. If you see the sudden collapse of a tree, don’t panic. Soak it in a tub to quickly get it hydrated. Then stop watering until it starts to get dry. A tree that was healthy before the incident has plenty of reserves to rebuild with. You will likely see some new growth peeking out in a few weeks. 

However, if the tree is slowly going downhill over several weeks and is starting to dry up, the cause is something other than a single let down in watering or over exposure. You will have to discover it quickly and the tree may even be gone at that point. If the branches are starting to desiccate, that’s not a good sign. Moisture is withdrawing and slowly dying back. It is very likely a root issue. It could be a systemic fungus like Phytophthora, which can be hard to deal with. Specific chemicals like Allude, Aliette, and Subdue Maxx, Agri-Fos can help. 

But that is a last resort. Healthy trees and good watering practices are the key here. If it is just looking scorched and yellow/rust colored mottling on the outer portions, it may a fungus like pythium, anthracnose and others. I have long desired to work on a more comprehensive guide, but alas, the time. Check back in the archives of this column for additional info. Just don’t give up hope too quickly. 

Other issues can be self-induced. This is the time of year to evaluate the spring growth and prune where necessary. Saving length where you need it, cutting back where you don’t and slowing the tree down. Your trees may be in different stages of development, so the pruning will change accordingly. 

The thing to remember here is that if you open up the canopy to the interior, those leaves don’t have the same cuticle and solar protection that the outer leaves had. It also opens up the trunk to sun scald, a problem I have encountered myself. So if you thin the tree extensively, think about protecting it in light shade until new leaves grow or existing leaves become acclimated to the new found sunlight. While you are doing the pruning, it’s also a great time to wire your deciduous trees. Just be sure to watch them for cutting in. Enjoy the summer of bonsai.

Scott Elser

Hello, Old Friend

Click for Branch Tips index

Several of the articles that I have written over the past couple of years have talked about the development and history of a few of the trees in my collection. I have spoken about a lodgepole pine that I collected out of a ditch on the slopes of Mount Hood. I also talked about the development of a European Beech, first raised by Alan Taft. Then we paid a visit to Liberace, the Engelmann Spruce that my wife, Lisa, rescued from the sell bench, formerly owned by my grandfather. Lastly, we went back to the first public appearance of Ryan Neil, with his master, Mashiko Kimura and another lovely Engelmann. 

My goal in the telling of these tales was to show just how much trees can develop over a length of time. That your trees will get there, if you are patient. 

Most of the trees in my care were developed by myself, or other non-professionals. In fact, I can think of only one azalea and black pine as imports or developed by the Japanese community. The rest are pretty much home grown. Many of them had previous owner from the ranks of BSOP that have passed on. Folks like Tim Boyle, Edris Stryker, and Anne Spencer. That imbues them with some age, character, and history, even if they were not the most glamorous stock to start with. 

Early this spring I began to think about what to display at this year’s BSOP spring show. I had three trees that spent six months last year up at Pacific Bonsai Museum for their Natives exhibit. Since I like large trees, and those took a lot of effort to prepare for the show, these three trees were prime candidates. I put most of my bonsai energy into getting those ready last year, so I wanted to reap some of the benefits of that work for this year’s BSOP show. During the winter, I had touched up the cascading Douglas Fir (See the photo elsewhere in this newsletter). 

Now, the reason that I had worked on it was because it had lots of dead shoots on it. I made the mistake of wiring it in the winter, after it had shut down, and it was not able to repair the areas where needles were removed – or probably a bit of bark in the process. So when it began to grow in the spring, the shoots developed small swollen embolisms that cut off sap flow and the branchlets died. These were all one or two-year-old shoots. Nothing older died. So of course, I repeated this mistake again this year before I learned that timing was the culprit, not my technique. Actually, it was about mid-stream in the wiring – and one of Ryan’s streams, where I switched gears and did not remove any foliage, and just wired. So this year, so far, it is doing much better. I have to mention that this is a Douglas Fir anomaly. I know of no other tree that responds this way. Lesson: Wire Doug Firs in late spring before bud push, not in November. 

But I am digressing a bit. I just had to slip a little technique in there. The tree I really want to talk about is my sole Western Hemlock, Tsuga heterophylla. You have probably seen this tree in the forests and along roadways many times and never known it. It grows in mixed forests in the shadows of Douglas Firs, Western Red Cedar and Sitka Spruce. But from a distance, it looks like a Doug Fir. Just look at the top. If it is drooping over to one side, it’s a Western.

 I collected this tree many years ago in a forested road cut somewhere in the coast range, just a few miles from the ocean. This tree went back to the first National Show and the folks liked it so much they gave it an award. Back then, they wheeled the winners into the Saturday banquet on a cart, covered in a cloth. Dennis Vojtilla reaches over to me and says, Scott, that’s your pot peeking out under the cloth. At first, I thought, who else was using that kind of pot in the show? But it did turn out to be the hemlock. A very humbling experience. 

But that was sooooo long ago, in bonsai terms. I’ve gotten married to a beautiful wife, moved across town, built a new garden, and lived another ten years. Of course, this tree has accompanied me along in this journey, and I tell you, no other tree is so happy to just sit there, humble and consistent, like a Western. It’s like, no, no, I’ll be fine. Go play with your fancy black pines and your fancy maples. I’ll still be here. And it was. 

So, it was with great anticipation of reacquainting myself with the tree that I worked on it last spring, getting it ready for the Natives exhibit. In the intervening years, it had gotten gross wire scars from my neglect. So much so that I had to cut out whole branches. But I got it worked into a really nice form. I had described styling as wanting it too feel like the fresh rain was just dripping off of it. That work paid off as the tree came back from Seattle healthier than when it left. The back branch strengthened considerably. 

Fast forward to April of this year when I thought I would just touch it up for the BSOP show. I had already wired it last year, so no problem. As I began to work on it though, I noticed that every single branch had wire cutting in. We are talking wire that took days to put on now had to be reworked. I took the opportunity to really thin things out and take it back to just a pair of branches at any junction. I cut off whole branches at the trunk and many in the crowded crown area. See last month’s article on the spruce. 

The tree had grown way outside of its intended silhouette. I wired and pruned and was frustrated that I only got so far at a time. Late nights were the norm as I worked in the garage. Finally, I got it done and it looked beautiful. The best I could do, or maybe have ever done. Lee gave me one of the best comments during the show, which was that it looked so American, and lots of open space. But I tell you, that open space will be filled by the time Rendezvous rolls around. The tree is now sitting in a spot where I can see it really well and enjoy it. I began to think about how much joy it brings me to create something like this. And make no bones about it, this tree was created. It was not found. It did not do this on it’s own. But the illusion is that it did. 

The other day I was having lunch with my best friend Tom, who doesn’t do bonsai, but is a painter, so an artist in another respect. We talked about the fact that he might sell a painting hanging in his house if someone asks, for just a pittance. But he can always paint another one. A painting is frozen in time, a bonsai is not. What I can’t do is wind the clock back twenty-five years to when I began this tree and just make another. This tree and I, as well as others in my garden, have been on a long journey together. 

They are not my friends, and I do not talk to them. But I do see them almost everyday. I have cared for them so long, it is hard to imagine life without them. But then I look at the beauty that we have created together and the potential that lies ahead. I can only commit so much time to bonsai. It is still a hobby for me. Seeing the heights to which I can raise a tree, like in this hemlock, gives me impetus to do more. But I see that I need the courage to eliminate trees that still have potential in order to concentrate my efforts on the best of trees. 

As I related to my friend Tom, the funny thing is that as a tree gets better, it takes more time. More wire, more water, more fertilizer, a better pot, maybe. I can never put it on the wall and say, that looks nice, and walk away. It is working on a relationship in a way, just like we do with people. It must be cultivated and cared for. You can approach a tree as a block of marble, ready to be sculpted, or as a friend, to be cherished. The truth seems to lie somewhere in between. 

Over these many years, I am starting to realize the attachments that I have built with my trees. Not something to take lightly, nor to be cast off. More than that, I must be prepared to consider their futures, as most will very likely outlive myself, and thus begin a relationship with yet another bonsai artist. 

And as I start to go down this road, this way of thinking, I am realizing that now, personally, I am on the cusp of actually becoming a bonsai artist and creating something that brings emotion and response from the viewer. That is where I hope you see me going from here, checking out a new horizon, and taking a new path with a few of my good friends, the trees. 

Scott Elser

Three's a Crowd

Click for Branch Tips index

We are all in the midst of the repotting season and it seems to take quite a toll on our personal and social time as we descend into a furious frenzy of cutting, sifting, chop-sticking, and mossing.  However, it also happens to be the best time of year to work on many trees that haven’t been repotted. Such is the case for many of our conifers that are just starting to wake up. It is sort of a lull between deciduous and conifers for me. The weather has really wreaked havoc in the system, both my schedule and that of the trees. We are all a bit confused. Things seem to be settling down and on their way to a splendid spring.

The push right now is to get my conifers pruned, if they were not last fall, so that all of the energy can be maximized and focused in the areas desired. This process also balances out the strength of the tree. One tree that I worked on recently is a largish Engelmann Spruce. Many of you are familiar with this tree. It has been seen at our shows once or twice as well as being shown at the Artisan’s Cup in 2015, National Show in New York in 2016, and the Natives Exhibit at the Pacific Bonsai Museum in 2017. Yep, that tree. It sure has been well travelled. It is also the tree that I, or we, styled together about a dozen years ago, when Boon got me into a Golden State workshop with none other Masahiko Kimura, and his young Jedi apprentice, Ryan Neil (Note the essential shell necklace –vintage Neil). What a fortuitous meeting, with my two teachers and Mr. Kimura. But since this tree spent most of last year up in Federal Way at the Natives exhibit, it was time to take stock and prune out any dead tips, cut back where I could and generally reacquaint myself with the tree.

Tree as collected by Randy Knight, 2004

Tree as collected by Randy Knight, 2004

 Golden State workshop with Mr. Kimura and Ryan Neil, 2006

 Golden State workshop with Mr. Kimura and Ryan Neil, 2006

Repotted and ready to go for the workshop

Repotted and ready to go for the workshop

Mr. Kimura, Ryan, Myself, Boon.

Mr. Kimura, Ryan, Myself, Boon.

 
 Final Result

 Final Result


When I exhibited the tree at the Artisan’s Cup, it was a last-minute replacement for a tree that dropped out at the last minute from California. As such, it was some really late nights getting it ready for the show. It was already somewhat wired and cutting in. So I reworked the tree and told myself that most of the wire could stay, though I cut out much of the heavier wire for aesthetic reasons and everything held pretty well. But then it was on to New York the next year, with a partial de-wiring, and adding back some detail wire. I worked on it a whole day with Ryan to get the first branch just right as a model to follow and learned much. I finished the tree myself, but I was dissatisfied with the results. There was this sort of gnawing discomfort that it just wasn’t giving the impression that I wanted. However, I was still very proud of the achievement because it was very full and much more developed than most collected spruces. Maybe too much so. The crown was almost a solid helmet of foliage with not quite enough separation between elements. It has fabulous dead wood, but the foliage was rather boring. Still wondering what the future of the tree was, I sent it to New York and back, and then to Pacific for the 2017 season.

Artisan’s Cup 2015

Artisan’s Cup 2015

2016

2016

Fast forward to our current pruning session. As I began looking for back buds to prune back too, I realized there weren’t many. Much fewer than I expected. I think this was partly due to the reduced amount of light at the Museum and less fertilizer during the season (per my instruction, at the time). But as I began to look at the branches, I think there was another big contributing factor. And that is, overcrowding. There were just too many branches to support. The tree grows like a juggernaut, but all of that energy was being dissipated into more and more branches. This is a very good problem to have. It took a good dozen years to get here, but now I realize that it was time to reassess and start thinning things out. While pruning this tree I was very committed to the rule of two. Only allow two branches at any intersection. It could be the trunk and a branch, two larger or two smaller branches, or a large and small combination. But two is going to be it and I was going to be ruthless about it. It was then that I discovered that I had junctures of three and four branches all over the tree. In my desire to maximize the foliage mass for consecutive shows I had inadvertently sacrificed the structural quality of the tree. I was so focused on the creation of nice foliage pads that I didn’t fully reexamine the tree each time I touched it. It is very common to leave three shoots on the end of branch for fullness before a show. But since I had stacked all these shows up in a row, after four years, those shoots turned into ramified branches, which I hadn’t questioned. I also discovered that this was a major factor contributing to wire cutting in at an astronomical rate. Spruce are known for wire marking rapidly and this tree is no exception. The stronger the bend, the more it cuts in. That is very predictable on spruce.

When folks are new to bonsai, they generally fall into two camps. Pruners and Waterers. The Pruners are people who will readily prune their trees down to a stump without blinking an eye. The can leave the tree rather weak and unresponsive until it builds it’s strength back up. Waterers are content to nurture their trees slowly over time. They would prefer to go through a long prayer ritual to the bonsai gods before they are ready to cut off a single shoot. I definitely fell into the former camp and have learned to balance my approach. But this spruce had had enough of nurturing. Now was the time to prune. It was DAMN hard. I spent a lot of time growing those branches. And mostly, they were good branches. I had to weigh many factors. I was not going to keep three, sometimes four, branches at one juncture. So, what to do? Do I keep the two shorter ones? Do I keep a long and short? Do I keep the one on the right or left? So, here is my little hierarchy to make those decisions.

One, keep the branches with live buds. This is so hilariously obvious yet is the one I get caught on all the time. If you have elongating species, like the spruce, and you pinched it the previous season, you won’t necessarily have buds on the tips. Plus, there can be insect damage, overall weakness, etc.… So always check to see if there is a bud. Next, do I need the length? Sometimes I do. At other times, I want to compact and keep it short. In that case, I like to keep a long and short branch. It looks more natural and develops more elegantly. Thirdly, where are the adjacent branches growing? By pruning, will I make a hole, which may actually be desirable for some negative space, or is there a better branch available to take its place? In all cases for this spruce, there was always something available nearby. And finally, can I improve the structure of the tree? Can I eliminate flaws like crossing branches? For a show, I may wire things into position to fill a hole that I would never keep long term, or so I thought, four years ago.


Freshly pruned but unstyled, 2018

Freshly pruned but unstyled, 2018


Now that the job is done, I have a renewed fondness for the tree and vision for the future. It was quite harrowing at first, but now I see a tree once again. Good trees are intimidating, old and large even more so. By pruning, it got older and more tree like, and I now feel as though I can bring it to fulfill the potential it has had all along. The tree looks great and I would have to show you the garbage can full of branches to prove that I pruned anything. Please note how the apex is slowly being moved to the right and that the back branch is finally peeking around the right side. I left all of the wire that was not cutting into branches on the tree to help hold it for this next growing season, but come fall, I am really looking forward to completely de-wiring the tree and restyling it from scratch. I just did not have time now, with preparations under way for our spring show. It is now set up to grow vigorously through this next year and build up strength for a good styling session. There will likely be much more pruning at that time. But at least for now, the strength is balanced and many structural flaws are eliminated. Remember, three’s a crowd.

Scott Elser

Annual Physical

Click for Branch Tips index

The first and most important thing that I learned from my studies with Boon was that the health and vigor of the tree were preeminent. Without a strong tree, all of the wonderful technique that I was learning was of no use, and maybe harmful to the tree. That was a fact that I soon proved true with a very nice Subalpine Fir. I still miss that tree, as I had collected it with my Grandfather, the person who started me in bonsai. It was so long ago that I can’t accurately recollect the tree’s health before I started. I certainly styled it aggressively, but with no visible cracks or tears. After flushing out with spring growth, it promptly turned brown and collapsed. That was well before Akadama, proper soil, and proper technique, and it was planted into a tall, moisture sucking cascade pot. Since then, I have been working to identify when trees are healthy and strong and able to respond positively to any bonsai technique I apply, whether it’s bending, pruning, decandling, repotting, or even just spraying.

A question that comes up frequently is whether to repot a sick tree to get it healthier. That is pretty much a resounding NO. Think of it this way. You are having some health challenges and the doctors tells you that if you drink more water, get a little more exercise, eat a little better and drop a few pounds you will be just fine. The other option is open-heart surgery, which may or may not be successful. Which would you prefer and what would make you healthier in the end? I personally would not be choosing to go under the knife. So before you repot, ask yourself if instead you can monitor water more closely? Maybe you should be checking morning and evening instead of once a day? Or maybe just paying closer attention each time you water. If it’s lacking moisture, maybe you soak it down twice each watering session to get better saturation. Or maybe it’s backing off until the next round. 

I have been able to really make a difference by paying closer attention to each plant, even the same size species in the same size pot. It really does help. That said, we DO repot in order to build up the strength of an existing tree. That might include moving a tree from a collection container, or a nursery pot into a bonsai container. It may also include moving a tree up or down in pot size to move it along in its development. But the point is to only repot a reasonably healthy tree and giving it what it needs to be successful. 

Another factor in the equation is sunlight. I was in Ashland with the Southern Oregon group awhile back and a gentleman had a very large and wonderful Black Pine. I told him that it could use more sun and he admitted that his yard was mostly shade. Some folks interpreted that to mean that I was saying it was unhealthy. It was not. It was just the right shade of green, and had good buds. But the needles were longish, and more importantly the internodes were very long. 

More sun will actually allow the tree to gather it’s needed resources in a smaller area, which translates to shorter needle and internode length. That also means that the quality of the solar energy the tree is collecting is much higher, enabling it to build the necessary energy to back bud and build a more compact tree. So just getting your tree more sunlight can really boost it’s  energy. The problem can be that you just get way too much sun come July and August, and then it’s time to break out the shade cloth. But the trees will thank you with lush, verdant growth.

The single biggest indicator of tree health coming out of winter dormancy is the size of the new buds. Relative size indicates how much energy the tree has built up. You may have dense foliage, but if the buds are small, the tree is weak. It may have been that the tree put on some great growth the last couple of years, but at the end of last season it ran into troubles. Maybe it got to dry during the summer and weakened the roots, or not enough fertilizer, or it got shaded out. Something happened to stress it out. On the other hand, a tree might have had a rather weak showing in spring, but built up strength in its sparse foliage because the watering, fertilizing, and sun light you gave it were spot on. So, what exactly would that look like? 

The clearest examples are the buds of a Japanese Black Pine. On an untrained or nursery stock tree it’s very easy to compare the branch tips. At the apex they will be a creamy white, with a nice stiff point. There will likely be a very large bud surrounded by many smaller, but equally white buds. Down towards the bottom of the tree, or on the interior, where the buds are likely weaker, they will be a darker color, maybe reddish, with a rounded tip, and much smaller size. There is also likely just a single bud. The difference is very dramatic. 

Black pine apex buds

Black pine apex buds

Black pine lower side bud

Black pine lower side bud

That differing bud strength is what we are trying to balance with our pruning and decandling techniques. So pines are really obvious, but many species are not. There are some species that I grow where I cannot see any buds or tell if the branch is alive until they start growing in the spring. That makes things very challenging, but each year my eye gets trained a bit sharper. 

On deciduous trees, you will likely see large, fat buds on the tips and upper portion of the bonsai, but as you work in towards the interior, they start to weaken. You may see internode sites where a microscopic dormant bud exists, but there is no sign of them, and nothing to activate them. Take a look at the fatness of the branches. Shoots which have grown thick and coarse will have many more and larger buds than the thinner and weaker branches. This means that most of the trees strength will be concentrated in those thicker shoots. That may help us if we are trying to thicken the trunk or a certain branch. If not, it really serves to weaken the other branches if not addressed. 

The good news is that those strong shoots indicate that the overall health of the tree is strong. By pruning these strong branches back to one node for opposite branching species, like maples (two buds, one on each side), or two buds for alternating species (most of the other deciduous trees) we can control and even out the branch strength. Leave the weaker branches longer and with more buds. I rarely, if ever, regret cutting out those coarser sections of branches. 

For conifers, foliage is another great indication of health. Remember that you want to look at the total needle mass. That means that roughly ten needles that are 2” long have the same strength and solar capacity as twenty, 1” needles. Make sense? For trees in development, you may have areas that you decandled or otherwise pruned and end up with needles of varying length for the short term. Feel the needles. Are they crisp and cool? That’s a great indication of health, as well as their color. A deeper color relative to the species is stronger. Anything straying towards a yellow or pale color is weaker. 

Strong trees are also occupying the entire pot with roots. This is a great indicator of strength. The denser the root system, the more gas in the tank the tree has for styling work. During this time of repotting, it’s a great time to examine the strength of the root system and make any corrections needed. One of the best indicators of root strength is the amount of water taken up by the tree. During the growing season, if the tree is utilizing all the water you give it at any one time, the tree is in balance and chugging right along.

Here’s to a great growing year ahead! Scott Elser 

All Potted Up and No Place to Grow

Click for Branch Tips index

In a follow up to last month’s article on pruning, especially Japanese maples, I received a question from a member about putting shape to some maple seedlings. More specifically, is this a good time of year to do so? My answer is like many things in bonsai. Although this may not be the optimal time of year horticulturally speaking, it’s still a great time to create some movement in trees, so let’s talk about why.

hwt-9_benditnow.png

When you have trees that move a lot of water through their systems, like Japanese maples, the structure that moves all of that water is on a larger scale than plants that move less water. That leads to them being both very rigid and very brittle. Contrast the maple with something like a juniper that moves resources very slowly. The size of the cells and tubes that the sap flows through a juniper are much smaller, so they are able to slip and adjust much more. Let’s just say for example that the juniper cells are an 1/8 inch long and I can bend each one 5 degrees without damage. In one inch I can bend it 8 times, or 40 degrees. Next we have the maple that has cells a ½ inch long. I can only bend it twice in that inch, or a mere 10 degrees. I can’t adjust my branch or trunk nearly as much. Some trees are more flexible just by their nature.

So, say I have a tray of seedlings or rooted cuttings. If I leave those grow for three or four years, it’s likely that they are just going to grow straight up. I am giving them proper health and nutrition and there is nothing that maximizes that more than growing straight up towards the light. But that doesn’t make very interesting bonsai material. So after five years of growing, I find that all of a sudden my maples have long internodes, are a ½ inch thick and are impossible to bend. My only option is to pray that there is a lower branch that can become a new leader, or prune the whole thing way down and hope that it back-buds. Either way, I have lost some valuable growing years. But curiously, the same situation arises with the Juniper. We already said that it’s more flexible, but what we didn’t talk about is strength. Even though the juniper can take a sharp bend, applying enough force to bend a ½ inch juniper in a short space is quite a feat and more than we can usually accomplish.

The better method for raising your own bonsai from an early stage is to bend them right away. The best time is when they are about an 1/8 inch in diameter, no matter how old or what the stage. With some pines, you might be able to take it up to a ¼ inch. You are probably not going to be able to bend them the first year, and it may be up until the third year that you can give them their best initial movement. 

When you do get to that first wiring, we have some things to talk about. First off, how tall you want the final tree to be? If you are working towards a shohin of about 8 inches and you want the trunk to bend three or four times, that means each one of your bends has to be about 2 inches apart. If you want a medium size tree, the curves will be larger and spaced farther apart. 

Starting these medium and larger trees are difficult, as you may not even have enough length to cover the whole trunk line the first go around. That’s OK. We have to start somewhere. Make sure that your movements vary in the length of intervals and angles to create an interesting shape that is interesting in all three dimensions. Also, we may end up with what started as a shohin growing into a larger size. We can make great use of those smaller movements in a larger tree to increase its quality. 

As we grow along, we may also re-evaluate our initial curves. We may look at a tree and say, you know, if I cut here, this will make a really great shohin. Or maybe this shape is not really that pleasing and if I cut here and make a new leader I can build in some taper and make a better shape. Nothing seems to go quite as planned in the life of our trees, so be opportunistic and take advantage of what each tree is offering you. 

The next thing that you need to know is to just let your tree grow. Let the leader and branch tips take off and grow, grow, grow. Remember, you have to grow some new wood in order for those curves to set, and to grow some girth on the trunk. If you wire in the winter, inspect them in April or May to see how they are doing. It may be the right time to remove the wire. If it’s a conifer, you can leave it a little longer, as any cutting in will likely disappear very quickly in the rough bark of the future. For thin barked species like maples, it’s a different story. Scars may visibly last for up to 20 years, so remove the wire before it cuts in too much. I have had many cases where I simply had to cut off the branch because the wire scars were too deep. 

Finally, another word about timing. Now is a great time to wire deciduous seedlings, when you can see their structure really easily. I want to caution about wiring mature maples this time of year and not to overlap the information too much. We talked about the brittleness of maples and it is easy to damage mature branches unknowingly this time of year. It may be better to wire them in early spring when they are in full swing and can repair any damage. The seedlings are more flexible and you have less invested in them. April and May are great times to wire seedlings too, especially when they have the new length of fleshy growth that has not quite lignified yet. It is easier to bend and it has all the rest of the growing season add tissue. The caveat of course, is that you have to work around the leaves. Here’s to some great new bonsai just around the bend.

Scott Elser

Learning from the Landscape

Click for Branch Tips index

Last month I took advantage of the fact that there is a small window to prune Japanese Maples, just as their leaves are dropping, so that they won’t bleed. I pruned a few of the bonsai on my benches, but my main targets were the trees in my landscape. When moved to a new house, we inherited a ginormous weeping Japanese maple, front and center in the most prominent area of our yard. It’s probably 15-20 feet across. I was able to cut it back a bit last year, mostly to keep it off the driveway. 

But this was the year that I wanted to get in and do some real structural work. Along the way, I pruned another large maple in the yard, as well as my mother in law’s maple, and another friend’s large specimen. For some reason, after twenty years of pruning this type of tree, things really started to sink in, so I thought I would share some new and confirmed insights. I can now prune with confidence at a fairly feverish pace and the decisions fall easily right into place.

First of all, the most important aspect here is the non-bleeding time of year. I find that a good time is when there are just a few fresh leaves on the tree, but it’s lost all the others. Take a snip and wait just a few seconds. If it bleeds, wait another week. 

As the leaves start to abscise from the tree, the sap is also slowing down to a halt. Otherwise it would be pushing sap out of the points that just lost leaves. The tree then begins to heal over and seal up these areas and the sap re-pressurizes a few weeks later. So, if you prune in December, you get bleeding all over again. It can extremely weaken the tree if you let it bleed profusely. In the spring, it provides entrance for fungi. You can prune safely after the leaves have hardened in the spring, around April or May, but it is very hard to see the overall structure.

Next, and just as important, is the fact that although maples have an opposing leaf structure, those opposing pairs rotate 90 degrees every other pair, making horizontal or vertical oriented buds. I have not really paid all that much attention to this feature in the past, but things really started to click when I did. I now understood why some branches seemed to just reach for the sky and others spread out. It was just they way they started on the main branch.  

Look at the photos. You can see in the first one the orientation of the buds, how they alternate along the branch. In photo two you see an unpruned branch and how the structure is developing into vertical branches and horizontal branches. I no longer prune back to the first node on a branch, but to the one that is oriented in the direction I want. In bonsai, I always prune to the horizontal branches, unless I have a need to create depth. On these weeping landscape trees, I am going for something a little different.  

201712-01.jpg

Here is the interesting part. Remember those vertically aligned shoots? As I went to prune this year, I noticed that 95% of the dead branches were those that were the bottom half of a pair, the ones facing down. It didn’t matter if the branch was one year or five years old, those were the ones that were getting weak and dying on their own. The tree was educating me and telling me how it likes to grow. It was doing it’s own pruning.

Look at photo two and you will see that the downward facing buds have disappeared on their own. So taking that cue, I began cleaning out those downward branches anywhere I could. It’s a quick way to shorten branches or thin things out. After several seasons and/or several cuts you begin to develop an undulating structure that creates great movement and allows you make foliage pads on a weeping tree.  

201712-02.jpg

Look at photo three and you can see the effect of this style of pruning. I have been pruning like this for awhile, but now I finally understand that alternating nature, how to use it effectively, and what to expect next year.  

201712-03.jpg

So my suggestion is to grab your saw and pruners and dive into one of these trees and see what you can learn. There are so many more branches to work with than on bonsai, so much more practice. And if you make a mistake, it’s easy to grow more branches. It’s not so critical as your prized bonsai and you can relax a bit. Take that snip and see if you are still in the window for pruning.

Bonsai Home Waters

Return to Branch Tips index

This fall I have been working on the second styling of a very large tree. In fact, it’s the tallest and widest tree I own. It is definitely the hardest to move and is too tall to fit in the back of Lee Cheatle’s van. So, it’s been quite a daunting project to undertake. Way back in 2004, I had the privilege of spending a day in the wild with a few BSOP members, including the world’s foremost yamadori collector, our own Randy Knight. I now know the year, after miraculously finding a photo of the tree. Matt Reel (before he left for Japan) was with us, along with Lee. 

 After a while of scrambling, we spotted this tree and Randy helped me pry it from its rocky perch. It had probably been there a couple of hundred years, growing ever so slowly. Somehow, we got enough roots for the tree to survive and I planted it in a box for several years and then into a bonsai pot. An impossibly large bonsai pot. It’s all I can do to move it from a bench to a cart, let alone carry it. 

In 2014, ten long years after it’s collection, I finally styled the tree with help from Ryan Neil in his Elongating Species course. The tree was fifty inches tall, and had branches and trunks going everywhere. A few branches in the extremities had died over the years, but everything was pretty much intact with lots of branches to work with. 

I obviously had been looking at the tree’s possibilities for a long time and knew that Ryan had something in mind for it. I kept trying to figure out where I could shorten it to make a new top, plus dealing with the branches popping out from the sides that were starting to make their own trunks. How was I going to lower those branches and orient them correctly? 

Then Ryan started in on me, encouraging me to look at it a different way. I started cleaning the tree but wasn’t totally convinced. I heard a voice inside me say, that’s not really how we do it in bonsai. I try to be open to new things, but this is kind of crazy. But as our conversation turned from minutes to hours, I finally had a moment where the light turned on I blurted out to Ryan, Got it! I have been to that place. I grew up there. My job now is to use this bonsai to take you there. I had let my well-developed ideas of bonsai norms occlude my own personal experiences.  

I grew up a rather privileged life. That is to say that I grew up here in the Northwest, on the east side of Portland, the gateway to Mount Hood. I was a Boy Scout with plenty of backpacking in the cascades on the weekends. I climbed Hood twice, and Mount Adams once, spending the night on the mountain itself. My cousin and I bushwhacked the wilds of the Wallowas one summer. My dad and I bowhunted for deer in the high hills opposite of Mount Hood. There is virtually no area that I have not been to at some time or another from Hood River to the Santiam Pass. The mountains were my playground, and usually somewhere near timberline. 

As Ryan continued describing this form of alpine tree, I recognized it as what we call Krummholz. It’s a German term meaning “twisted wood”, which describes the trees surviving at the timberline level – where just a few eke out an existence and are constrained to bow, literally, to the forces of natures. The wind and snow drive them to a spreading structure with multiple trunks and ground hugging forms. In leeward pockets, the trunks can extend a bit higher until sheared by hostile winds. This is the place that I want to take you. That is what the best bonsai do. They take you to a place, a memory, a feeling. And finally, I had that vision in my mind, the tree that I wanted to create. 

Fast forward to 2017. The wire had been on the tree too long, at least in some places. I had already removed some portions as they cut in, but this last year, the tree really took off and almost doubled it’s foliage. Time to rework. I removed the wire in September so that it could recover and start to heal any damage during the fall. It started to bleed some sap from the deeper scars, but not too bad. 

I began to re-evaluate the design, making some tweaks here and there as I wired. This beast has seven apices. Yes. Seven. Just like the like the seven-headed beast in the book of Revelation. The main branch starts to cascade and then turns towards the sky to create one of those apices, so it’s pretty crazy stuff. And now, it’s even budding back on the hundred-plus year old trunk to create new branches. 

It was about then that I had the really big “Aha” moment. After more than 25 years of working with bonsai, I realized that this single tree represented my home waters. That’s the term fishermen use to refer to their local, favorite fishing hole, whether it be a river, stream or lake. The place they go to again and again for a good time and great adventure. It was then that I realized that this tree had been with me during nearly all of the great outdoor adventures of my youth. The Subalpine Fir, Abies lasiocarpa. It’s definitely one of the least used native trees for bonsai, but it was everywhere that I went as a youth. 

The memories started to flood into my mind, taking me to places that had long since grown cobwebs. This tree was there at the timberline when I climbed mountains. It was there while hunting as we crawled through the thickets of the trees that were almost impenetrable. They were there beside the dusty paths as I tramped along the Pacific Crest Trail. Unlike the lofty and much more common Douglas Fir, this was the tree that I could reach out, touch, and brush my pack against. 

In high school, I learned to paint watercolor landscapes. Mountains were my favorite subjects, along with a few extra brush strokes, the trees at timberline. I have been drawing those trees ever since, and now make a living drawing at times, you guessed it, Subalpine Firs. So here is this bonsai, which I have had on my bench for so long and didn’t recognize the significance that it held for my life. It is the one bonsai that can truly meld my love of the outdoors with my passion for creating. It now has the highest of honor in the garden and may be my best contribution to the bonsai world. It certainly has a ways to develop, and I have to find/make/ design a new container for it. The jury is still out on that one, because it also has to be a part of that place that I am sculpting. 

I have included a few photos. I somehow managed to take a photo of the tree before it was removed from the mountains. The large tree, just behind it, makes it more difficult to see. There is a photo after this year’s styling. I really need to go back and reset the branches, especially with info from the photos. After next years Spring growth, I will be able to reduce the length and compact some branches. I didn’t want to push it too much this year. And finally a photo of myself, about 15 or 16, in the Jefferson Wilderness with Subalpines in the background.  

I wanted to share this tree’s story and the connection that I have with it to encourage you to find the same. That’s why I do bonsai – to connect with my environment, my past, and my future through art. You may not have the kind of life experiences that I have to draw upon, but of course, you have your own, and I can’t wait to hear them.

Scott Elser

Pacific Crest Trail, Myself, and Subalpine Firs

Pacific Crest Trail, Myself, and Subalpine Firs

Subalpine Fir being collected in 2004

Subalpine Fir being collected in 2004

Tree after styling in 2017

Tree after styling in 2017

Viva Liberace!

Return to Branch Tips index

How many of you have seen this tree at one of our auctions or raffles? Well, not this one exactly, but many a tree just like this have made their way off our benches and into the donation pile. Such was the destiny of this Engelmann Spruce. Many years ago when my grandfather passed away, I inherited most of his bonsai. He’s the one that actually got me interested in bonsai, and he must have dug this up as a seedling on one of our collecting trips. It’s had an interesting life so far. 

2015: Engelmann Spruce recovering from neglect

2015: Engelmann Spruce recovering from neglect

After watching some Floridian bonsai teacher on television, my grandfather was convinced that planting trees in pure sphagnum moss as a soil substrate was the way to go, and this tree was one of those experiments/victims. Actually, the tree did not suffer too much as it was in a very shallow plastic saucer so that it couldn’t hold much water anyway. It literally sat in the back corner of my bonsai bench for many years. The tree started out only 10-12 inches high – where the first branch is in the picture. It started to grow, then shot up. But the container and myself did not keep up with the rapid growth and the tree’s health ultimately took a nose dive. 

Every year I try and winnow down my collection, a tough prospect. This tree was on its way out. I had too many trees already and we moved to a new home 2015: Engelmann Spruce with less space for bonsai. Lisa, my wife adopted the tree, esperecovering from neglect. cially after hearing that it was my grandfather’s. You know, like finding a stray cat on your doorstep. Our first step was to replant

the tree into a larger container and get it back to health. The tree responded quickly to good soil and better conditions (light, water, fertilizer). After only a year the tree was ready to be styled.  

I love bunjin trees and this one in particular was a good candidate. It had no lower branching and was tall and narrow. But what this tree had over any garden variety seedling was age. It was obviously very old already, with flaking bark at the base. Engelmann also has nice short needles, so the scale would work great. Our challenge was to come up with a design that could take advantage of the great bark at the base and make this stripling into something.

You can see Lisa in the photo bending the trunk with #6 copper. Actually, she might have had a little help with “her” tree. We ended up using rebar, blocks, and guy wires to hold the trunk in place. We applied so much force that we were already cutting into the bark before we finished styling. We should have used some raffia here. Experience is a great teacher. Spruce is very flexible, but can easily spring back. I wanted to both exaggerate the angles, and get plenty of movement going. The tree already had good caliper, so there was a lot of grunting involved.

This is also about the time the tree got it’s nickname. I explained to Lisa that this was a bunjin or literati style tree. Being an unfamiliar word, she just sort of unconsciously inserted the closest sounding word she knew – Liberace. You know, the flamboyant pianist from the sixties and seventies that wore sequins and ruffles on everything? That guy. So the name stuck. You can see the results just a few months later.

Lisa “bending” the trunk

Lisa “bending” the trunk

The original photo was taken in early February of2015, and the styling happened just a few weeks after. The styled photo was taken in June of 2015 after the first flush of growth, and at its new home. 

The tree responded incredibly well and we had nice, lovely wire scars by fall. We dewired the tree and it was later rewired in the spring of 2016. We also moved it into a new Jim Gremel nanban style pot. You can see by the container sizes that this was an aggressive move. It definitely slowed the tree down a bit, but it recovered nicely. However, it was later hit by a bout of Rhizosphaera Needle Cast on a few of the branches, which I initially thought was just a symptom of the repotting. When Todd Schlafer presented at our club, he mentioned the disease, which strikes spruces. After a bit of internet research I confirmed the disease, treated it, and the tree did just fine this year. 

Fast forward to this fall, 2017. I lightly wired some extending branches and tuned things up a bit. I also started opening up the trunk, removing a bit of bark to help disguise the wire scars. I hope to make this one very old and gnarly looking tree. Three growing seasons and look what can be accomplished. One or two more years and it may be ready to show.

Scott

2015 Strong growth after the initial styling

2015 Strong growth after the initial styling

2017 The tree is well on its way.

2017 The tree is well on its way.

 
hwt-7_Watering.png

Percolation problems? Dam it.

Return to Branch Tips index

So you’ve been diligently watering and fertilizing all season, but the water now just seems to run off the edge of the pot and into oblivion, leaving your root ball high and dry. You check the soil and it’s still dry under the surface and the water is not getting where it needs to go. Even though we are transitioning into fall, the trees are still consuming a lot of water. One of the main causes of this loss of percolation is the build up of unused fertilizer on the surface of the soil, along with weeds, old leaves, dead moss, etc… The soil is too compacted for the water to penetrate. There are a few ways to address the situation. 

First of all, if you have just repotted in the last year or two, the soil underneath is likely fresh and still granular. Just scrape off the crust, down to the good soil and replace with fresh soil if needed, and then top dress with shredded moss (half dried, clean sphagnum and half fresh green) to start re-growing a nice healthy carpet on the soil surface. That carpet of moss does many things and one of the most important is grabbing that fresh water from your hose and directing it down into the root zone. Be sure to not go too deep in your cleaning efforts. It may be best to wait until you can repot in the spring to tackle the roots properly. 

dam_it.png

Rope dam applied to sloped and compacted root ball. 

If we have hard, compacted soil from a tree that has not been repotted in four or five or more years, we need a different strategy. It is likely that the loss of percolation is impacting the health of the tree. So we need to get that water in there to build up the health of the tree BEFORE a Spring repot we can address the roots and compacted soil. So how do we do that? Something that I am trying this year is to build a small dam around the edge of the pot with a length of rope. I just used some half-inch sisal rope I had on hand. I cut it to length and fastened it to the soil with staples made from bonsai wire. I really like the natural fibers best. Cotton or hemp might also work well.  

In my case, I was dealing with a very old mountain hemlock with steep sides to the root ball. The first time I repotted it I had to use a reciprocating saw to cut a slab of roots from the bottom just to get it back into the pot. It had been many years since the previous owner had done anything. In my last repotting, I shoehorned the tree into a new pot, so I did not have a safe opportunity to really tackle the issue properly. And so, my current dilemma. In this case, I made two rows of rope dam to slow down the water so that it would percolate into the root ball and the technique has worked marvelously. It also keeps the fertilizer from washing away. 

Another method, which I have not yet, tried myself, is to make a wall all the way around the outside of the rim of the pot with duct tape, or something similar. All we are trying to do is to redirect the water into the pot. Of course, this method is more drastic, and there will be some clean up later, but we do what is needed for the health of the tree. Give these methods a try. 

That’s the reason we try to leave a quarter to half-inch drop between the rim of the pot and soil level when we repot. Actually, since my first draft of this article, Ryan Neil has released a new video on Mirai Live about this very technique. He goes into great detail about the symptoms and signs of a flagging tree and how to address the situation. 

I wanted to fit in another seasonal subject here. Actually, it’s several things that are very interrelated, so pay attention. As you will see in my Hard Won Truths for this month, this is the best and most important time of year to fertilize. But why? The tree is now doing several things. It has shifted from foliar growth to vascular growth. That means that it is storing up energy for winter and beginning to build its defenses against the cold, packing nutrients into the cells. It’s also creating new cells and building vascular tissue, as well as next years buds. We want to supply as much nutrition as we can to the tree to help it build. All of the foliage has hardened off by now, so we don’t have to worry about long needles, large leaves, or long internodes. 

htw-6_fertilize.png

Unfortunately, this means that since the tree is putting on vascular tissue (growth rings) any wire we have on a tree may be cutting in. If it is starting to cut in now, it is really going to be dug in by the end of the season. I think that I may have more experience than anyone around at dealing with deeply cutting wire and ugly scars. Wire has stayed on many of my trees way too long and at times I have been forced to just cut them off. Branches fool you because they don’t all cut in the same amount, or in the same areas. The branch tips rarely cut in. 

Look for the areas where you made a sharp bend, or where you have had a lot of foliage growth, or where a branch forks from the trunk or another branch. Those are the areas where the tree adds tissue the quickest. Elongating species like fir, hemlock, and spruce are perhaps the worst since they have most of their strength in that vascular tissue and tend to really bulk up this time of year. 

But all of this also means that this is the best time to wire. You can get that branch setting mass in just a few months, and any minor damage done by bending or applying wire can be repaired by the tree before winter. So if you take wire off, put it right back on, if needed, to maximize your efforts. If you remove the wire on conifers, before it starts cutting in a little, then you really haven’t gained much. Worse, if you don’t rewire it, the tree will add tissue in the position that you just tried to correct. 

So the trick is to be able to work your tree so that you only take off and replace what is needed and save yourself some work. If it has been several years, then it has likely out grown the length, if not also the strength, of the wire and it will have to be redone. So that is how my fall work is shaping up - lots of unwiring and rewiring. But, I am making more headway than in the past.

Scott

Water Wise

Return to Branch Tips index

It seems like water has been a subject that I at least touch on every few months in these articles and it is about time to revisit the matter once again. Why cover it so often? Mostly because we are all on this journey together, constantly learning and upgrading our skills and technique. 

For many of us, getting our first cell phone was the un-tethering of our lives (Now we are glued to it). We were able to call in grocery lists, or make that flat tire call. Then all of a sudden, we could take pictures and send a text message. I actually purchased my first iPhone so that I could more easily send texts. That phone served me well beyond it’s like expectancy. It was a 3gs. That tells you something about me. I am not usually a first adopter to technology. I mean, it took three generations for me to jump on board. I upgrade only when it serves my needs or the darn thing wears out. But the time came, and I upgraded to an iPhone 7. Yep. Four generations there. Then within a day I thought it was the most marvelous piece of technology that I had ever touched. Everything worked the way that I thought it should, intuitively. I could do the things I needed to much easier. But enough about the iPhone. Now about watering. It’s time for another upgrade.

I changed my watering practices a bit this year and the results are stunning. My trees are growing better and stronger than ever. That is partly due to a better fertilizing regimen, but also due to better watering practices. Of course, you have to throw the rest of the bonsai skills in there – repotting being the major one – doing it properly. Then there is pruning – the right amount at the right time, pinching, etc… 

But it all comes down to watering. What is the difference this year? In a phrase, it’s not overwatering. Now that has been really tough, having gone through the wettest winters on record. But I can’t control that in my situation. Unless you have a covered area, you can’t either. But all the trees survived that better than expected. The key this year has been to check water a couple of times a day – not an easy feat for those of you who commute to work. I commute about twenty feet down the hall, so I can check water when needed. I usually like to check twice a day, once about 10-11 am and again in the afternoon. Sometimes I do it three times a day, which would be better. Above 90 degrees and I am definitely checking three times.

But all that is the same as I have been doing for five years. What is different is not watering everything, all the time. I now pay much more attention to each plant and how it is using water from day to day. I have some Magnolias in full sun and they are barely using one full watering a day. So sometimes, I skip two waterings on them and wait until they have used up what they have. 

On the other hand, I have a Rocky Mountain Juniper that sucks water like there is no tomorrow. Nick Lenz in his book about native trees for bonsai said that he gives his RMJs just a whiff of water at a time. Why then is my tree sucking the pot dry? Water and oxygen balance. MyRocky has doubled its foliage mass this year. That’s no mean feat for an RMJ. It is obviously cranking on all cylinders. But I still wait for the top of the soil to dry a bit before I water it again. The point is to give the tree all the water it needs, but no more. 

I used to water everything the same and somewhat control the water by the particle size of the soil – fine particles for shohin, coarse particles for pines, especially five needled pines. But that led to some trees being overwatered, or not enough. So now I drench each tree that I am actually watering, to make sure I get plenty of water into the shin, the soul of the tree, right under the trunk. Or I don’t water at all. The danger I used to have was applying just a light coat of water. When I thought the tree was wet on top, it was really dry inside the pot. Those now dry roots die, then rot because they can’t uptake water anymore and are drowning in it. So once the cycle is started, it takes diligent effort to correct.

I have been able to significantly improve the health of several trees this year that were flagging by limiting the amount of water they receive. Just paying closer attention and being patient for them to grow on their own terms. I have to figure in several factors.

1.  Overall health of the tree. How well and how rapidly is it growing.

2.  Size of the container relative to the size of the foliage. Depth plays an important part here.

3.  Species of the tree. I am watering single-flush long needle pines – which are all alpine species, like Ponderosa, Limber, and Lodgepole only once a day. My azaleas and maples are never allowed to dry out.

4.  Daily weather – hot and windy, or wet and cool?

5.  Position in the garden. I have trees that get morning sun and afternoon shade, and the opposite. What condition is it moving into?

6.  When can I water again? It has to do well until I can get back to it. Better to give a healthy tree extra water than let it dry out.

Now that we are entering into the summer in earnest, many trees are hardening off, forming a cuticle on the leaves that limit moisture loss. Some are even going dormant. They are not rapidly expanding, so even though the temperatures are going up, the amount of water is going down. I have really noticed this in the last week or two on some trees. More or less, conifers. 

On other trees, especially ones that were heavily pruned in late spring and are now in their second flush of growth, are showing no signs of slowing and require even more water to keep them from burning. As a hint, I moved some deciduous trees that were growing slowly into a bit of shade and they are really taking off. That means that they are using more water in the shade than they were when in full sun. Go figure.

Am I taking any more time to water than before? Not really. My collection takes only about 15-20 minutes each session. I learn to evaluate the water conditions quickly and move on. I know my trees, and what to look for in each one. I get to spend a little time with them everyday. Last thing. Be sure to have a few bonsai buddies on tap for watering when you leave for more than a day. Help each other out. See you in September. 

Scott Elser

Azalea Pests and Diseases

Return to Branch Tips index

I have been wanting to get back to talking about pests and diseases for quite awhile – since the first couple of articles last year. Mostly because I was only able to hit on a few highlights the first go around. We introduced some of the broad issues and a short list of the chemical solutions to fight them. But going forward, I would like to addresses pests and diseases more specifically and hopefully give you the tools to both identify and treat them on your trees. As my own challenges with these problems occur, I have been trying to keep a photographic record so that I could share them as the need arises. While documenting such an outbreak of leaf gall on my azaleas, it occurred to me that I had a nice little package on azaleas, with some good treatment strategies, so here goes. Be forewarned, I only have one azalea bonsai in my collection – a Kozan variety Satsuki which is blooming right now. But I just counted and I have 38 azaleas, plus about a dozen rhododendrons in the landscape around our house. Most are very old and mature, and nearly all are summer blooming, putting them in a class with the Satsuki breed that we usually see as bonsai. It has provided a great learning ground, and may also help you with your landscape plants as well as your bonsai. 

Azalea Leaf Gall
This is a very unsightly disease and the cause of my latest round of spraying. I first saw this disease on a bonsai many years ago. It causes the leaves to thicken like a jade leaf and then distort into grotesque forms. It first starts out a light lime green. They usually occur randomly across a plant. The easiest solution is to just prune them out and that may be all that is actually needed to control it. The galls won’t kill the plant, but they will weaken the branch. But they just plain look bad. If you don’t get them pruned, they will turn white and fuzzy as they start to fruit and give off spores. You can see both stages in the photos, but don’t let them get that far. I discovered a relative epidemic once I started trimming the bushes around the house and found them thriving just under the new green leaves. They start to appear at, or just after flowering. Once they are removed, you can spray with the fungicides propiconazole (Bannermax, Fertilome Liquid Systemic) or chlorothalonil (Daconil) to prevent future outbreaks. I am just trying this spray treatment now, so I cannot verify the effectiveness yet.  

Azalea Leaf Gall

Lacebug
Grrrhhhh. I hate these guys. My wife was at Portland Nursery last week and they had a sign up that basically said, give up on azaleas and don’t plant them, all because of these guys. They are really becoming a nuisance the last few years in Portland. The nursery also said there are some resistant varieties out there. But as I said, I have about fifty mature plants to protect and they are my favorite landscape plants, pretty much ever, short of a Japanese maple. So they are here to stay and I am digging in. I am including photos of these buggers in three different stages. You can find better photos on the internet if you like. I am sharing these just to let you know the threat is real and can be dealt with, and that you may have to recognize them in different forms. The first signs are the stippled leaves. This may remind you of spider mites, but if you turn the leaf over, you may see adult or juvenile lace bugs running around. And they do have legs! I put this one guy on my barbecue and it was hard to keep up with him. Note also the black dots of fecal excrement. The lack of webs also tells you that it is not spider mites. I have also included a photo of spent lacebug carcasses to further indentify their presence. 

The short solution is to use a product with Imidacloprid in it and they go away. This is a systemic treatment and affects most bugs that want to suck on leaves. The problem being that if not used properly, it may affect good insects like bees. I really don’t want to enter into that discussion and don’t have strong enough information to properly guide you. I am just making you aware of what you are dealing with, both from a diagnostic and treatment point of view. There are also other direct contact sprays that you can use. The challenge will be getting the spray to them. I suggest a tank sprayer that you can get a high pressure on and stick the nozzle up under the branches so that you get all the undersides of the leaves. These guys should be fairly easy to kill, similar to aphids.   

Juvenile Lacebugs

Lacebug

Lacebug carcasses

lacebug_damage.jpg

Lacebug damage

Azalea Bark Scales
You may have never heard of these critters, and I hope that you never do. But, I have had todeal with them at both my old and new house, on azaleas and also Andromeda. These guys look like wooly aphids, or a wooly scale. They like to hang out in the crotches of branches or in the grooves of bark where they get more protection. Most sucking insects feed on the sap in the leaves, which is traveling up from the roots, through the xylem and out to the leaves. These bark scales suck on the sap that is flowing down through the phloem. That means that they are resistant to most systemic treatments like imidacloprid, which only works on the sap flowing up. Very few systemics are able to work both directions, but there are some that do, and of course are expensive and elusive. What is so insidious about these guys is that they hide out under the canopy, out of sight, where they go unobserved until permanent damage occurs. They tend to colonize on single branches of a plant, sucking it dry until you see it start to slowly fade and then eventually die. Pruning back the leaves reveals many tiny cottony tufts along the stems of the plant. But take heart, there is an effective solution. It’s work, but it can be done. Immediately prune out the infected branch. Pretty much it’s toast down to the roots. That means that you will have to grow a new branch to fill in, but in the landscape this is not a problem, just a patience issue. On bonsai, if you are paying attention, it should never get this far. But once you have pruned out the dead branches, it opens the tree up to spraying. Since the purpose of the cottony white shell is to protect the bug once it is stationary, the only time you can effectively treat them is in the spring – April-May, while they are out crawling around to a new home and have not yet developed their shell. I leave it to you to select your favorite poison. Some have suggested using a spray oil to suffocate the bugs in other seasons, but I have not tried this. I have had full recovery of plants using this method though, and am in the process of treating a few plants at our new home. 

That’s it for azaleas. Scott Elser

Abstract vs. Realism

Return to Branch Tips index

If your eyes have managed to scroll down the page before you read this, you are probably wondering what these images of Mount Rainier have to do with anything related to bonsai. They are actually what I do most everyday to support my bonsai habit. That is, creating tee shirt designs for companies like Eddie Bauer, Columbia Sportswear, and Icebreaker. Eddie Bauer is an active outdoor lifestyle clothing brand with headquarters near Seattle and is nearing 100 years old. Mountains and trees figure in heavy with their Northwest heritage and the lifestylethey represent. And since you can see Mount Rainier right out the window of their home in Bellevue, they quite naturally want to feature that majestic giant in just about any design where there’s a mountain. There might be a whole collection with Denali, or Everest, K2, or the Tetons, but there is always Rainier. So every season, I have to figure out a new way to represent the mountain, whether it is the feature or in the background. 

By stepping out of bonsai and using tee shirt designs as examples, I am hoping that we can take a close look at the concepts of what we are dealing with and what we are trying to accomplish in our bonsai. What you can see by these examples, all from the same person, is that there are many ways to represent the same physical object and it can be associated with many different ideas. Maybe it’s very literal, as in a photograph, or abstract – to the point where you might barely recognize the source. 

What we have in bonsai is making some of the same choices in the way that we style trees. So, right off the bat, we put a tree in a pot, and in doing so we have removed it from world of reality and into some level of abstraction, even if we do nothing else. We could go so far as to put a pot of soil out and let the wind blow in whatever seeds it wants and come back in ten years and see what happens, but you can’t get around the fact that someone made the pot. So much for being completely natural. 

Now that we have that tree out of the relative comfort of the ground and into a stuffy, confining pot (which might actually provide much more comfort and stability than it ever had in the wild) we have some decisions to make. How much are we going to intercede on the behalf of both the tree and art, to make a bonsai? 

We have to decide what our goal is, even with each individual tree, and what we want to represent. Do I want to create the sensation of standing on a certain mountaintop where that tree came from? Am I trying show off the beauty of its blossoms? Do I want to show it all full of vigor and health, or is it barely surviving? And more to the point of this article, do I want to show it as a highly stylized abstraction of what a tree can be, or simply represent the singular specimen that it is? Is this tree going to announce itself or just sit quietly in the corner? Will it be highly sculptural, creating defined, consistent shapes or just a, grow as you may, haphazard style?

Culture definitely weighs in heavily on what we want to see. The Japanese refined the art of bonsai through technical prowess and cultural sensibilities. The technical aspects of growing and maintaining bonsai speak for themselves. Plants don’t change the way they work, so we have to learn to work with them, to support our efforts. But the cultural aspect is something that we can control. A good place to start is with Japanese aesthetics. They have learned how to evolve their trees into a style that is both pleasing and maintainable over hundreds of years. But even that style is ever changing, and different among various practitioners. 

The Japanese, it would seem, crave a peaceful balance, with not a hair out of place and as close to perfection as possible. Take for instance, putting moss on the surface of a pot for exhibition. It definitely makes things look better, but for the Japanese, the thought of bringing dirty soil seen on top of the pot into their home is quite unfathomable. Contrast that with myself, who regularly piggy-backs dirt into the house from my waffle stompers. Cultural habits are different and lead to varying aesthetics.

So, back to the trees. Take a look at Mount Rainier 1, the usual view represented of themountain. It’s basically what you see along I-5 especially from Seattle. Then there is view number 2, which I took much closer to the mountain on the southwest side. Doesn’t even look the same. I choose rather consciously to represent the mountain in its most familiar form on tee shirts so that folks recognize it. I myself would be much less recognized by my back side, than my front. That is a constant that I have chosen.  

Rainier 1  

Rainier 1  

  Rainier 2

  Rainier 2

Now take a look at Rainier Park. Do you recognize the mountain? Yet I traced it from the very same views. I just used a few straight lines is all, but it’s the same. Even though its roots are in a very real mountain, it is really just the suggestion of ANY mountain. The shapes are broad and highly stylized, even the trees are just one step away from Christmas ornaments. 

Now observe Rainier Pixel. It’s definitely based on a photo, something we would call real, but now the resolution in some places gets very coarse and you can barely make it out. This focuses your attention to the peak, very much in the same way that we use foliage to frame a piece of deadwood or control the way that our eye flows through design of a tree.

Rainier Park

Rainier Park

Rainier Pixel

Rainier Pixel

Then there is Sketch Rainier. This one is totally made up of lines with no shapes at all. If you get to close, it’s very difficult to decide which is a positive or negative shape, but it becomes much more interesting, and even refreshing with that push/pull aspect.

Sketch Rainier

Sketch Rainier

Puget Sails

Puget Sails

Then there is Sketch Rainier. This one is totally made up of lines with no shapes at all. If you get to close, it’s very difficult to decide which is a positive or negative shape, but it becomes much more interesting, and even refreshing with that push/pull aspect.

 Scott Elser

Spring Show in New Home 

Our annual spring show returned to the Japanese Gardens one fine, rainy weekend in April. Back to the garden, but in new quarters, as our display was divided into two separate rooms across the new plaza, plus an outdoor display by Brian Lonstad. It was a great success, even though it featured fewer trees than we are used to. We saw many new trees and several new exhibitors. 

Folks had a really good time during the day visiting with attendees and Saturday evenings critique was a great hit. During the critique, we voted on the best trees, shown below. Congrats to all of the winners and many thanks to all who participated, either by showing trees, helping set up or take down, tree sitting, and demonstrations. We hope to expand further into the plaza next year with more outdoor displays. Thanks everyone!  See the May Newsletter for the photos of the winners.

Scott

NATIVES Exhibit at Pacific Bonsai Museum

Return to Branch Tips index

This weekend I had the privilege of attending the opening of the new, summer long exhibit at the Pacific Bonsai Museum in Federal Way. This year’s special exhibit is simply titled, NATIVES, and features bonsai native to all corners of the good ol’ US of A. 

What makes this exhibit stand out is the comprehensive approach to a visual presentation of the American landscape. Fourteen vignettes portray a distinct segment of the American outdoors featuring a backdrop painting by German artist Luna Tinta. Wonderfully abstract at times, and others times representational, these paintings create a palette of colors rhythms that draws you into each landscape. In each scene, a bonsai from noted Northwest artists like Ryan Neil, Mike Hagedorn, Randy Knight, Dan Robinson, and myself, as well as trees from the museums permanent collection pair with each painting. 

Completing the visual treat are kusamono created for especially for each scene. BSOP member Vicki Chamberlain of Ashland created custom ceramic containers representing each locale, partly from materials or minerals from the same locale. Maryland artist Young Choe then created wonderful kusamono with plants from again, the same native locale. Can you say native five times fast?

The whole effect is simply stupendous. We’ve not seen anything like it and certainly it is going to have an effect on North American bonsai, much like the Artisan’s Cup has, in setting new standards and a different approach. Accompanying the main displays in each alcove are two additional trees from the same region, often by the same artist. You will probably see species and forms that you’ve not seen before. And some trees rarely seen as bonsai. 

A favorite of the crowd was the Tucker Oak representing southern California. Gnarly, twisted, and still bleakly bare this time of year, the palette created with the golden hills is so different than my own green Northwest. Another feature of the scenes is that they incorporate different views. The Redwoods, represented by the museum’s own outstanding specimen, is shown with a backdrop looking up straight to the sky through a patriarchal grove. It adds a very visceral action to the scene. 

The display featuring a cascade Douglas Fir of my own is just the opposite. This view is of Ecola State Park from the air. It’s a calming sea of blue. This is the same tree, by the way, that was featured in an 18 month long, side by side demo with Ryan Neil and myself a few years back. It has come quite a ways in a relatively short time. Speaking of Ryan, the color of the Badlands painting paired with his Ponderosa Pine was astounding. Rich and elegant, the view is full of punch and energy.

One of my very favorites was Michael Hagedorn’s exquisite Mountain Hemlock grove, which won the Best Conifer award at last year’s National Show. It is paired with a view of Mount Rainier and calls to mind the way that you usually have to try and sneak a peek of the peak through all of those branches as you hike along. And the vine maple accompanying it completes a very graceful scene. 

Along with the scenes listed above, you will find Alaska, the Bayous, Apostle Islands (Lake Superior), the Appalachians, Yosemite Valley, the Rockies, and the Cascades. Credit for this innovative and challenging exhibit belongs squarely with Aarin Packard, the curator of museum. It’s really his vision that initiated the concept and drove it’s creation. The exhibit runs from now until October 8th. Be sure to check on museum hours before you go. And if you can’t make it, you’ll be able to view it in pixel form on Mirai Bonsai soon. Or just use that as a nice preview. An exhibit catalog is forthcoming. 

Ponderosa Pine and Badlands by Ryan Neil

Ponderosa Pine and Badlands by Ryan Neil

Douglas Fir and Vine Maple with view of Ecola State Park by Scott Elser

Douglas Fir and Vine Maple with view of Ecola State Park by Scott Elser

Mountain Hemlock and Vine Maple with Mount Rainier by Michael Hagedorn

Mountain Hemlock and Vine Maple with Mount Rainier by Michael Hagedorn

Redwood with Redwood grove, museum collection

Redwood with Redwood grove, museum collection

Sierra Juniper and Yosemite Valley, museum collection

Sierra Juniper and Yosemite Valley, museum collection

Tucker Oak and Tehachapi Canyon, museum collection

Tucker Oak and Tehachapi Canyon, museum collection

Air Layering Tips

Return to Branch Tips index

It is a little surprising to me, but one of the more frequent questions I get asked about is air layering – the process of re-growing roots on a tree, either to create a bonsai from a landscape tree, reposition existing roots and planting angle, or making a more attractive radial root base. I have successfully performed the procedure on many trees including Japanese Maples and Crabapples. Sometimes I keep both the top and bottom after separation, but my primary goal is always the top, it seems. 

All of the trees I have air-layered have been existing bonsai, and were always in a pot already. I haven’t actually performed the procedure in a landscape tree. These are essential tips to make you successful. For a more complete explanation of the process, consult another resource such as the excellent magazine articles and many bonsai books in the library, or even online. 

The first thing we have to understand is what is going on inside the tree itself. Water is transported up to the leaves through the center core of the tree – the xylem, and nutrients flow down to the roots via a thin layer on the outside of the tree just under the bark - the phloem. With air layering, we are interrupting the flow of nutrients from the leaves down to the roots. With no place for the nutrients to go and with the optimal environment provided, the tree begins to send out new roots to feed itself. Since we leave the xylem intact, the tree has plenty of moisture to maintain itself. 

Taking this information into account, the best time to begin an air layer is when the leaves have hardened off and are pumping nutrients downward. This tends to be about May. With many species, we would then be able to separate the tree later in the fall. Some species like conifers may take more than one season to root. Some trees will not root at all, so do your research.

Here then, are the tips. Be sure to remove a bark ring with a width at least the diameter of the trunk. Also critical is making the cut at the new potting angle you wish the tree to be at. The new roots will grow right on this upper cut line. After the cut, an option is to wrap a wire snug up against the top cut line. Wrap this wire around twice and tighten well so that you can completely cut off the sap flow. I like aluminum because it’s thicker. I had a beech jump the cut and wire both, and then re-fuse together. So make sure you get it cleaned out adequately.

I use rooting hormone in a powder form. But it doesn’t stay so well. The solution is to make a paste by adding a little water and then spread it on the wound. It only needs to go on the upper cut line.

The next hint is a biggie. I slice a plastic pot down one side and then cut a hole the diameter of the trunk in the bottom so that I can fit this new pot around the air layer area. I make plans to either wire the pot back together once on the tree, or duct tape it together. I recommend wire all the way around the pot as the easiest method with little risk of failure.

Now that my pot is ready, I apply the hormone to the wound. Then I wrap a layer of sphagnum moss around the wound and tie it on tightly with raffia. This keeps constant moisture on the cut site and the extra pressure seems to help. Once this is done, I mount my pot in the proper position, usually with wire hanging from branches, and sometimes propped up with chopsticks. It must be immobile. The remainder of the pot is then filled with regular potting soil. This setup means that I can separate the tree at the appropriate time and not repot it for another year, allowing the new roots to grow undisturbed. This contraption may look really odd for a year, but it works great.

When I go to repot in the future, I use a piece of plywood and screw it into the base of the new air layer. This stabilizes the tree and gives me something to wire the tree into the new pot, and is invaluable in protecting the fragile new roots. If you don’t have a quite enough roots filling the pot at separation time, you might even do this outside, under the plastic pot. And then, when the roots have grown two seasons, I can safely pick out the sphagnum moss and introduce regular bonsai soil. 

Repotting

And now, here are just a few quick tips on repotting in general. There are several posts from previous year’s Branch Tips that you can review on our website that have more detailed information. There is also a summarized step-by-step procedure under Documents and Articles in the Member Services section. 

The most important thing that I wanted to mention is all of the rain that we have received. Once we take the tree out and prune off the small feeder roots, they have a diminished capacity to uptake water. That means that the tree can literally drown in all this nasty Portland wetness. We want to provide an evenly moist environment for the tree to recover and begin growing new roots. To do this, I try and keep my trees under cover for several weeks after repotting and water them only when dry – which right now with foliage barely emerging means only once a week or so.

If you are new to bonsai, beg, grovel, or become an indentured servant and repot with a more experienced member. There is no way to adequately explain what roots to cut, or how much on this tree and how much on that tree. Or, how do I fasten the tree into the pot? Repotting must be learned by doing it over and over. So volunteer your set of hands for a Saturday morning and see how fast you learn. 

Scott Elser

Wiring Tips

Return to Branch Tips index

The other day, as I was wiring away on a Douglas Fir, I was thinking about more of my Hard One Truths to stockpile for upcoming newsletters. As my fingers were dancing around branches, I decided that there were just too many tips for wiring and that they might better be presented as a whole collection. What follows are tips that will help you in the process of wiring and styling your trees. This is not a treatise on how to wire, nor is it the fundamentals. I could try and explain the fundamentals, but the truth has been made all too clear over the years. 

One cannot fully grasp wiring fundamentals unless you under the mentorship of someone who is a lot more experienced at it than you are. The best teachers are the professionals that have studied in Japan. Not because they went over there, but because they spent umpteen thousand hours wiring and just as importantly, unwiring many, many trees. Wiring is a tactile activity and requires hands on instruction. Don’t worry, I am still working my technique too and I get plenty of scrutiny from my instructor, for which I am grateful. So maybe you have some of that tutelage under your belt and you need some refining. Here are some tips to help you along the way. 

1.  OK, right out of the gate. If I have limited resources and can afford only one set of wire, I choose copper, because I can do anything I need to with it. I do prefer aluminum for deciduous, but I can get by with just copper. And believe it or not, copper wire is actually cheaper per branch because a smaller wire will hold a much larger branch. Remember, you can use almost half the size of copper that you can for aluminum. I have large rolls of 4, 4.5, 5, and 6 mm aluminum that I bought twenty years ago and have never used because it is just too horsey. If you can, buy a whole set of wire in the sizes you will need. If you are working on large collected trees that will mean stocking all the way up to #4 for copper. If you are more of the shohin type, then you may only need something up to #14 or #12. If you don’t have a proper range of gauges, you will either use too large of a wire, and possibly damage the branch, or use too small of a wire and thus be ineffective. Unfortunately, there is no one size that will do everything, even on a single tree. By the way, we refer to aluminum by its actual measurement in millimeters. For copper, it’s a nominal number and as the number increases, the wire gets smaller. #4 is freakin’ huge and #22 is hard to feel between your fingers.

2.  If you are applying the main wire on a branch and wish to wire two tertiary branches together with a second wire, you must pass at least one turn of the main wire between the two branches or you will be forced to cross the second wire over the first.

3.  OK. So you were not so successful on number 2. If you are using fine wire, go ahead and cross over the main wire. I give you permission. But remember, it still has to look neat and work effectively. Even when I don’t have to, I sometimes cross wires with an extra wrap because it enters the branch at abetter angle and supports the branch better. And that is what we are after. If you don’t, you may tear the branch off in some situations.  

4.  The pinch. Just really realized this last year. I have known for sometime that the important hand in wiring is really the off hand – the one guiding the wire and branch together. What will help is if you can think of actually pinching the wire against the branch. This will help snug things up and actually make things scar less. It allows you to maintain wire contact better while you bend the branch. Ever put wire neatly on a branch, only to have it all separate when you start bending? This is for you.

5.  You are not going to like this, but just like good medicine, it works. Unwire a tree done by someone who wires well. Deconstruct what they did, and even evaluate if it worked or not.

6.  Don’t wire everything. I used to do this and am still tempted at times. Instead, work smarter.

I usually try to wire a pair of branchlets by extending a wire from the main branch out to where I have control of one branchlet. Then I use the wire to bend the branches so that they sit at the same level, and in the proper place. This usually means a slight twist, but I only need the one wire. Save money and save time. This also leads to a softer and more natural aesthetic. Remember, the wire only needs to extend far enough to where you get control of the branch tips. Often on the tops of trees, I need only wire the main branch, because everything else is sitting nice and proud.

7.               Apply wire clockwise or counter clockwise in the direction that will tighten as you bend the branch. This takes some planning. Doing the opposite will allow the wire to loosen as you bend.

8.               To provide an anchor for the next wire (usually a smaller gauge) you need to extend your existing wire 1.5 to 2 turns onto the next branch so that the former and latter wires overlap by this amount.

9.               To anchor any wire, you need to get at least one turn around the main branch. This means it is nearly impossible to wire two branches that are directly opposite of each other with the same wire. There must be an anchor somewhere. 

10.            If you are wiring a branch downward, always start the wire on top of the branch. When you bend the branch downward, it will want to spring back up, but the wire on placed on top of the branch will stop it from doing so. The same is true in reverse for branches you want to bend upward.

11.            Use guy wires if possible, for several reasons. First of all, you use less wire, which saves you either by using a lighter gauge, or having to apply a coiled wire at all. Secondly, there are times when you can’t get enough wire on the branch to bend it anyway, especially downward. Try putting on a gauge of wire strong enough to put a sideways curve into the branch. Then attach a guy wire to pull a branch down into the proper position. The one limitation to remember about guy wires is that they only work in one direction. You can however, use a second one for a compound effect.

OK, OK. I can’t resist. Here are the fundamentals, since we are here. It’s kind of like E=MC2. Neat and simple, but figuring out how to apply them can get pretty rigorous in a hurry. Hence the reason for all the tips that I have given above. Wiring must look good and be effective. I don’t think that it is the least bit surprising that the wiring that is the simplest and cleanest is also the most effective

A.              Always anchor a wire by wiring from one branch to another branch or trunk. It is simple math. Four branches, two wires. You use less wire and it works so much better.

B.              V power. That’s what I call it. When wiring a fork of branches, the wire on one side goes clockwise, and the other goes counter clockwise, overall making a vee shape. Always. That’s it. If you can do those two things, you can wire anything.

Scott Elser

Winter Strategies

We recently went through the coldest weather that I can remember for quite some time. What made it so rough on our trees was the duration of low temperatures. We sent out a quick note to remind everyone of the impending doom, but I thought we should go over our winter strategies a little more thoroughly. 

Living in the Pacific Northwest is really great for growing bonsai. And it’s hard to find a climate much better than Portland itself. We get sunnier summers and believe it or not, drier winters than Seattle, and we don’t have the scorching sun of California. Our semi-marine weather allows azaleas and maples grow like weeds, while providing a buffer against hot summers and bitter winters. But not always. We can get lulled into a false sense of security only to be awakened by arctic air in the teens. Such was the case recently. 

I haven’t found anyone who could identify tree damage due to cold with any reliability. There can certainly be some branch die back, and trees may just up and die. But it is really hard to tell if it was from cold. There are so many other factors that cause damage. But the best defense against cold is a healthy tree, just as it would be for any pest or disease. 

And what is cold? That might be a matter of opinion, and when will a tree die or be damaged will vary by species, age, health, how it is potted up, and even where it is positioned in the garden. I personally don’t even think about the temperature unless it is going to dip below 25 or so. The first rule of order is to get the trees out of wind. Trees in a pot can be desiccated quite quickly by biting winds. 

You can look up the cold hardiness of species online, and then throw it out the window. Or at least add a good 10-20 degrees. Trees in the ground enjoy the warmth of the earth, while our trees on the bench are all on their own. Ground soil rarely freezes more than an inch or two down, whereas the bonsai pot will easily freeze all the way through. A freezing rootball does not prescribe death, so don’t be misled. There are many trees that enjoy a good chill. But I can’t give you anything to predict a certain outcome. Just like you can’t predict a heart attack, but you can work on all the factors that would encourage such an event.

The thing to remember about low temperatures is that timing is everything. 20 degrees in November might kill some trees, but is pretty doable in January. Why? The trees drop into dormancy slowly. They don’t just flip a switch. You’ll notice some trees dropping their leaves early, and some hardly at all. Those are some clues to pay attention to. While the maples and elms are losing their leaves, many alpine conifers are still cranking away. Their waxy cuticle helps protect the needles so that they can function in more adverse conditions. It also allows them to function over several years. So the conifers are going into dormancy later than the deciduous trees, in general. Note how beeches and oaks tend to hold onto their leaves throughout the winter. The trees use this mechanism to protect next year’s buds, and thus these species seem to be among the most winter hardy, and are almost always the last to leaf out in spring. 

I have quinces that almost never go completely dormant unless it gets really, really cold. By the time January rolls around, most trees are snugly set for the rest of the cold months and are able to handle cold temperatures much better. Let’s not forget that a cold snap can be just as dangerous in spring. My first exposure to BSOP itself was at a PNBCA convention in Beaverton in 1990 or so. The centerpieces for the banquet were all bonsai that had died the previous spring in a freakish cold snap in the teens during March, after many trees had started to leaf out. My rule of thumb is to always be prepared for cold weather by Thanksgiving and stay vigilant through March.

Early on, I had an alcove on the side of my house where sat an unused hot tub. This made a convenient location to cram all of my trees into for the winter. I simply walled it off with some plastic to keep the wind out. (You can tell that at this point, I was unmarried) As time went along, my collection got bigger in number, and the trees much larger. Winter with the hot tub was no longer an option. So I then left all of my trees out on the benches and prayed for moderate temperatures. When low temps came along, I huddled everything together under an open shed and wrapped up the whole thing to shoulder height in shrink wrap – what they use on commercial palettes. Silly, but it must have worked. Now, in our new place, I have nowhere to hide. And to my surprise, I can no longer move all of my trees on the spur of the moment. They’ve gotten bigger while my muscles have gotten smaller. So they stay out and I put them on the ground, if possible. The medium and smaller trees I move under the generous eaves of our house, where there is very little wind. A small respite, but essential, none the less.

Now, to strategies. If I know that cold weather is coming, I like to water my trees well, knowing that the wind will dry them out. This is especially important for trees undercover that do not receive our copious rain. Then be sure to let them drain well. If you are using good, granular bonsai soil, this is no problem. I then water them again after the cold has past. Since we wire our trees into the pot, some folks worry that they pots will break. This simply is not so if you are using regular bonsai soil. I have had only one pot break in over 25 years, and it was a nice one. The particular pine had not been repotted for 6-7 years, so the roots were packed very tight. And the pot had an incurve lip, so the roots couldn’t go anywhere. Add a little freezing water and boom, instant shards. I just taped the pot together until spring, since it was wired to the tree and there was no chance of it drying out.

Next, get the trees out of the wind. Snow is great, as it insulates the trees, but nature never seems to get things in the right order. A cold frame of some kind, recessed in the ground is the best. I wish I had that kind of space. Along the backside of a house is great. Longtime member Anne Spencer used to unpot her trees and place them in bark dust in a covered shed. She then had to repot everything the following spring. It worked for her, but I don’t recommend it. 

My method is to leave everything out on the bench until I see a big event coming. Then I bundle up and spend an hour or two moving things to safer quarters. Plastic trays really help with the smaller trees and give just a little protection. Okay, call me crazy, but when I have had to leave a large tree on the bench, I sometimes wrap the pot in an old blanket. 

Just nesting the trees into the ground will help a good 5-7 degrees, thanks to quantitative research by Mike Hagedorn. It takes some advantage of the earth’s own heat. And there you have it. It might seem a bit late, but we have to make it all the way through March, so there is plenty of cold yet to go.

This month marks the beginning of a new feature in the Tips articles. I am calling it Hard Won Truths. These will be just a sentence or two and will feature little tidbits of knowledge and advice that were either earned by costly mistakes, or because it took my dense brain too many words from my instructors before it sunk in. These are the hints that will really make a difference, starting now. If you don’t read anything else, read these.  

Scott Else

Six Essential Tools for Bonsai

Return to Branch Tips index

Since we have so many folks that are new to bonsai, I thought I would talk about the tools that are essential for your success. I also thought you might print the article out to read and then casually leave it in a conspicuous place for your spouse to discover, who might need some holiday gift giving suggestions ;-) These six tools that I am covering are the ones that I use over and over, almost every time I touch a tree, whether it be conifer or deciduous, large or small. I’ll cover what to look for and in some instances, what might make a good substitute. 

I would rarely buy a bonsai tool online. Only when I am familiar with the quality and consistency of a brand would I do that. There are many great tool makers out there, like Joshua Roth, Futaba, Kaneshin, Fujiyama, and a new upstart, American Bonsai, which are all American made. American’s tools are very consistent and I would check them out. I am trying them myself. Because the markings are often in Japanese, I have a hard time tracking which brand of tool I actually have. 

One of my own limitations to some tools are my relatively large hands, so I always have to check and make sure that they actually fit in my big mitts. That pertains mostly to scissors. Then I open and close the tool to see if it is too loose or tight. A tool should barely fall open when you hold it horizontally. If it’s too loose, you can give the rivet a tap. But a word of caution, there is no way I know of to loosen a tight tool except by using it over and over. My next test is to hold cutting tools up to the light to see how the edges meet and if there is a gap letting light through. Root cutters, concave pruners, and knob cutters all work in a bypass cutting fashion. That means that the edges slightly overlap each other. They do not meet perfectly. So they have to close far enough for the cutting edges to pass, but not have a gap when they do. Stainless steel as a material is often nice, but not needed. Most of my tools are not. Now on to the tools themselves. 

Number 6 – Angled tweezers This is easily going to be the cheapest tool to acquire of the lot, but it does come in quite a few grades. A good pair of tweezers is a godsend and a bad one is just frustrating. We are talking here about the type with a bent or angled tip. These often come with a small spatula on the end and the cheaper models are just spot-welded together. But really, you don’t need much more than that. Oh, I do have a really nice pair that I love, but my original pair is still a workhorse. If you use them in repotting like I do, in place of chopsticks, you can wear them down over time. 

Their chief duty is pulling weeds and general clean up. Make sure to get a pair with not too narrow of a point. Otherwise, they just act like scissors and cut the weed in half rather than pulling it. This is especially important if you also get a straight pair. Here’s the difference; Angled tweezers are great for pulling weeds, repotting, and general work. The straight tweezers are better for pulling needles and leaves. The elbow of an angled pair will accidentally grab onto adjacent foliage, which can be quite hazardous. 

There are lots of occupations and hobbies that use tweezers, so you might be able to find something that you already have, but they really do need to be eight or so inches long for reaching under the tree. Ideally, they only open about 1/4-3/8 inch, otherwise you have to keep applying the pressure to get in between other leaves and such, which just tires your fingers. Also, the metal needs to be stout enough to apply some good pressure when pulling needles. With cheaper tweezers, I sometimes squeeze hard enough to touch the sides together. If so, I just bend them out farther. 

Angled Tweezers

Angled Tweezers

Number 5 - Root Cutters Though I have a smaller pair of root cutters, I use my large pair almost exclusively for root work and any large pruning short of using a saw. They really are very versatile. Use them to cut taproots flush, as well as any other large roots. This tool is essential for creating a great root base and enables you to get your trees into shallow bonsai pots. Even though I regularly cut through pumice, lava, and the like, I have never had to sharpen mine. That’s not bragging, it just means that they are very durable and can take the punishment, but mine probably could use a touch up.

Root Cutters

Root Cutters

Number 4 - Wire pliers I use wire on every single one of my trees, so this tool can become very important. You can use just about any small pair around the house, but in my book, nothing really compares to a bonsai designed pliers. The type that I have pictured work excellently at a fair price. The rounded tip allows you to apply power with pinpoint accuracy and without getting a part of the branch stuck in there. The tapered/rounded handle allows you to twirl the tool in your hand easily when tightening a guy wire or removing wire. Almost all of the inexpensive models have straight handles and are hard to use. Their tips also are not very strong and they become hard to use. At workshops, I have picked up pliers from students that were nearly worthless. Be picky here with the real deal, or just get a sturdy pair of Stanley’s and save your money. 

 Wire Pliers

 Wire Pliers

Number 3 - Wire cutters There are quite a few different designs for wire cutters. Pictured are my favorites for small work, but every other pair I have tried works. There really is no other tool for the job out there. Bonsai cutters are made to cut right up next to the branch withoutdamaging it. Plus, they concentrate the power out on the tip for that same reason, instead of needing to cut in the crotch of the tool, like many electrical dikes.

 Wire Cutter medium

 Wire Cutter medium

Number 2 – Concave Pruners You really have two choices here; regular concave pruners or spherical cutters. The difference being that regular concaves are curved on a single axis and spherical cutters are curved on two axes making a truly round cut. The difference between a concave pruner and the root cutter or knob cutter is that you can cut from the side of the branch. This is your workhorse pruner. Invest wisely and note the suggestions at the beginning of this article on how to choose one that works well. The is one thing that you need to keep in mind for any pruners. You are only going to be able to cut a branch about half the diameter of the actual blade. This also depends greatly on whether you are working with conifers or deciduous trees. I can cut twice the diameter of a pine as I can a crabapple or maple.

Concave Pruner

Concave Pruner

Concave pruner side view

Concave pruner side view

Spherical pruner side view

Spherical pruner side view

Number 1 – Scissors Did you guess this one already? This is not the pair that you have in your junk drawer in the kitchen. This is the tool that will make thousands of cuts each season and vital for your bonsai success. Choose wisely. There are lots of variations in shapes, but make sure you get one that fits your hand, and can make hardy cuts. The smaller and narrower versions are for bud cutting only and should be considered as a alternate pair in your kit, not the primary one. Great scissors abound at decent prices, so finding one should not be too hard. With your main pair you want to be able to do light pruning, maybe up to a quarter inch branch at times. You also need a narrow point to get in between tight spaces. That’s why you need dedicated bonsai scissors. 

 Scissors

 Scissors

What you don’t need. Now that we have gone through all of those essentials, how about the things that you don’t need? There are lots of tools out there, but some of them are not very practical, or rarely used, so I am here to help you keep a little more money in your wallet for better trees, or better tools. So, here are the tools that you don’t need.

1.  Bending clamps. I bought several of these and even used some once or twice. It took my maple ten years to recover from the experience. There are better ways to bend a branch. I have never seen a pro use one.

2.  Branch splitters. These are similar to root cutters, but with narrower and longer blades. I bought one twenty years ago and never used it. If I did need one, I can make the root cutters do the work. Come to think of it, in all that time, I have only heard of someone actually splitting a branch once or twice.

3.  Bending jacks. These can be of use in larger sizes, and many pros use them this way. Most often they make it so that you can get the work done with one person. But the smaller ones are really unneeded. 

Branch Splitter

Branch Splitter

Bending Clamp

Bending Clamp

4.               Jin pliers. These are similar to the regular straight pliers mentioned above but these have a canted head. That means I can’t use them to twist wire, but I can use my wiring pliers to make jins. That means these are redundant.  

 Jin Pliers

 Jin Pliers

And last but not least, if you do large bonsai or are getting more advanced, here is what you might need to add to your assortment. 

1.               Compound wire cutters. You can buy larger, more expensive bonsai wire cutters, but why when these guys are a fraction of the price. It will cut 4 gauge hardened copper wire and won’t be damaged by steel wire. Buy the Knipex brand. I bought a cheaper $20 version and they hurt my hand and were trashed by steel wire.  

Compound Wire Cutter

Compound Wire Cutter

2.               Knob cutter. I almost put this as my seventh choice for a tool. I use it mostly on deciduous trees, and it really gets a workout to clean up all my cuts so that things heal over nice and smoothly. Look for a pair where the two cutting edges meet to form a nice, smooth curve. I have not used them, but too many I see these days meet at an angle and I can’t see how they will make the kind of smooth cut I need.  

Knob Cutter

Knob Cutter

3.               Saw. Many, many types here. A narrower body allows you to get between branches, but can buckle easily. So some have a thicker blade and teeth. This one is my first choice. I have a large folding landscape saw that I use on larger cuts, and several models in between.

Scott

The National Show – Portland brings it


Return to Branch Tips index

As I made my way to Rochester, New York this last September for the Fifth National Bonsai Exhibit, I was anticipating a fun time and a chance to do a little bonsai shopping. This was the fourth time out of five that the Pacific Northwest, and Portland in particular, has sent trees on the long journey back to the National, and we’ve always been well represented by our trees.  

But, what occurred this last show was astounding. Three major awards went to the Portland club alone, and when taken as an influence, our region was unmatched. Nine BSOP members sent trees back east. I’ve included a photo of each tree so that you get a feel for how Portland was represented.   

First off, congratulations to Dennis Vojtilla on a well deserved win for the Finest Deciduous tree. His European Birch clearly stood out from the field. Deciduous trees require dedication and perseverance, and Dennis’s years of effort were finally recognized. This was actually the birch’s second trip to Rochester.  

Then there is Michael Hagedorn, one of our local pros who took the award for the Finest Evergreen bonsai. The Mountain Hemlock group was collected by Mike as one giant clump and took three strong guys just to move it around.  

Finally, John Jaramillo won a special prize, the Natural award. When I asked Bill V. to define what the award meant, he said it was created on the spot at the request of judge Enrique Castano. Way to go John! Rounding out the field for Portland were some awesome trees. Here’s what went to Rochester:   
•     Greg Brenden                Common Juniper
•     Scott Elser                      Engelmann Spruce
•     Michael Hagedorn          Mountain Hemlock (Best Conifer)
•     Howard Greissler            Rocky Mountain Juniper
•     Randy Knight                  Rocky Mountain Juniper
•     Paul Krasner                   Japanese White Pine
•     John Jaramillo                Scots Pine (Natural Award)
•     Ryan Neil                         Shore Pine

 Dennis Vojtilla – European Birch (Best Deciduous)

 Dennis Vojtilla – European Birch (Best Deciduous)

Scott Elser with his Englemann Spruce

Scott Elser with his Englemann Spruce

Scots Pine by John Jaramillo

Scots Pine by John Jaramillo

Rocky Mountain Juniper by Randy Knight

Rocky Mountain Juniper by Randy Knight

Greg Brenden with his Common Juniper

Greg Brenden with his Common Juniper

Rocky Mountain Juniper by Howard Greissler

Rocky Mountain Juniper by Howard Greissler

Shore pine by Ryan Neil

Shore pine by Ryan Neil

Mountain Hemlock by Michael Hagedorn, Finest Evergreen Bonsai

Mountain Hemlock by Michael Hagedorn, Finest Evergreen Bonsai

That’s just the BSOP itself. Now consider the trees, clients and students of the Northwest teachers like Ryan Neil and Mike Hagedorn. First up, the National Award or, best of show, won by a local Mountain Hemlock owned by Eric Schikowski of Ohio. This tree was collected on
Mount Hood by Randy Knight and developed by Ryan and appeared in the Artisan’s Cup
and nearly won that event. This tree finally got to make to its new home on this trip back.  

Colorado Blue Spruce by Jason Elder

Colorado Blue Spruce by Jason Elder

Colorado Blue Spruce by Todd Schlafer

Colorado Blue Spruce by Todd Schlafer

Jason Eider of Seattle won the All American award with a Colorado Blue Spruce by having a tree, stand, and pot all of North American origin. Jason made the stand himself and is a student of Ryan’s. Todd Schlafer of Colorado is also one of Ryan’s students and won the ABS, or North American award, also with a Colorado Blue Spruce. That demonstrates the tremendous amount of influence from the Portland area.   

On a completely different note, it was a lot of fun to walk around the market place and see all the fabulous trees and accessories available. Certainly there was more in one place than I had ever encountered, and all at a high level. My first stop was of course, at Sara Rayner’s display where I picked up a few pots. Check out the before and after photos. The difference in time is a mere two hours. By the end of the show she had completely sold out.  

Sara Rayner display before

Sara Rayner display before

All that’s left after two hours…

All that’s left after two hours…

Other vendors also did well. Mirai was doing a brisk business selling all of the trees they brought, plus pots, stands, and tee shirts. I was able to view first hand the line of American Bonsai’s tools. This new line is entirely American made and have some nice design tweaks. The workmanship looked great, and the prices were good, but I am no metallurgist. I purchased a large pair of spherical cutters and will let you know how they are holding up at a later date.  
There were also many, many trees available of all shapes, sizes, and development levels, from seedlings to show ready. More potters, and even imported antique pots. There were also demonstrations throughout the weekend, as well as talks on antique and collectible pots. All in all, a great experience to meet fellow enthusiasts from across the country and chat up old friends.   

I must point out that this show is organized and put on by Bill Valavanis of International Bonsai. He created the show and continues to do a great job. But it’s nothing official. There is no sanctioning body, just bonsai enthusiasts coming together from across the country to have fun and put on the best exhibit possible. Special thanks to Ryan and Chelsea Neil of Bonsai Mirai for driving the truck back East. All of the trees listed above were transported on the Covered Wagon. The show would not have been the same without that truck and the grueling trek across country. Thanks guys.

Scott

One more tree from the National Exhibit
Dear BSOP members,
I want to apologize to you members and especially to Bob Laws for an omission in the latest newsletter. I inadvertently left his excellent Apple tree off the list of BSOP trees that went back to the National Bonsai Exhibit in September.  Check out the photos of Bob’s tree. If you don’t know, this rather large tree was created as an air layer from one of the apples in his own back yard. I think the trunk diameter is somewhere between 8-10 inches. Not only was Bob’s the only major tree in the exhibit with fruit on it, three of the four apples that started the journey made it the three thousand miles intact to Rochester. Quite a feat. Thanks for letting us enjoy this tasty treet Bob.

Scott Elser  


Pests and Diseases – Part Two – Disease Treatments

Return to Branch Tips index

I knew that when I started this series that it was going to be a daunting task, and it is proving me right. But we are on the right track. I got some positive feedback on the last article, so we are forging ahead. The trick to the whole subject is tackling the relationship between three main factors; specific plant species, different pests and diseases that might occur on them, and the myriad of treatments available and their efficacy. I could make a nice chart, but I don’t have a way to make a three dimensional version. I can only relate two things at once. With that in mind, I decided to talk about treatments so that you can have that information in hand. Later on, I will talk about specific pests and diseases, so this subject will drag on for few months. We are going to cover disease treatments this month, then move on from there. But first, we need to go over some of the fundamentals.  

Forgive me if I repeat some things as we go through the series. If I do, it’s for your benefit, to remind you of safe practices, both for you and your plants. Just like the medical profession, our first objective should be to do no harm, to either tree or self. Be sure to check out any chemical you plan to use thoroughly. Read the instructions. Many of the chemicals listed will affect humans in some way, but in the doses and exposures we receive while handling them in the specified manner, they have been deemed to be insignificant.  

However, if we deviate from the specs, things can change dramatically. Some chemicals are safe when applied in certain ways, and not safe by other means. Certain chemicals are only approved for commercial applications, but are not regulated by sale to you. Many chemicals can be absorbed directly through your skin. Others may drift in the wind while you spray, getting in eyes or lungs.  

If you search online, all of the chemicals will have a bulletin available which goes through all the specific details of what it affects and how. Go to extoxnet.orst.edu to find these bulletins. You can also download the actual labels as a PDF, which I find infinitely easier to read than the fine print on the bottle. Another thing to keep in mind is that these chemicals have been tested on certain species of plants, which are listed on the labels.  

Our bonsai are quite varied by species and variety and it is not possible to test all formulations for all of the variations. So if your plant is not listed, the chemical may still work, but it may also have unwanted results. Best to test it first. Also, some chemicals are too strong to use on tender new growth. Keep that in mind. There is the occasion that chemicals will also work for something that it was not directly intended. Boon turned me onto a spray call Bifin that was originally designed as termiticide for professional pest control, but he uses it for those pesky spider mites. More on that next time.  

For now, we are going to talk about treatments for disease. The best defense is a good offense – healthy, vigorous trees. We tend to overall slow the growth of trees and put them in an unfamiliar environment, both of which present challenges to keeping trees strong, but we also give them extra care that hopefully more than makes up for that.   

Even so, we may run into problems with diseases. These diseases come in two general categories, and so do their treatments. Some diseases are surface born, and we see the effects directly on the leaves or needles. We will see these as rust, mildews, smuts, needle casts, blights, etc…. Other diseases are systemic – they affect the vascular system of the plant. These tend to be cankers and rots – things that have fruiting bodies like mushrooms or conks, and that eat away at the woody tissue.  

Keep these in mind as we talk about different chemicals and how they work. Most chemicals for diseases work prophylactically, meaning they are designed to prevent disease, not cure it. That means that we need to remove any sign of the disease, whether dead foliage, branches, or cankers, then spray to prevent re-infection. Any damaged tissue will remain so. No problem for deciduous trees which lose their leaves each year, but conifers will hold onto those damaged needles for few years unless we remove them.  

At the end of this article, you’ll find a chart to summarize each of the chemicals and their characteristics. As I mentioned in the last article, finding these online is probably going to be much easier than heading to your local garden center. You can find Daconil and Mancozeb fairly easily, but the rest are more specific and commercially oriented. Be sure to look for chemical itself, as some chemicals are marketed under different trade names. Ok, let’s dive in.

Daconil
One of my tried and true, go-to fungicides. If you have pine trees, you are going to need it. It’s the third most popular fungicide in the U.S., behind Sulfur and Copper. It is a broad spectrum, non-systemic fungicide that works on needle blights (pines), rusts and mildews. Daconil is a wettable powder, which means that the powder is suspended in a liquid form and easily settles into the bottom of whatever container it’s in. So this automatically means frequent shaking or stirring while spraying. It also means that it leaves a very visible, powdery residue on the leaves. Don’t worry, the rain easily washes it away after awhile, which means of course, respraying. It is also used on some crops.

Mancozeb
This is my other tried and true fungicide. Mancozeb is a combination Maneb and Zineb in a wettable powder, just like Danconil. All the same spraying issues. It’s used on a lot of edible crops and is very broad spectrum. It simply treats a lot of stuff, so I tend to use it on both conifers and deciduous trees as a general treatment. It is relatively inexpensive and easier to find than anything discussed here, save Daconil. It is in my regular rotation to combat Phomopsis in junipers. I have had great, measurable results there.  

Heritage
This fungicide is also broad spectrum, but I use it mainly against Phomopsis. You’ll notice that I am using two to three different formulations in rotation for tough diseases like Phomopsis. This is to make sure I can stay on top of any variants and stay ahead of the disease. Heritage is very expensive, though I think the very small bottle will last me many years. It comes as tiny granules with it’s own measuring and dispensing system. Each spray bottle takes about the amount of pencil eraser. A little goes a long way, but the initial investment is steep. Maybe you can share with others.  

Cleary’s 3336
This chemical is rather new in my rotation. Another great, broad spectrum chemical. This one is systemic and one of the few that can be curative – able to actually get rid of the disease after it appears. You can use it as a spray, dip, or drench. If I could only have one, I would seriously look at 3336. It works on many diseases, including Anthracnose, snow mold, rust, smut, Phomopsis, Katbatina, and needle casts.

Banner Maxx
I have used this a bit, but with unsubstantiated results. The base chemical, propiconazole is available under many names, and with different concentrations and thus different instructions, so beware! We thought it would work great on Phomopsis but has proved less effective than hoped.

Others
I am still gathering information on other fungicides like Aliette, Subdue Maxx, and Agri-Phos. My challenge here is identifying the actual disease that I am fighting, more than anything.  

Copper
Many formulations of copper have been around for a long time and many are safer than their more modern counterparts. Unfortunately, I have very little experience with these formulations to comment on them. Generally, they have not been strong enough to go after the tough diseases that I am encountering.

So why don’t I have things like Safari, Imidacloprid, Malathion, Orthene, etc…. on this list? It might not be obvious, but those guys all deal with bugs, and that will be another, upcoming article. There are many, many more treatments out there. Most are designed for very specific situations and diseases. Many use special techniques, like direct injection into the bark. I have tried to winnow down my knowledge and experience into something that is helpful to you and will save you lots of time and testing. See you next month.  

Scott

Table of chemical treatments

Table of chemical treatments

Pests and Diseases – Part One

Return to Branch Tips index

I have been doing bonsai for some twenty-five years plus now. In that time, I have experienced and dealt with many problems concerning pests and diseases. Some of these come and go. Others seem perpetual. I notice this in the landscape, too. One year I am fighting a certain weed, and the next year, something totally different. Many insects and diseases wax and wane in severity with passing time due to many factors, some being their natural cycles, nearby host trees, what your neighbors are doing, etc… We don’t live in a closed environment, so we are subject to whatever the winds might blow in from next door. So it should be no surprise that we have new and different problems to deal with each season.

Today we are starting a multi-part series on Pest and Diseases – mostly how to treat them. I am not going to be able to cover all of the pests and diseases that your bonsai might encounter.  However, I do hope to cover quite a few and arm you with tools necessary to diagnose your problems and how to deal with them. This will not be a scholarly approach, but one based on experience, so be sure to double check what you can with your own library, web sources or expertise. This information is hard won, through triumphs and failures.  

I have collected information from club members, research, and through the many efforts of my teachers like Ryan Neil, Boon Manikativipart, and Mike Hagedorn. Each of these men maintain larger collections, both for themselves and others, and are able to experiment and adapt on a much larger scale than myself. So I am trying to do my part to make you successful by sharing what we have all gleaned out. In all fairness, I have to tell you that when it comes to bonsai, I am pretty much willing do what it takes to protect them.  

When I have the opportunity to use a more natural method, other than chemicals, I will do so and I hope to share a few that work very well. Otherwise, I tend to be on the side of nuking the suckers. If I have an old, beat up Pinto, I may not have insured more than the minimum, nor polished and waxed. But if I just acquired a brand new Mercedes, you can bet I am going to do whatever it takes to keep it in tip top shape. Conversely, we have to guard the health of our plants, and that also means using the least amount of chemicals possible. It can’t be good in any sense to just keep spraying away. It is also important to remember that once we eliminate the source of the problem, it will not fix the foliage immediately. Once it’s damaged, there is pretty much no repairing it. We have to wait and grow new foliage. For deciduous trees, that may mean this year, but likely next. But for conifers, that means that we are a good two years out, which can really affect your plans for showing a tree.  

By far the largest issue that I have had to deal with in the past few years is that of fungi, or diseases. We have had some perfect weather the past few springs for different fungi to really take hold and spread. That usually means wet weather with mid to warm temperatures in March, April, and May. Sounds like Portland, doesn’t it. I’ve noticed that there are two general classes of diseases – those that work on surfaces of foliage, and those that work on the interior,  or vascular system of the tree. Think about this when choosing a treatment. You can’t treat cancer with a band-aid, nor a cut with chemotherapy. Bingo, the light just went on for me.

How do you tell the difference? First, look and see if the damage you observe is in the foliage or in the trunk and/or branches. If there are chunks of leaves missing, you are probably dealing with an insect. Otherwise, we are dealing with either discoloration in the leaves, or desiccated and withered foliage. If the edges of leaves are turning brown, it might simply be a sign of sun burn. That means you need to alter your watering regimen, or move the tree to a shadier location. But if the new shoots from this year suddenly start to wither as the temperature warms, where they were fine before, you might be into some other systemic disease in which the vascular system and thus, moisture flow is interrupted. That makes the symptoms appear like leaf burn, but are vastly more devious. This means that you will need to treat with something that works systemically rather than the surface. These problems can be caused by Pythium, Phytophora, Verticillium, etc… Remember, conifers can burn too, but it is much less frequent. Do you see yellow, black, or red spots on the leaves? That’s likely a sign of rusts, or Anthracnose. These diseases are fairly easy to deal with via sprays, and many times the generic, broad spectrum garden sprays will work. What about powdery mildew? Same fix.

If you see cankers or lesions on the trunk or branches we are dealing with something much more insidious. Any kind of growth not natural to the tree is pointing to a systemic problem.
This usually involves the soil and/or root system and these are much more difficult to deal with. We will cover this more in depth in our next installment.

If you have colored bands on your conifer needles, you have a needle blight. Easy solution, Daconil. If you have tuffs of juniper foliage dying off, that is a bit harder to handle. It could be a few different diseases, including Phomopsis and Kabatina. We’ll cover those next time too.

So back to the insects. Take a look at your foliage and notice what is happening. Are there chunks missing out of the leaves? This is more likely to be insect damage than a disease. Most diseases do not remove tissue, but rather they discolor, desiccate, or otherwise alter the foliage, but do not remove it. Other causes for missing foliage might be hail stones, bird pecks, or other mechanical damage. Does the foliage look off color – sort of grayish, or have light colored stipling all over? This may be a sign of spider mites or lace bugs. To test for spider mites, hold your hand or a piece of paper under the foliage and give it a couple of taps. Small bits will drop onto the paper, which may be just about anything. But if you run your finger over them and they smear, it’s likely the spider mites. They can also make fine webs in the foliage.  

Are there chunks missing out of the side of the leaves? Shot hole bees make a perfectly round hole. Notched sides may indicate Weevils. I used beneficial nematodes for a couple of seasons and have not seen the weevils back for over ten years. Caterpillars are easy to take care of via BT, or Bacillus thuringiensis, a naturally occurring bacteria.  

Do you notice black mold on your trees, or sticky honeydew on the leaves? This is more than likely caused by some form of aphid. Usually green, but often black, sometimes wooly, covered by cottony tuffs. How about scales – these can also be wooly, or even armored – oval bumps along the trunks or branches. Yes, there are insects under those bumps. Use your fingernail to scrape them back and you will see their dark bodies. Most aphids are easy to remove – a blast of water will do, but they will be back. Sometimes with the help of ants that carry them into the trees to farm them for their honeydew. There are also insecticidal soaps that work well.  

Scales are different. That armored shell or tufty crust makes it almost impossible to penetrate with any kind of chemical, no matter the strength. For the last ten years or so, I have been using a chemical called Imidacloprid, which I have written about before. It is the most widely used pesticide in the world, at this point. Since I started using it I haven’t seen a single scale or aphid of any type. You can use it in liquid or granular form, under the name Merit or in product by Bayer, or others.  

Unfortunately, it is also part of a class of chemicals called Neonicotinoids. You have probably heard about them. Misuse of these chemicals, like a relative called Safari, have been responsible for bee population declines. The problem is using them on flowering trees, as this is what the bees feed from (All trees flower, but not all produce a pollen that the bees are interested in). You will have to make your own decisions about this and maybe do some more research if it is warranted. Use any chemical with caution and care. Protect yourself as well as the environment. Wear goggles or glasses when spraying and rubber gloves. Long sleeves are good – then wash the garment afterwards. Avoid spraying on windy days- which is just frustrating and wasteful anyway. Do not spray on days above 85 degrees as you may do more harm than good. And what cannot be emphasized enough, is READ THE LABEL. All of it that pertains.

When I first started bonsai, I wanted to make care and maintenance easier, so invested in all kinds of spray bottles, which I filled with mixed concentrations of each chemical I needed. The kind of sprayer that you squeeze the trigger to pump out the contents. They work great for occasional sprays and you can keep the chemical at the ready. The only problem being, as your collection grows, so must your arm strength. Spraying the entire collection in this manner requires mixing many refills and really gives your forearms a workout.  

What I have gone to now are the half-gallon sprayers that you hand pump prior to spraying. You can mix a larger quantity and it’s much easier on the arms. The units sell for between $510, and are available at most hardware or garden centers. I really prefer the ones with a metal nozzle and especially a metal pump shaft. I also label these like before, with each chemical, but I also mark the measured amount needed for that sprayer/chemical combination. When I need to spray the entire collection, I use a two-gallon tank sprayer. I use masking tape to make a quick label of what I have mixed inside if I don’t use it all in the first shot. I also have a second sprayer I use for weed killer so that I can never mix the two together. Be aware. Invest your money in the best sprayer that you can afford. If you buy the $20 model, you will be replacing it by years end, so better to spend the $30 the first time.  

I have never found the need for a full size backpack sprayer, but would certainly enjoy one if I had it. Now, the best tip of the whole article. Be sure to let out the pressure on all of these sprayers before returning them to the shelf. Many units have a valve for just this purpose. Doing so will save cleaning up a big chemical mess when the unit falls over or something bumps into the trigger and it sprays until all the pressure is gone. How do I know?.... I can’t really say happy spraying, but I do hope that your growing season is prosperous and I have been able to help a little.  

Next time: More in depth on fungi and how to treat them.

Scott

An array of Insecticides and Fungicides

An array of Insecticides and Fungicides

Keeping the chemicals in a leak-proof container

Keeping the chemicals in a leak-proof container

Chemicals are labeled with mixing instructions

Chemicals are labeled with mixing instructions

An assortment of pump sprayers

An assortment of pump sprayers